Every web owner wants to build good and long-term relationships with their customers and prospects. That is where the contact form comes in. Adding contact forms to your site is highly recommended because it helps your prospects reach you and helps you gather data about your site visitors.
Without a doubt, WordPress users have access to tons of contact forms plugins and numerous features. This makes creating forms easy and seamless for users. What if you can also create forms using the Elementor Contact Form widget?
How to Create Contact Forms using Elementor
Elementor Contact Form widget lets you personalize and add any contact form type to your site within minutes. It comes with all necessary features and fields to enable seamless interaction with your site. It should be noted that contact forms are a feature of the Pro version of Elementor.
That means you have to upgrade to Elementor Pro to create forms. Now that we have established this fact, let us look at the simple steps to create your contact form using Elementor.
Step-by-step Guide to use Elementor to Create a Contact Form
You can add contact forms to your site through two methods. There is the paid method, which requires installing both Elementor and Elementor Pro widgets. There is also the free method, which requires installing a 3rd-party plugin. We will focus on the Elementor Pro in this guide.
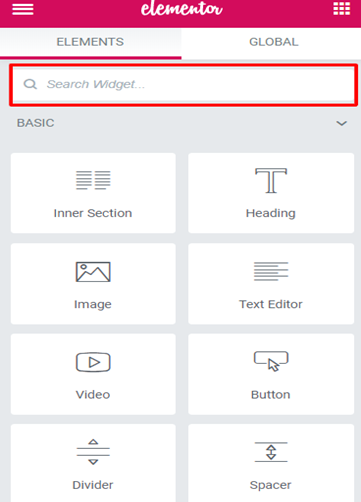
Step One: Find the Elementor Contact Form Widget from the plethora of widgets available on your Elementor page. Click to open the page that you want to include the contact form.
With the drag-and-drop option, you can easily add widgets on a page in Elementor but this post looks at the comprehensive process of creating a contact form with the Contact Form Widget in Elementor Pro.
Step Two: The Elementor Contact Form comes with pre-populated fields for basic areas, such as Name, Email, and Message. The next step is to customize the default form to fit into what you want. To do this, navigate to the Content section in the Form settings and add “Form Field.
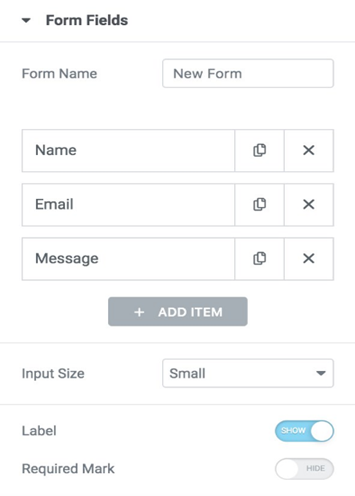
For the Form Name, give it a title. Next, click on the Form Fields. Here, you can add as many fields as you want. You can duplicate and delete as you create the fields.
You will find a bunch of field options that you can use, including Text, Email, URL, Checkbox, Textarea, Tel, Select, Radio, Acceptance, Number, HTML, Hidden, Password, Honeypot, reCAPTCHA, and reCAPTCHA V3, among others.
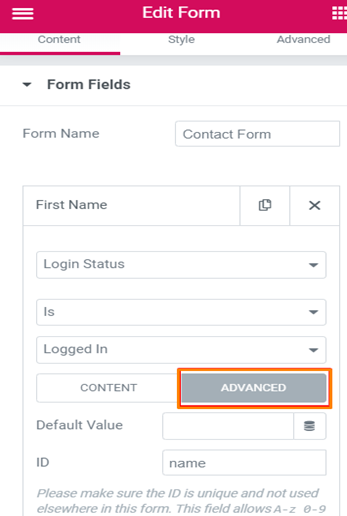
You can play around with the features to see what works and what you can add to your contact form. The Advanced Tab lets you explore more options for customizing your form. Check out this too to see if you will like the features that are inherent in it.
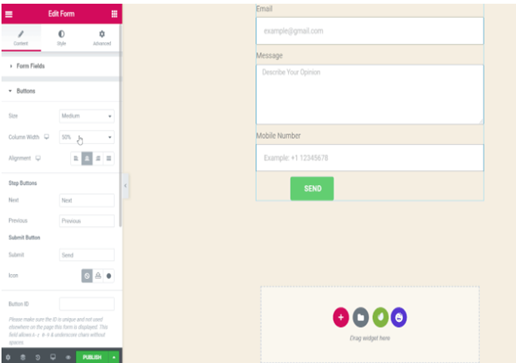
Step Three: Customize and design your Submit Button based on what you want. It has different fields that you can adjust and customize to suit you, including Size, Column Width, Text of Button, Button ID, Icon, and Alignment. Explore these features to add some style and flair to your contact form.
Step Four: Set up the “Actions After Submit” menu Usually, when a user submits a form on your site, you would want your site visitors to have some form of feedback or response to show that the form has been submitted. This is not automatic. You have to configure the “Actions After Submit” section to get what you need.
Click on the “Actions After Submit” section on your form and click on the “Add Action” field. You will see different options, such as Email Webhook, Discord, Popup, ActiveCampaign, GetResponse, and Slack, among others. Select any of the options to add actions after submission.
For instance, if you choose Email action, the contact form will add a tab for Email. You can configure an email to be sent to a user that has sent you an email through your contact form. Fill out the options and set the conditions to customize the form action.
It should be noted that Elementor offers numerous options of actions that you can explore. Then again, you can consider other third-party services to make it more seamless. Some of the third-party services you can explore include Hubspot, Mailchimp, Drip, Convertkit, and Slack, among others. All these are in-built integrations in Elementor, making them easy to access and use.
Step Five: This step lets you customize your message to users when something happens when they fill out a form. For instance, when they successfully submit a form or there is an error, they should get a message.
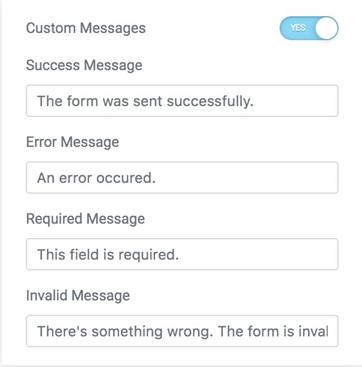
To configure this, click on the “Additional Options” and choose Yes or No for “Custom Messages”. Edit the default four messages to what you want your users to see. These messages are Success Message, Error Message, Required Message, and Invalid Message.
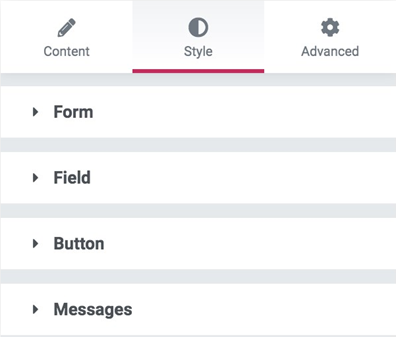
Step Six: Style and customize your Elementor Contact Form to make it look unique and not boring. Elementor offers custom styling options that you can use. To do this, click on the “Style” tab and review the options and settings available. You can use any of these to change the complete style of the contact form.
Step 7: You have successfully configured your Elementor Contact Form and the next and final stage is to publish it. To do this, click on the “Update” button located at the lower part of the form.
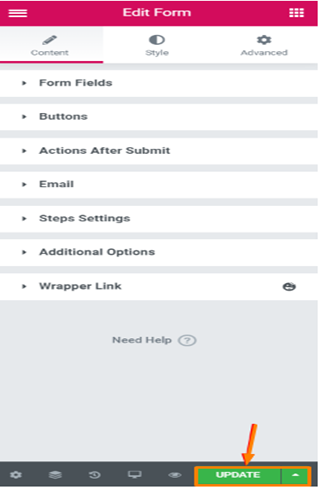
This will publish your form and make the page go live and accessible for your site visitors. You can begin to collect data and leads from subscribers to your website.
Conclusion
The type of contact form you want to design will determine the features that you will use in Elementor. However, this post has provided the basics of how to create a form using this tool. As mentioned, you can only access the Contact Form feature in the Pro version of Elementor. It costs about $49 to purchase a pro version of the tool. The features available are worth every penny you pay for it.
How do I set up my Elementor Contact Form?
Navigate to your Elementor dashboard and open the Elementor Contact Form page. Use the features and tools available on the platform to create your contact form page. When you have completed the form design to your preferred taste, publish the contact us page and it will go live.
Is Contact Form 7 compatible with Elementor?
Contact Form 7 plugin is an add-on feature for the Elementor page builder. This means that Contact Form 7 plugin is compatible with it and you can use it to build your forms.
Which contact form plugin is best for Elementor?
Numerous form plugins work perfectly with the Elementor. Some popular ones are Gravity Forms, weForms, and Contact Form 7, among others.
Can I use WPForms in Elementor?
Yes, WPForms is compatible with Elementor. With WPForms Elementor Widget, you can add different forms to your web pages and edit them based on your preference. You can also create and edit the form in the Elementor page builder.
Can I use Formidable Forms with Elementor?
Yes, you can use Formidable Forms with Elementor and even almost all contact forms plugins. All you have to do is install the plugin and activate it on your site. You can get started with the free version to see how the form builder works before you upgrade to the premium version.


![Best Tips to Use Gravity Forms in WordPress [2021]](https://fixed.net/assets/uploads/images/blog/tips-to-use-gravity-forms.jpg)