
Growing your website and business requires that you generate leads. The best way to do this is to collect emails through the contact form on your site. To do this, you need to create a contact form on your WordPress website. Of course, you can ask your site developer to help you with it.
However, you should learn how to do it so you can create a form that suits your brand image without having to spend a fortune. This post takes you through the step-by-step process of creating a basic contact form in WordPress.
Three Top Reasons to Use a Contact Form on Your WordPress Website
When you know the reason to have something, you will be motivated to go for it. So, why should you create and use a contact form on your website? Let us look at the top three reasons why you should consider having a contact form on your site.
• Curate the Customers Data
Business is driven by data and without appropriate data, your business may not grow beyond what it is today. One major way you gain access to your customers' and site visitors’ data is when they contact you. When you have a contact form on your site, you can request specific data about them.
You get to collect their email addresses, phone numbers, and some vital information that will come in handy for your marketing purposes. A contact form also helps you to filter inquiries. With it, you know the right question to ask from visitors and how to channel the question to appropriate teams to handle.
• Protect your site from Email Spam
Email spam is a pest and if you have an unprotected email address, you are a good target for spammers. With a contact form, you prevent this from happening. You do not have to publish your email address or phone number online. Your visitors can get in touch with you through the contact form.
• Inform Site Visitors
Apart from collecting information from site visitors, you can also use the contact form to provide information to your clients. When they get in touch with you, you can include information in the form on when they can expect a response.
So, now that you have the reasons why a contact form is crucial to your website, let us look at how to add one to your site. We will look at how to create a contact form using WPForms and Contact Form 7 since they are among the most commonly used contact forms for WordPress websites.
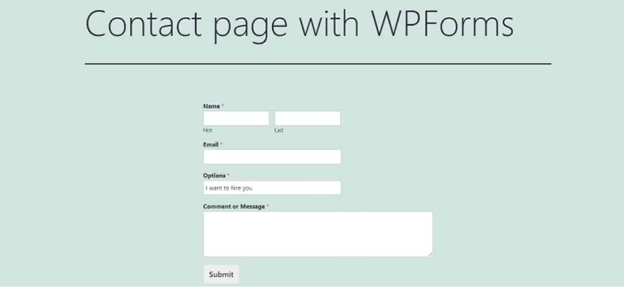
How to Create the WPForms Contact Form
WPForms is one of the most popular contact forms in the market. To create a form, the first thing is to install and activate the plugin. When you are done with this, the WPForms setup wizard will pop up with the message, “Create your first Form”. Follow the steps below to complete the process and get your WPForms up and running in five minutes.
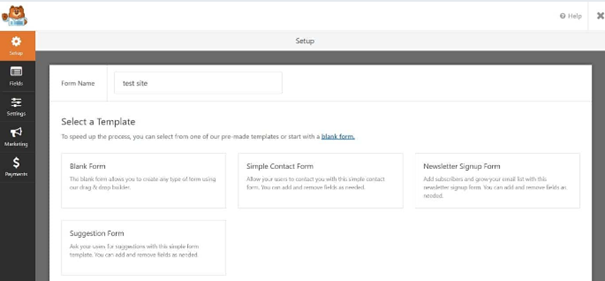
• Click the “Create your first Form” button to get started.

• Next, choose a pre-designed template and customize your form fields. You can also choose a blank form to create your form from scratch. For a beginner, choose the “Simple Contact Form” template.
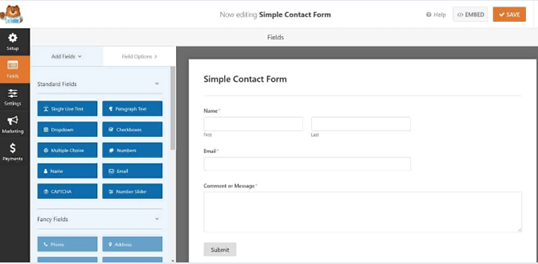
• You will be redirected to add or remove form fields in the form builder. You can also customize the form based on the aesthetic and function.
• In the space with “Add Fields,” put your cursor in the space provided, and fill out the fields based on the prompting of the pop message. If you want something basic, you can use the basic form fields that have already been provided.
This does not require that you remove or add any fields to it and it is very functional. If you want to add additional fields, you can drag and drop them from the list of fields in blue boxes to your left on the page. When you are done filling out the space, click “Done” to continue to the next.
• The next thing is to focus on your notification settings. The notification settings allow you to get alerts when a user submits a new form on your website. By default, the notification feature is activated.
For a better user experience, you can use smart tags to send notifications to your site visitors when they submit a contact form. This lets them know that you have received their form and will get in touch shortly.
• The final step is to embed the simple contact form in your WordPress website. To do this, you can embed it in an existing page or a new one. So, click on either “Select Existing Page” or “Create New Page” from the popup message. If you are creating a new page, click on the “Create New Page” and give it a name. Click on “Let’s Go”. WPForms will embed your form on the new page and that is all. You can start reaping the benefits of having a contact form on your site.
How to Create a Contact Form with Contact Form 7
The first step in creating a contact form with Contact Form 7 is installing and activating the plugin. Follow the steps below to install and activate the plugin, and create your contact form:
• Log in to your site and go to “Plugins”. Click on “Add New” and type Contact Form 7 into the search box.
• Click on “Install Now” to download it on your website. Next, click “Activate” to begin to use the plugin.

• Next, click on “Contact” in your WordPress sidebar. Browse through the list of contact forms on your website. You will see a sample form, which you can edit and customize. You can also click the “Add New” on the screen to build a form from scratch.
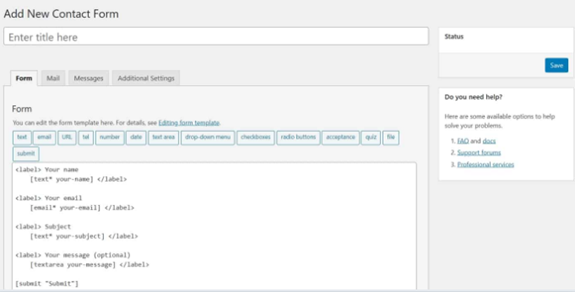
• Click on either a sample form or “Add New” to continue. Do not get scared about the next opened window. It looks complex but there are tools to generate the code automatically. So do not worry, as you do not have to code anything.
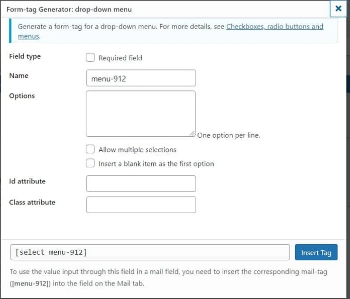
• Now it is time to configure your contact form. You can add a drop-down menu, which will allow your visitors to select the purpose for which they want to contact you. To do this, place your cursor where you want the menu to be placed on the contact form. From the toolbar, click on the drop-down menu and fill in the fields.
• Click on the “Insert Tag” when you are done to embed it into your form.
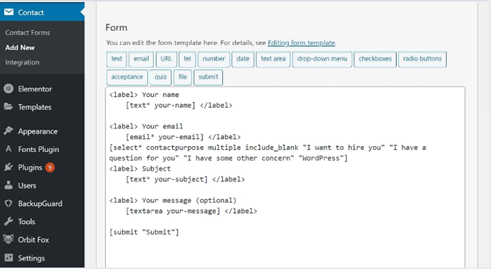
• Next, add a label. To do this, copy and paste the current code from the fields and adjust it to your preference.
• Configure the email you received from the contact form. To do this, navigate to the Mail section. You will see the pre-filled fields with similar tags and the ones you have created before. You can use them to customize how you would like to receive messages through the contact form.
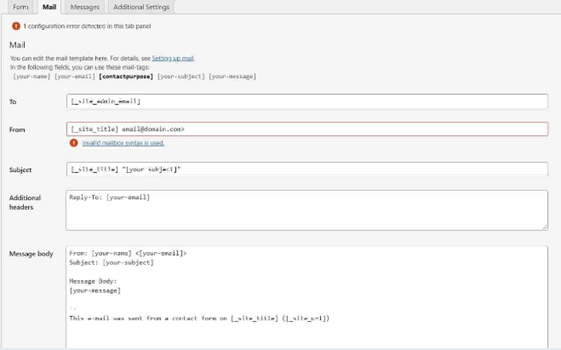
The included fields are To, From, Additional Headers, Message Body, and Use HTML Content-Type (messages are sent in plain text by default. If you want to use HTML, check the box).
It also has File Attachments and Mail (2), an additional mail template for auto-responders. If you want to activate it, check the box, and you can stick with the standard option as a beginner.
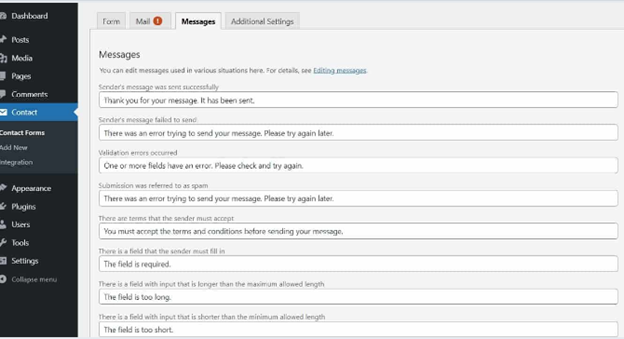
• Next, configure the specific messages you want your visitors to see when using your form. The options available include Success Message and Error Messages.
• Finally, add the form to your site. First, save the form with a unique name. You will see a shortcode appear on your screen after saving the form. Copy it and navigate to the page where you want the form to be placed. You can create a new page or add it to an existing page. Paste the shortcode into the WordPress editor and publish it. This will send it to the front end and you can start enjoying the rewards of having a contact form on your site.
Conclusion
There you have the simple steps to create a basic contact form using WPForms and Contact Form 7. If you want something fast and seamless, the WPForms plugin looks like a better option. However, if you are interested in working with codes even without any prior experience, Contact Form 7 is a better choice.
How do I create a form in WordPress?
The first thing is to select a WordPress form plugin. Install and activate it and then follow the simple steps to create the form of your choice.
How do I use a contact form in WordPress?
Login to your WordPress Admin Dashboard and navigate to plugins. Click on “Add New” and select the Contact Form plugin you want. Install and activate it. You can display the form by opening “Contact” and then “Contact Forms” on your WordPress Dashboard. From here, you can manage all forms.
How difficult is it to create a contact form?
The difficulty level will depend on the choice of contact form plugin that you choose. Some are very simple to use, while others are very complicated. WPForms, for instance, is very easy to use to create a contact form