WordPress security focuses on protecting your site, visitors, and data from malware and hackers. Now do not get things wrong. WordPress is a secure platform, and hackers are only successful in penetrating through the platform’s security features due to poor password policies or security vulnerabilities.
When you mitigate these, you significantly reduce the chances of your site getting hacked. So, how can you mitigate security vulnerabilities on your WordPress site?
Install a Backup Solution
Your first defense against a WordPress attack is to backup your data. The stark truth is that nothing is absolutely secure. If fortune 500 websites can be hacked, then your site is also susceptible.
Although having a backup solution in place does not mean your site would not be hacked, it simply protects your data. When you backup, you can immediately restore your site and data if your site was to be hacked. You will find various WordPress backup plugins for free and paid packages.
We recommend setting up a real-time backup, so your data can backup daily and automatically. Additionally, make sure you do a regular backup to a remote location on a cloud, such as Dropbox, Amazon, or other private clouds.
Enable WAF (Web Application Firewall)
Using a web application firewall is the easiest method to protect your website against malware. A WAF blocks malicious traffic even before it gets to your site. Here are web application firewalls that you can consider:
• DNS Level Website Firewall: When this is enabled, it routes your site traffic through a cloud proxy server and sends only authentic traffic to your web server.
• Application Level Firewall: These plugins evaluate the traffic when it gets to your server before loading the WordPress scripts on your site. Between the two, the DNS level firewall is the most effective in minimizing your server load per time.
Migrate your WordPress Website to SSL/HTTPS
Secure Socket Layer (SSL) is a security protocol that encrypts data transmitted between your site and users’ browsers. The encryption makes it difficult for an authorized person to snoop around your site to steal information. When you enable SSL, your site starts dropping HTTP and using HTTPS.
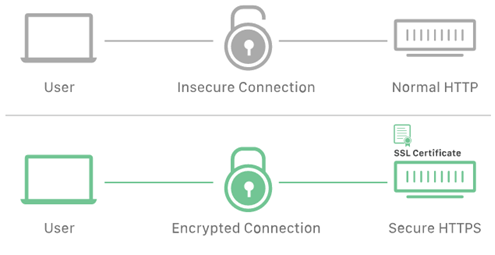
The symbol that shows that your site uses HTTPS is a padlock sign that is placed next to the site’s address in the web browser. Suffice to mention that SSL certificates come at an additional cost and are issued by certificate authorities.
However, you can choose to use the free SSL Certificates offered by Let’s Encrypt, which is supported by Facebook, Google Chrome, and Mozilla, among others. Additionally, many host companies now offer a free SSL certificate as a part of the package for hosting your WordPress site.
Use a Maintenance Service
The good thing about using a maintenance service is that it offers more than WordPress security. With such a service, you do not have to worry about the backend issues relating to your website.
From security to backup and other maintenance issues, your maintenance service provider will take care of them. You can focus on your business while you let the professionals handle the task of keeping your site safe always.
How to do WordPress Security with Coding
If you have some basic coding skills and want to keep a tab on your WordPress security by yourself, this part is for you. Here are steps to help you maintain your WordPress security with some coding knowledge.
Change your Default Username from “Admin
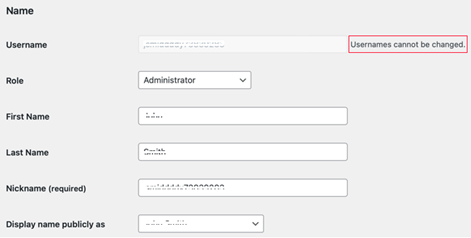
The default username for WordPress admin was “admin”. This makes it easy for hackers to figure out your username and brute-forcefully attack your site. Although WordPress has changed this and requires that you choose a unique username when installing WordPress, most 1-click WordPress installers still use “Admin” as the default username.
If you experience this while installing your WordPress from a web hosting company, you need to resolve the issue. WordPress does not support changing usernames. However, you can create a new admin username by deleting the old one.
How to Delete an Old Admin Username and create a New
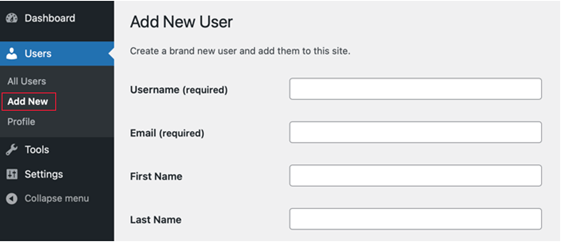
You can create a new username with the administrator user role. You may need to create a new email address as you cannot use the one you used in creating the existing account. Follow the steps below to create a new admin username with a new email address.
Step 1: Click on “Users” and fill out the short form.
Step 2: Log out of your WordPress account and log in with the newly created user account.
Step 3: Navigate to the “Users” and then “All Users” page and click the “Delete” link below the old username.
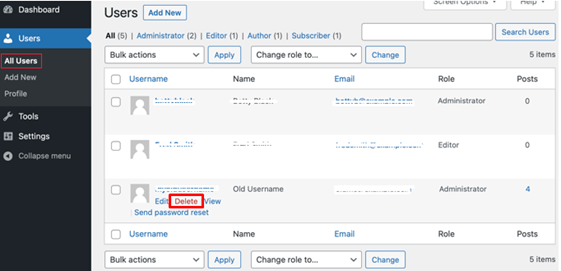
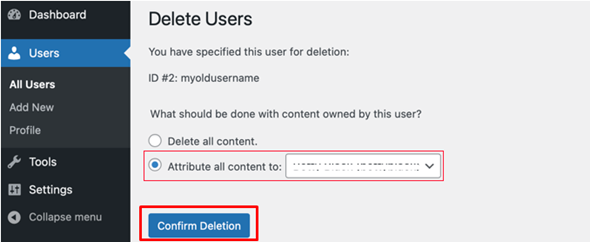
Step 4: WordPress will prompt you to know if you want to delete any content created by the old user. Click “Attribute all content to” and select the new username you created.
Step 5: Click “Confirm Deletion” to delete the old account. That is all it takes to change your old username to a new one.
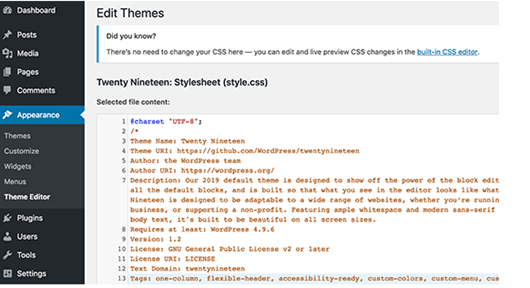
Disable File Editing
WordPress features a built-in code editor that enables users to edit themes and plugin files through the admin area. This feature can be a major security risk if it finds its way into the wrong hands. Therefore, it is best to disable it. To do this, follow the steps below:
Step 1: Add the code below in your wp-config.php file
• // Disallow file edit
• define( 'DISALLOW_FILE_EDIT', true );Reduce Login Attempts
Users can log in to their WordPress dashboard freely and with no restriction. When you do this, your WordPress website becomes vulnerable to brute force attacks. It becomes easy for hackers to crack your passwords through multiple logins with different combinations.
You should fix this by limiting the number of attempts after a failed login. To do this, follow the steps below:
• Install and activate the Login LockDown plugin
• Visit “Settings” and then “Login LockDown” page to setup
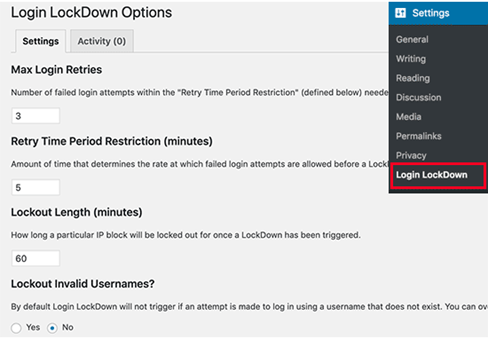
• Follow the prompts to complete the process and you are good to go.
Final Thoughts
With these steps, you can significantly increase your WordPress security and prevent attacks. If these look like something you would not want to spend time doing, we recommend using a WordPress maintenance service. This will take the stress off and you can rest assured that a team of professionals manages your site.
How do I know if a WordPress site is secure?
Open a page in a browser, for instance, Chrome, and check the security status at the left side of the web address. You will see either a “Secure” or “Not secure” message.
What is the most secure Web Address?
A secure Web address should start with “HTTPS” and not “HTTP”. The “S” in “HTTPS” stands for secure, which shows that the site uses an SSL Certificate.