You can take advantage of WooCommerce to improve customers’ experience in your store. Gravity Forms is one of the most popular form plugins for WordPress and WooCommerce. It is a paid version of the contact form and it has numerous features.
It allows you to improve your online store, generate impressive user engagement, and deliver more value. In this post, we will look at how you can use Gravity Forms in your WooCommerce store for good returns.
Why Integrate Gravity Forms into your WooCommerce Store
For a start, Gravity Forms is a premium-only WordPress plugin designed to help users to build multifaceted front-end forms. It features a drag-and-drop form editor with other exciting functionalities. Here are some benefits associated with integrating it into WooCommerce.
• It can be used to accept online donations for online stores that support causes.
• It is great for accepting online registration and selling tickets for event organizers.
• It can be used to ensure a pre-payment form completion. This is great for organizations that organize events, such as camps and retreats.
• It can be used to create just about any type of form.
How to Integrate Gravity Forms into a WooCommerce Store
Now that you know some of the benefits of using Gravity Forms in a WooCommerce store, let us look at how to integrate the form to get you started. It is important to mention that the Gravity Forms Product Addons extension allows users to seamlessly connect the form to WooCommerce.
With this, you can easily link your WooCommerce product to a specific Gravity Form and explore the different functions it offers. These include allowing users to input prices, automatic price calculation, and conditional logic.
The add-on extension can also be used to collect information from customers on their orders. For instance, if you sell items like engraved watches or jewelry, you can use the tool to request customers to provide the initials they would like to have engraved on their jewelry.
There are so many things you can do with the Gravity Forms in your WooCommerce Store. Let us look at some of them.
Use Gravity Forms to Add Conditional Pricing to your WooCommerce Store
As mentioned, Gravity Form comes with numerous features, add-ons, and extensions. To add conditional pricing, the Gravity Forms Conditional Pricing plugin is the tool to use. With this, you can create flexible pricing structures for your product field according to the conditional values on your form.
That means instead of building numerous Product fields, you can create a single Product field with different pricing. Follow the steps below to complete this process:
Step 1: Create a new form with Gravity Forms in WooCommerce. From under “Pricing Fields,” click on “Product” to add a new product field and click update.

Step 2: In the new window, click on “Settings” and then “Conditional Pricing”. Click on the “Select a Product” drop-down menu to view the list of Product fields on the form.
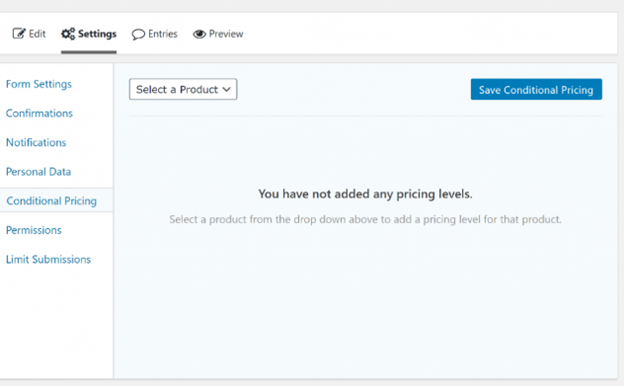
Step 3: Select the “Product” field that you want to add conditional pricing to and the first pricing level will automatically be created. Next, set a price for this specific pricing level and establish the requirements that must be met to apply this pricing level to the product. You have the freedom to add multiple rules per each pricing level.
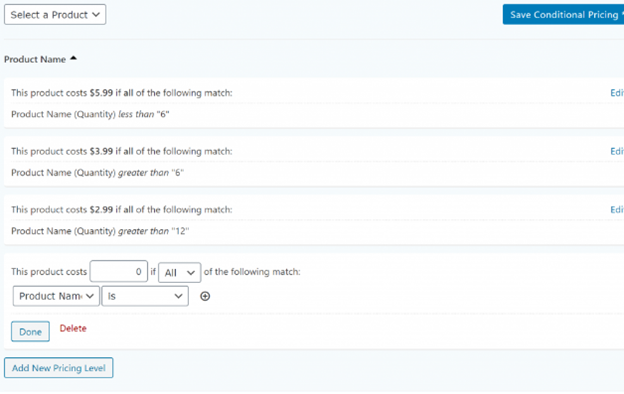
Step 4: Use the “Add New Pricing Level” button to create more pricing levels based on your requirements. Once you are done creating it, click the “Save Conditional Pricing” button to continue.
You can use the Gravity Forms Conditional Pricing plugin for bulk discounts for customers, date-based pricing for online courses or membership sites, field-based pricing, and based on users’ inputs.
Use Gravity Forms to Configure a WooCommerce Store to allow only Logged in Customers to Submit a Form
To avoid getting bombarded by forms that are irrelevant to your service, you can use Gravity Forms to restrict the category of people that can submit a form on your site. For instance, you can create a standard to allow only customers that are logged in to submit a form through Gravity Forms.
You can also use different factors to limit the form entries that you get. Some of the factors you can use include IP address, field value, user, URL, and role.
With the plugin, you can limit who, where, when, and how Gravity Form is submitted on your site. Let us see how you can configure your WooCommerce store and set a restriction to allow only logged-in users to submit a form on your site.
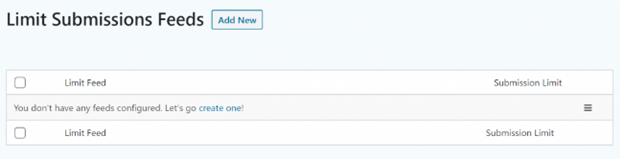
Step 1: Click to open the Gravity Form you want your customers to access. Click on “Settings” and then “Limit Submissions.”
Step 2: Click the “Add New” button to start building a new limit feed.
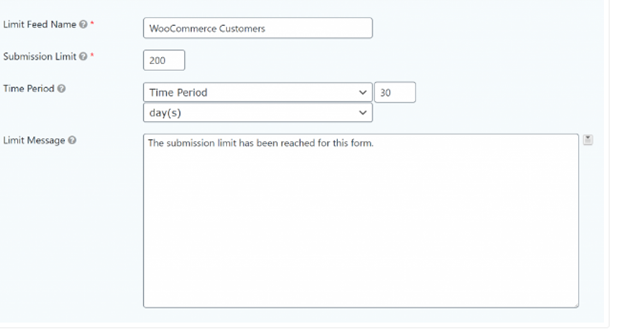
Step 3: Enter the name of the feed, period, and submission limit in the “New Limit Feed”. You also have the option to limit a message.
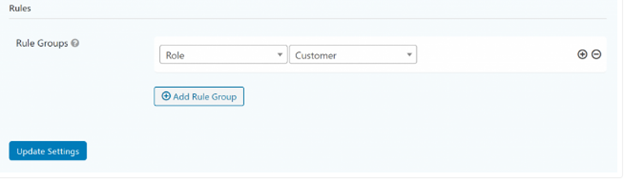
Step 4: Set the first drop-down menu to role. With this, the second drop-down menu will automatically load all user roles that you can restrict access.
Step 5: Select the “Customer” user role to allow only logged-in users to submit the Gravity Form.
Step 6: Click on the “Update Settings” button to continue.
It is also possible to restrict eligible people that can submit a form to only registered users. Use the Restriction Feature to do this and you will be able to schedule forms, limit the number of entries you get, and ensure only logged-in users can submit forms.
Conclusion
These are two unique things you can use Gravity Forms to do in WooCommerce. You can explore numerous features, add-ons, and extensions that the contact form can offer and use it to make your WooCommerce more efficient with a better customer experience.
Can I use Gravity Forms in WooCommerce?
Yes, you can. With the Gravity Forms Product Addons, you can build advanced product configuration forms and link them to any product in your WooCommerce store.
How do I use Gravity Forms to create WooCommerce Products?
Install Gravity Forms in your WooCommerce store and navigate to WooCommerce Product and add the required fields, including product name, product description, featured image, and file upload.
Next, select the product category, and create the Advanced Post Creation feed. Give the feed a name and then set the post type to “Product.” Follow the prompts to complete all fields and click the save button.
Can I use Gravity Forms with Elementor?
Yes, you can. To do this, search for “Form” and drag the form widget element to the opened page. Use the widget element editor to select the specific form you want and click on the “Apply” button.
How can I style Gravity Forms?
You must have some basic knowledge of CSS before you style Gravity Forms. Go to “Appearance” and then “Customize.” Next, click on “Additional CCS” and then add the code. However, you must first decide on the specific elements you want to style.