Introduction
Did you know that your website’s search capabilities significantly impact your business’s overall success? Yes, it does!
It can be frustrating to search for a product only to find irrelevant results. This can not only ruin your store’s reputation but also negatively affect your sales. For this reason, customizing your product search is a critical option that you should seriously consider.
By default, WooCommerce has a pre-built search feature that enables customers to search for products in your store. Nevertheless, this search feature is limited to basic capabilities, making it not good at finding products.
Adding an advanced smart WooCommerce product search can help provide a better solution for your online store. Customers can now find relevant results to complex search queries with the feature.
This article will show you how to set up a smart product search for your WooCommerce store for better search results. Keep digging for more!
Benefits of Smart WooCommerce Product Search
Adding a smart WooCommerce product to your website has many benefits to offer. By simply entering your keyword in the search bar, you can instantly access thousands of products relevant to your search. In this section, we’ll look at some benefits you can gain by adding this powerful feature.
1. Enhances user experience
With WooCommerce smart product search, you can customize your store’s search functionality for better product search results. Once customers can easily navigate various products categories in your store, they’ll enjoy shopping with you. In a nutshell, the convenience of finding a product will lead to an overall improved user experience.
2. Improves customer satisfaction
When customers can’t find products from your store or only find irrelevant results, they end up frustrated as they leave in search of other alternatives. However, by configuring smart WooCommerce product search, customers can access relevant search results from their product searches. This will not only simplify their searches but will also save their time.
3. Increase conversions
On average, over 70% of visitors leaving a website never return. Therefore, having better search features can effectively result in better conversions for your WooCommerce store. By configuring WooCommerce smart product search to optimize searches for your store, visitors will easily trace products in your store and make their purchases. Hence, your overall sales will likely increase with a 15-20% margin driving more revenue to your store.
4. Better product visibility
The smart WooCommerce product search replaces the default WooCommerce product search features to provide out-of-the-box search capabilities in WooCommerce. Customers can better view your products through customizations such as filters, auto-suggestions, and access to personalized results. Your website navigation becomes easier, helping display more helpful product search results. Wait! Are you interested in increasing your website’s visibility on Google search? Here are some valuable tips.
How to Add Smart WooCommerce Product Search
1. Use of the Smart WooCommerce Search Plugin
Step 1: Download and install the Smart WooCommerce Search plugin
To get started, navigate to WooCommerce > Plugins > Add new, and in the search bar, search for the ‘Smart WooCommerce search plugin’. Once you’ve found the plugin, install and then activate it.
Step 2: Enable smart search
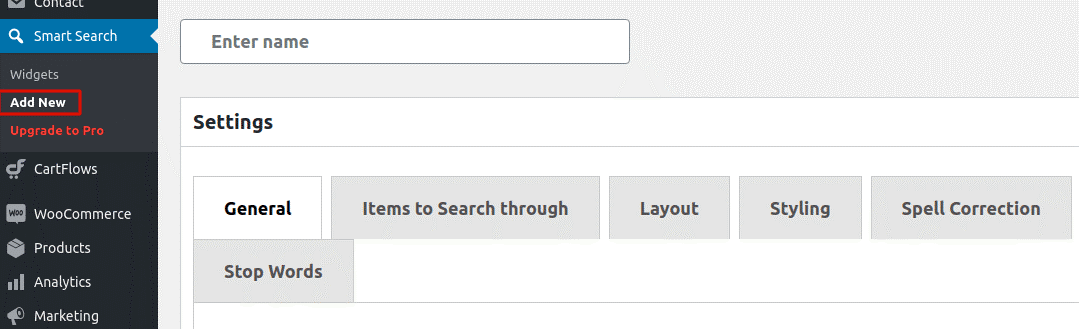
To enable the smart search option, go to WooCommerce > Smart Search > Default and click on the ‘WooCommerce Product search’ option. From the ‘WooCommerce Product Search’ settings, find the ‘General’ tab and tick the checkbox/activate the slider with the ‘Enable Smart Search in Product Search Widget’ option.
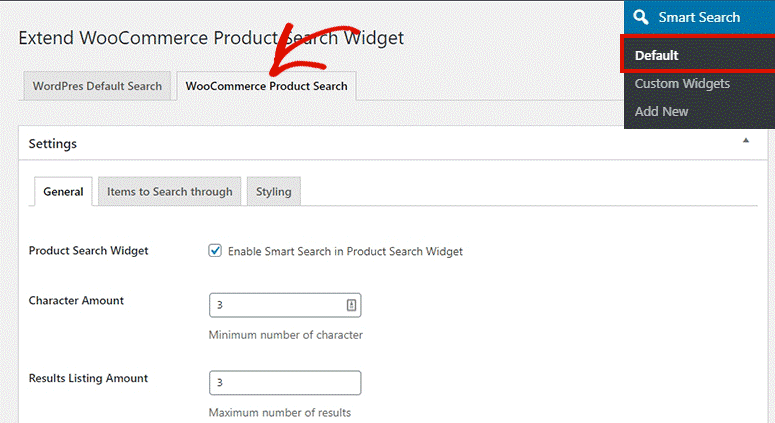
This activates smart WooCommerce product search. You can proceed to edit other settings in this section, including display images, SKU, and price.
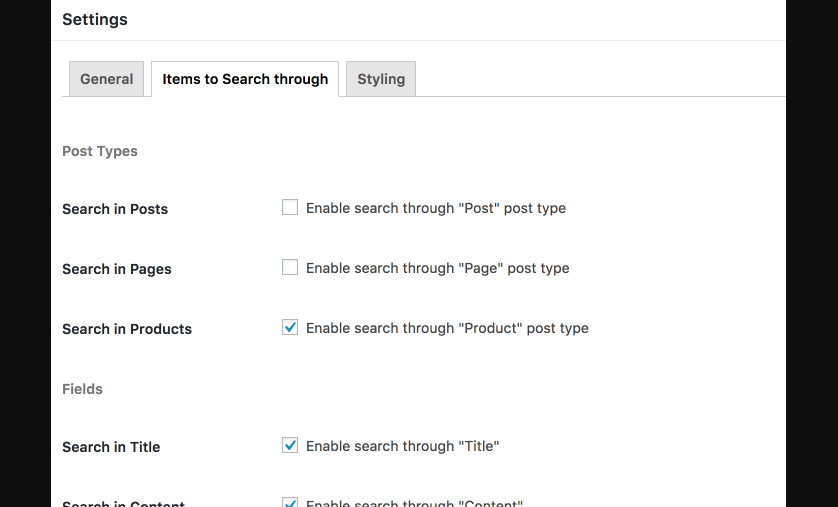
In the ‘Items to Search through’ tab, you can enable/disable different search criteria, including the search in title, context, excerpt, etc.
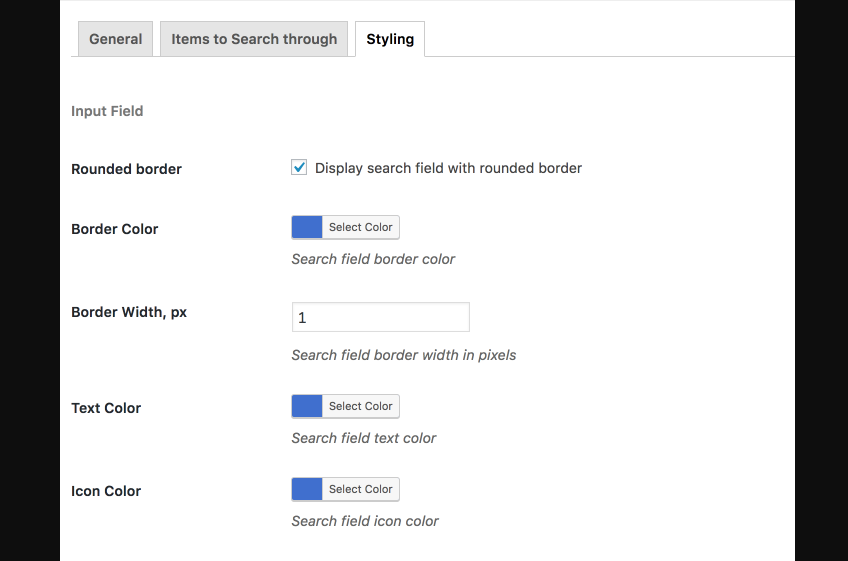
In the ‘Styling’ tab, you can customize the appearance of the search fields and results in appearance, including the background color, title text color, and border color.
Click on the ‘Save’ button once you’re done to apply the changes.
Step 3: Create a new custom search widget for your website
At this stage, you’ll need to create a custom search widget to be shown on particular product pages. Go to WooCommerce > Smart Search > Add new. Add a name to the custom search widget and proceed to the ‘General’ tab, where you can add a placeholder for the search bar. In the ‘Items to Search through’ tab, you can find additional options for custom product variations and post types. Moreover, you can customize your search bar based on your preferences in the ‘Styling’ tab. Once done, click on ‘Save’ to apply your changes.
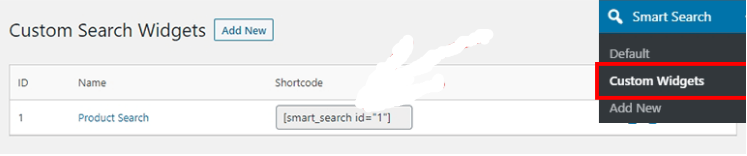
Step 4: Displaying custom WooCommerce search bar on WordPress
Navigate to Smart Search > Custom Widgets and select the ‘Custom Search Bar‘ option to display the custom widget. Copy the shortcode for the new product search bar, go to any pages or posts where you want to add the search bar, and paste the shortcode in the text editor.
Alternatively, you can navigate to Appearance > Widgets and apply smart search in the widget regions of your websites, such as the search bar or footers.
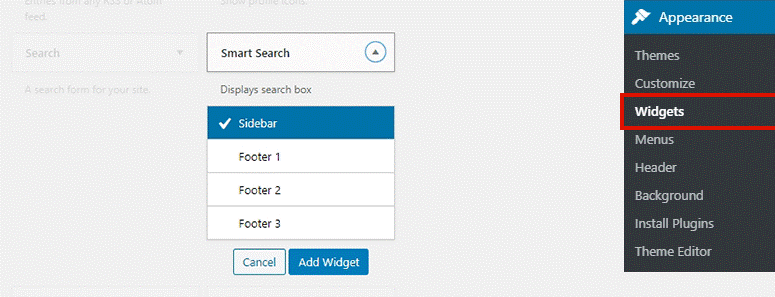
Remember to save your changes once done. And that’s it!
2. Use of SearchWP Plugin
Step 1: Install and activate the SearchWP plugin
Firstly, you’ll need to install and activate the plugin. Go to WooCommerce > Plugins > Add new, and on the search bar, search for the ‘SearchWP’ plugin. To proceed, click ‘’Install’ and activate the plugin.
Step 2: Set-up
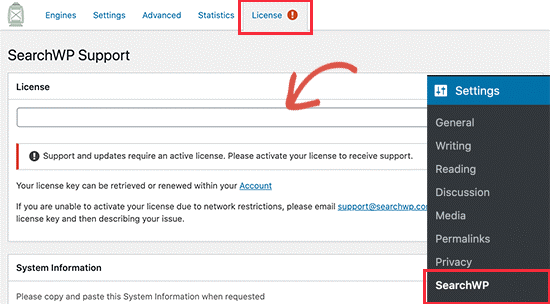
To set-up the plugin, navigate to WooCommerce > Settings > SearchWP. Switch to the ‘license’ tab and enter your license key.
Note: You’ll need to be on the PRO plan to use the WooCommerce integration.
Next, install and activate the WooCommerce Integration extension. Go to the SearchWP website, download the extension, and install it.
Step 3: Configuration
To configure SearchWP, go to Settings > SearchWP, and click on the ‘Sources & Settings’ button. Here, a pop-up will appear. Tick the ‘Products’ checkbox, and click on ‘Done’ to apply the changes.
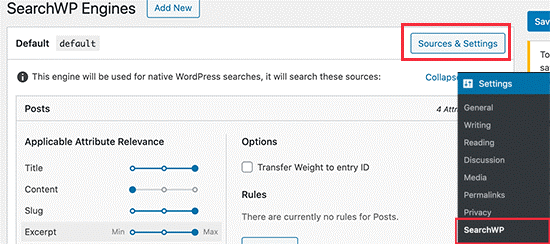
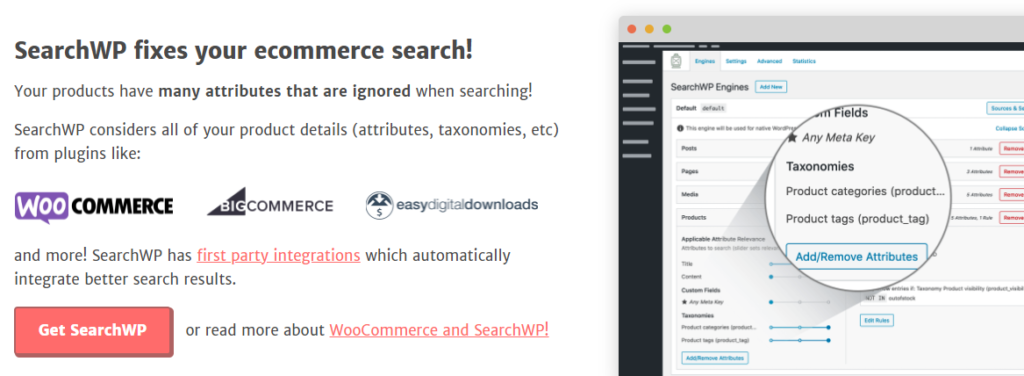
To proceed, go to the ‘Products’ area. Here, you can view the plugin’s capabilities. By default, the plugin checks the title, content, slug, and excerpt to help customers find matches for their searches.
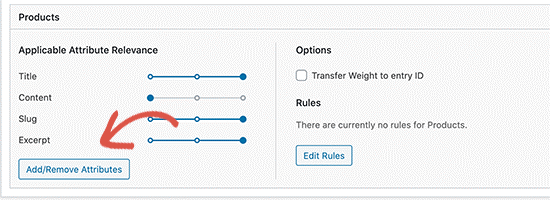
To increase these options, click on the ‘Add/Remove attributes’ button, where a pop-up will appear. Here, you can customize your options further by adding custom fields and taxonomies for enhanced search results.
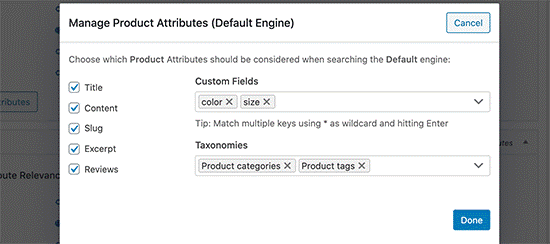
For example, we’ve added color and size in the custom fields and product categories, and product tags in the taxonomies. Click ‘Done’ to apply your changes.
Step 4: Enabling live search results
At this point, you have finished setting up SearchWP, and it’s now time to try out your new search bar feature. When you search for an item, you’ll note a slower search process, and the page will re-load before showing the search results.
You can eliminate this behavior by downloading the Live Search extension from the SearchWP website. Once downloaded, install and activate the extension. Next, go to Appearance > Widgets and add the ‘SearchWP Livesearch’ widget to your sidebar. Click ‘Done’ to save your changes.
Finally, visit your website to see the changes applied to your smart WooCommerce search. After a live search, SearchWP will display your products but without thumbnails.
And that’s all you needed to know on activating smart WooCommerce product search.
Summary
Navigation and search capability comprise the most critical features in a WooCommerce website. If you’re having difficulties with product search results in your store, it’s time you think of adding a smart WooCommerce product search.
Despite the default WooCommerce product search limitations, you can still integrate your site with the Smart WooCommerce Search plugin and the SearchWP plugin. Besides, you can use powerful features such as custom search bars and styling to improve your overall search experience.
By doing this, your customers will access more advanced search options to help them locate whatever they are looking for on your website. Consequently, you can expect more product visibility and increased conversions.
We hope the information in this article was helpful to you. So which plugin do you think will work best with your smart WooCommerce product search?
Let us know your thoughts in the comment section below!
What is the best product filter plugin for WooCommerce?
When it comes to WooCommerce product filtering, WooCommerce plugin Products Filter (WOOF) is the ultimate solution. Your customers can easily filter out products they are trying to find in your store to get the best possible results.
How do I use smart search in WooCommerce?
On your WordPress site directory, upload the plugin folder. Next, go to the ‘Plugins‘ menu and activate the Smart WooCommerce Product Search plugin. Finally, use the built-in widget or place the search plugin shortcode into your template.
What is wrong with the default WooCommerce product search?
The built-in search feature in WooCommerce is not the best for finding products. This is due to the lack of handy features to conduct sophisticated product searches. However, you can always replace it with plugins for faster and smarter searches.
Can I use shortcodes with SearchWP?
Yes. The SearchWP plugin enables you to add taxonomy terms and shortcode output in a WordPress search for better-optimized search results.