If you are in the business of selling premium content or running a WP membership site, you might want to set up dripping content and not show all of it straight away.
Today we will show you how to easily do this.
What is drip content?
Drip content gives you the opportunity to gradually release content and not giving it all away.
It provides membership sites with the chance to automatically release content at specific intervals to users. This way website owners are using their existing content in an efficient way.
It can be very useful when selling online courses, as this way you will not show your entire course all at once, and instead spread it across a predefined time frame.
Why do you need drip content?
In normal cases, you can just make your own membership site and give your content to paid subscribers.
If you are offering them monthly subscriptions, however, then you would need to keep your existing customers.
Drip content engages customers for a longer period of time, while you can reuse your content and deliver it in parts.
With the help of drip feed, you can make your content more effective. For instance, if you have online classes, users will be able to submit assignments before continuing to the next lesson.
The best part is, you get more time for creating new content, increase sales and traffic and promote your business.
What do you need to start offering drip content?
The main thing is a WP membership plugin which will help you to schedule drip content on your site.
You can use MemberPress, as an example.
It’s known as the best WP membership plugin available on the market. With it you can create paid subscriptions on your site and have automatic drip content set up.
Adding drip content
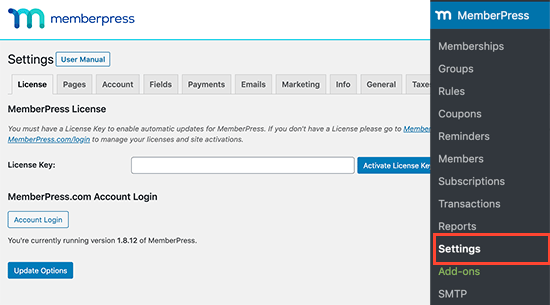
First step is downloading and activating the MemberPress plugin. Then go to MemberPress – Settings page and fill on your license key. This information is available in your account on the MemberPress site.
Next, is adding a payment method so that you can process payments on your site. Go to the Payments tab and click on the (+) icon for adding a new payment.
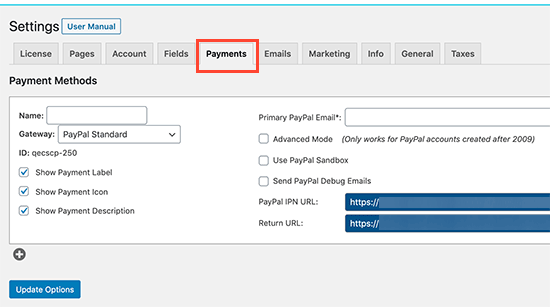
The plugin is compatible with Stripe and PayPal payments with their basic plan. With the premium plan you can also use Authorize.net.
Choose your desired payment method and fill in the required information. You can even add multiple payment methods by using the (+) icon.
Now, it’s time to add the membership plan.
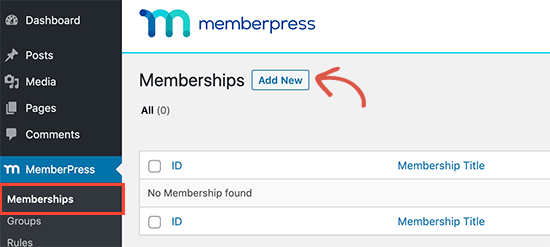
Click on MemberPress – Memberships page and go to Add New button.
You will now have to provide a tile for your plan and enter the price. The plugin lets you choose different types of pricing like expiring, lifetime and recurring.
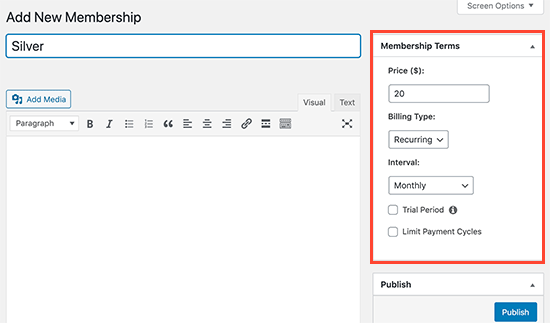
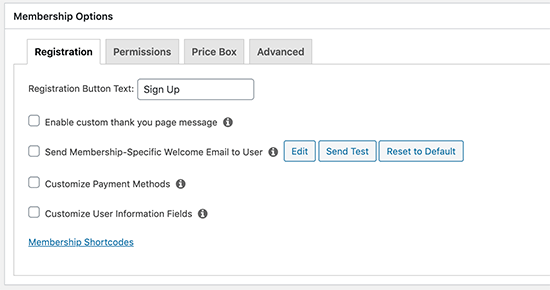
In the text editor you can add a description got the plan. You can also change different settings for your membership plan from the membership options box.
Don’t forget to save your changes and publish them.
When needed, you can create more membership plans by repeating the process.
Scheduling drip content rules
The MemberPress plugin comes with a number of rules. They allow you to restrict your content depending on the users’ membership and subscription.
These rules also give you the opportunity to schedule content at your own pace.
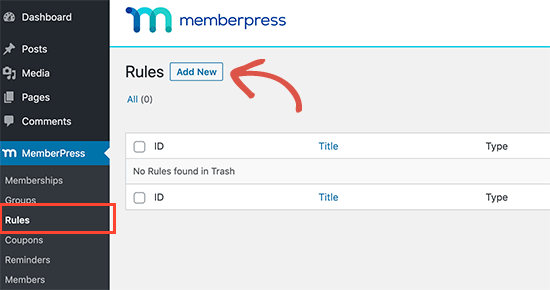
Click on MemberPress – Rules and then on Add New at the top.
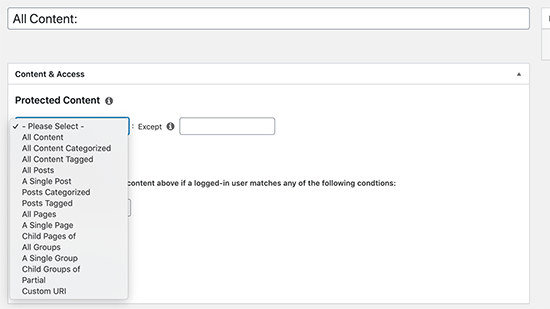
The next screen will allow you to choose the rule criteria.
The plugin provides a whole different range of options. You can choose posts with specific tags, pages, categories, single posts, and even URLs.
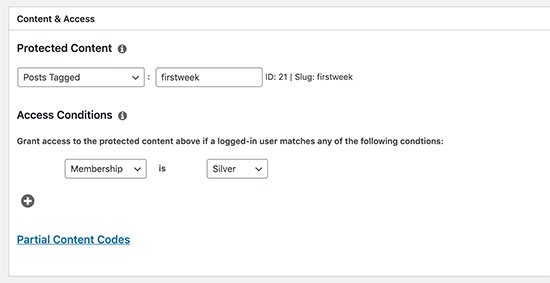
On the next page you need to choose the membership plan or members to whom this rule will apply to.
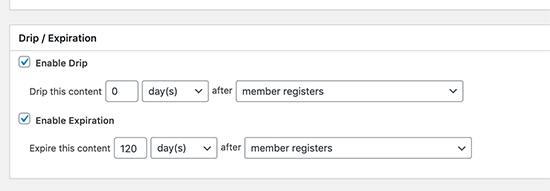
Now you need to set up the time to drip content.
Scroll down and make sure to check the box which is next to Enable Drip. This will show you the drip rules options.

You can choose after how many days the content can become available to the certain user. You can match it with criteria such as when user buys a specific subscription, product, registers and account, and so on.
You can also enable the drip expiration rule which allows you to make content available only for a limited time after which it will expire and will not be accessible to users.
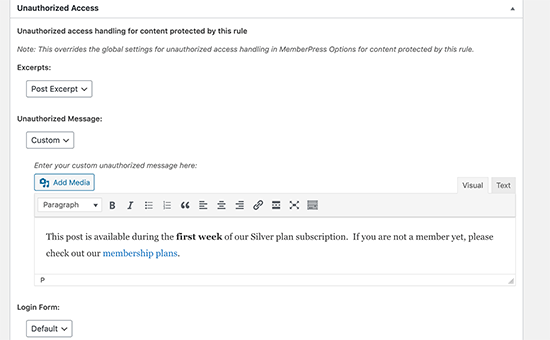
Bellow you can see how to handle unauthorize access. Users can see a custom excerpt, login form and message.
How to manage drip content?
Drip content can be a powerful tool when using to grow your membership site and community. It could, however, create bad experience in some cases.
Here are a few tips to follow to avoid such issues:
- Have a smooth content strategy
Plan your content in advance. Don’t give away all your content, but enough to keep customers interested.
Prepare your content prior to launching. Make sure your website is under maintenance mode to avoid your content getting cached by search engines.
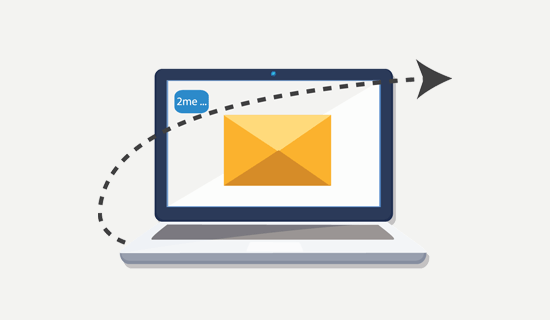
- Create an email list
Combine your drip content with your email marketing. This will allow you to set up a drip-email campaign which will send users email notification every time new content is available.
- Use on-site retargeting to promote products
A lot of membership sites rely on upgrading membership plans, renewing subscriptions and buying other products.
Use a good conversion optimization tool which shows users targeted messages like countdown timers, lightbox popups, etc.
We hope our article on how to set up and use drip content was helpful. Share with us your experience with drip content and how you utilize it to grow your business.