We often have customers asking why the changes they have made on their site, blog, or widget settings don’t appear straight away. It’s actually a very common issue and can be easily fixed.
Why is my WordPress site not updating?
One of the most common reasons for changes not updating immediately, is caching.
By default, a lot of WordPress hosting companies actually enable their own caching systems, as they store a temporary copy of your pages in order to improve site speed and to reduce the server load.
Aside from that, you can also be using a caching plugin, which was not configured properly.
There is also a possibility that the browser you are using may have stored a cached version of your pages in a temporary storage.
Usually when making any type of changes to your site, the cached versions expire, and you can see the changes right away.
In some case, however, often due to configuration error this can take some time. You will see only the old version of the page for a while.
In most cases you will notice that new posts do not appear in the homepage of your site.
You can see only the single post if you click on the view post link from your WP admin area, but you will not be able to see it on the main page.
Now, let’s take a look at a few ways you can use to fix this issue.
What to do when your website has an updating issue?
First thing you need to do is clear your browser cache. In most case, this will resolve the problem.
Step 1. Clear cache or force browser
Often your browser, in most cases Google Chrome, will show you a cached copy of your site and not the new one.
To resolve this, just hit CTRL + F5 (for Mac Cmd + R) on your keyboard and refresh.
This will reload the page and will fetch a fresh version. In most cases, this will fix the problem.
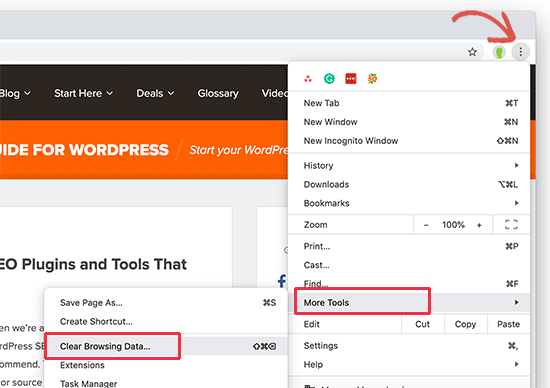
If this doesn’t work, next step you need to take is fixing the browser cache. With Google Chrome, you need to go to the three-dot-menu, located in the top right corner. From there, click on More Tools – Clear Browsing Data.
Step 2. Clear Cache for your WordPress Site
the second most popular cause for this issue is badly configured WP caching plugin. Most plugins are very easy to use when cleaning your cache with just one click.
WP Rocket
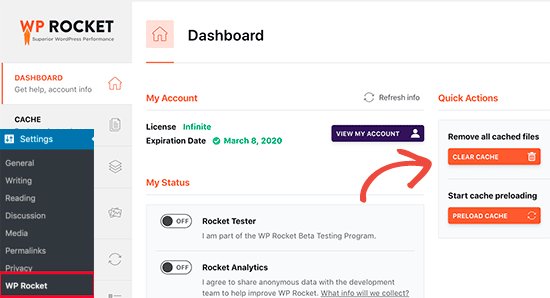
If you are using this plugin, go to Settings – WP Rocket and click on Clear Cache, located under the dashboard tab.
WP Super Cache
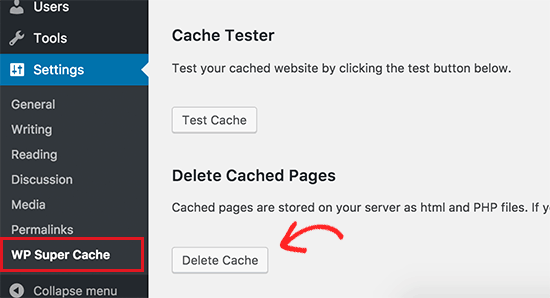
In the case with this plugin, click on Settings – WP Super Cache and then Delete Cache.
W3 Total Cache
Another popular choice when it comes to caching plugins, W3 Total Cache makes it super easy to clear your cash with just one click.
Simply go to Performance – Dashboard and click on Empty all cached button.
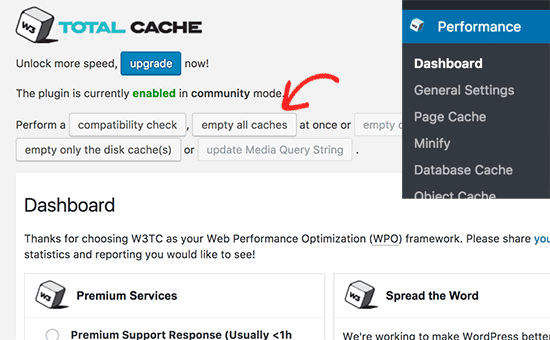
This will delete all cached content from your website.
FixedNet
A lot of hosting companies use their own caching system even if you are not relaying on a caching plugin.
For instance, we at FixedNet offer our own built-in caching system, named Litespeed. We provide fast, reliable and fully managed web hosting, inclusive of all our site maintenance plans. We manually optimise the hosting for each website, and provide the cPanel control panel so you can self-manage. Our team ensures the hosting we provide fits your requirements perfectly, such as setting up the right caching environment for your needs.
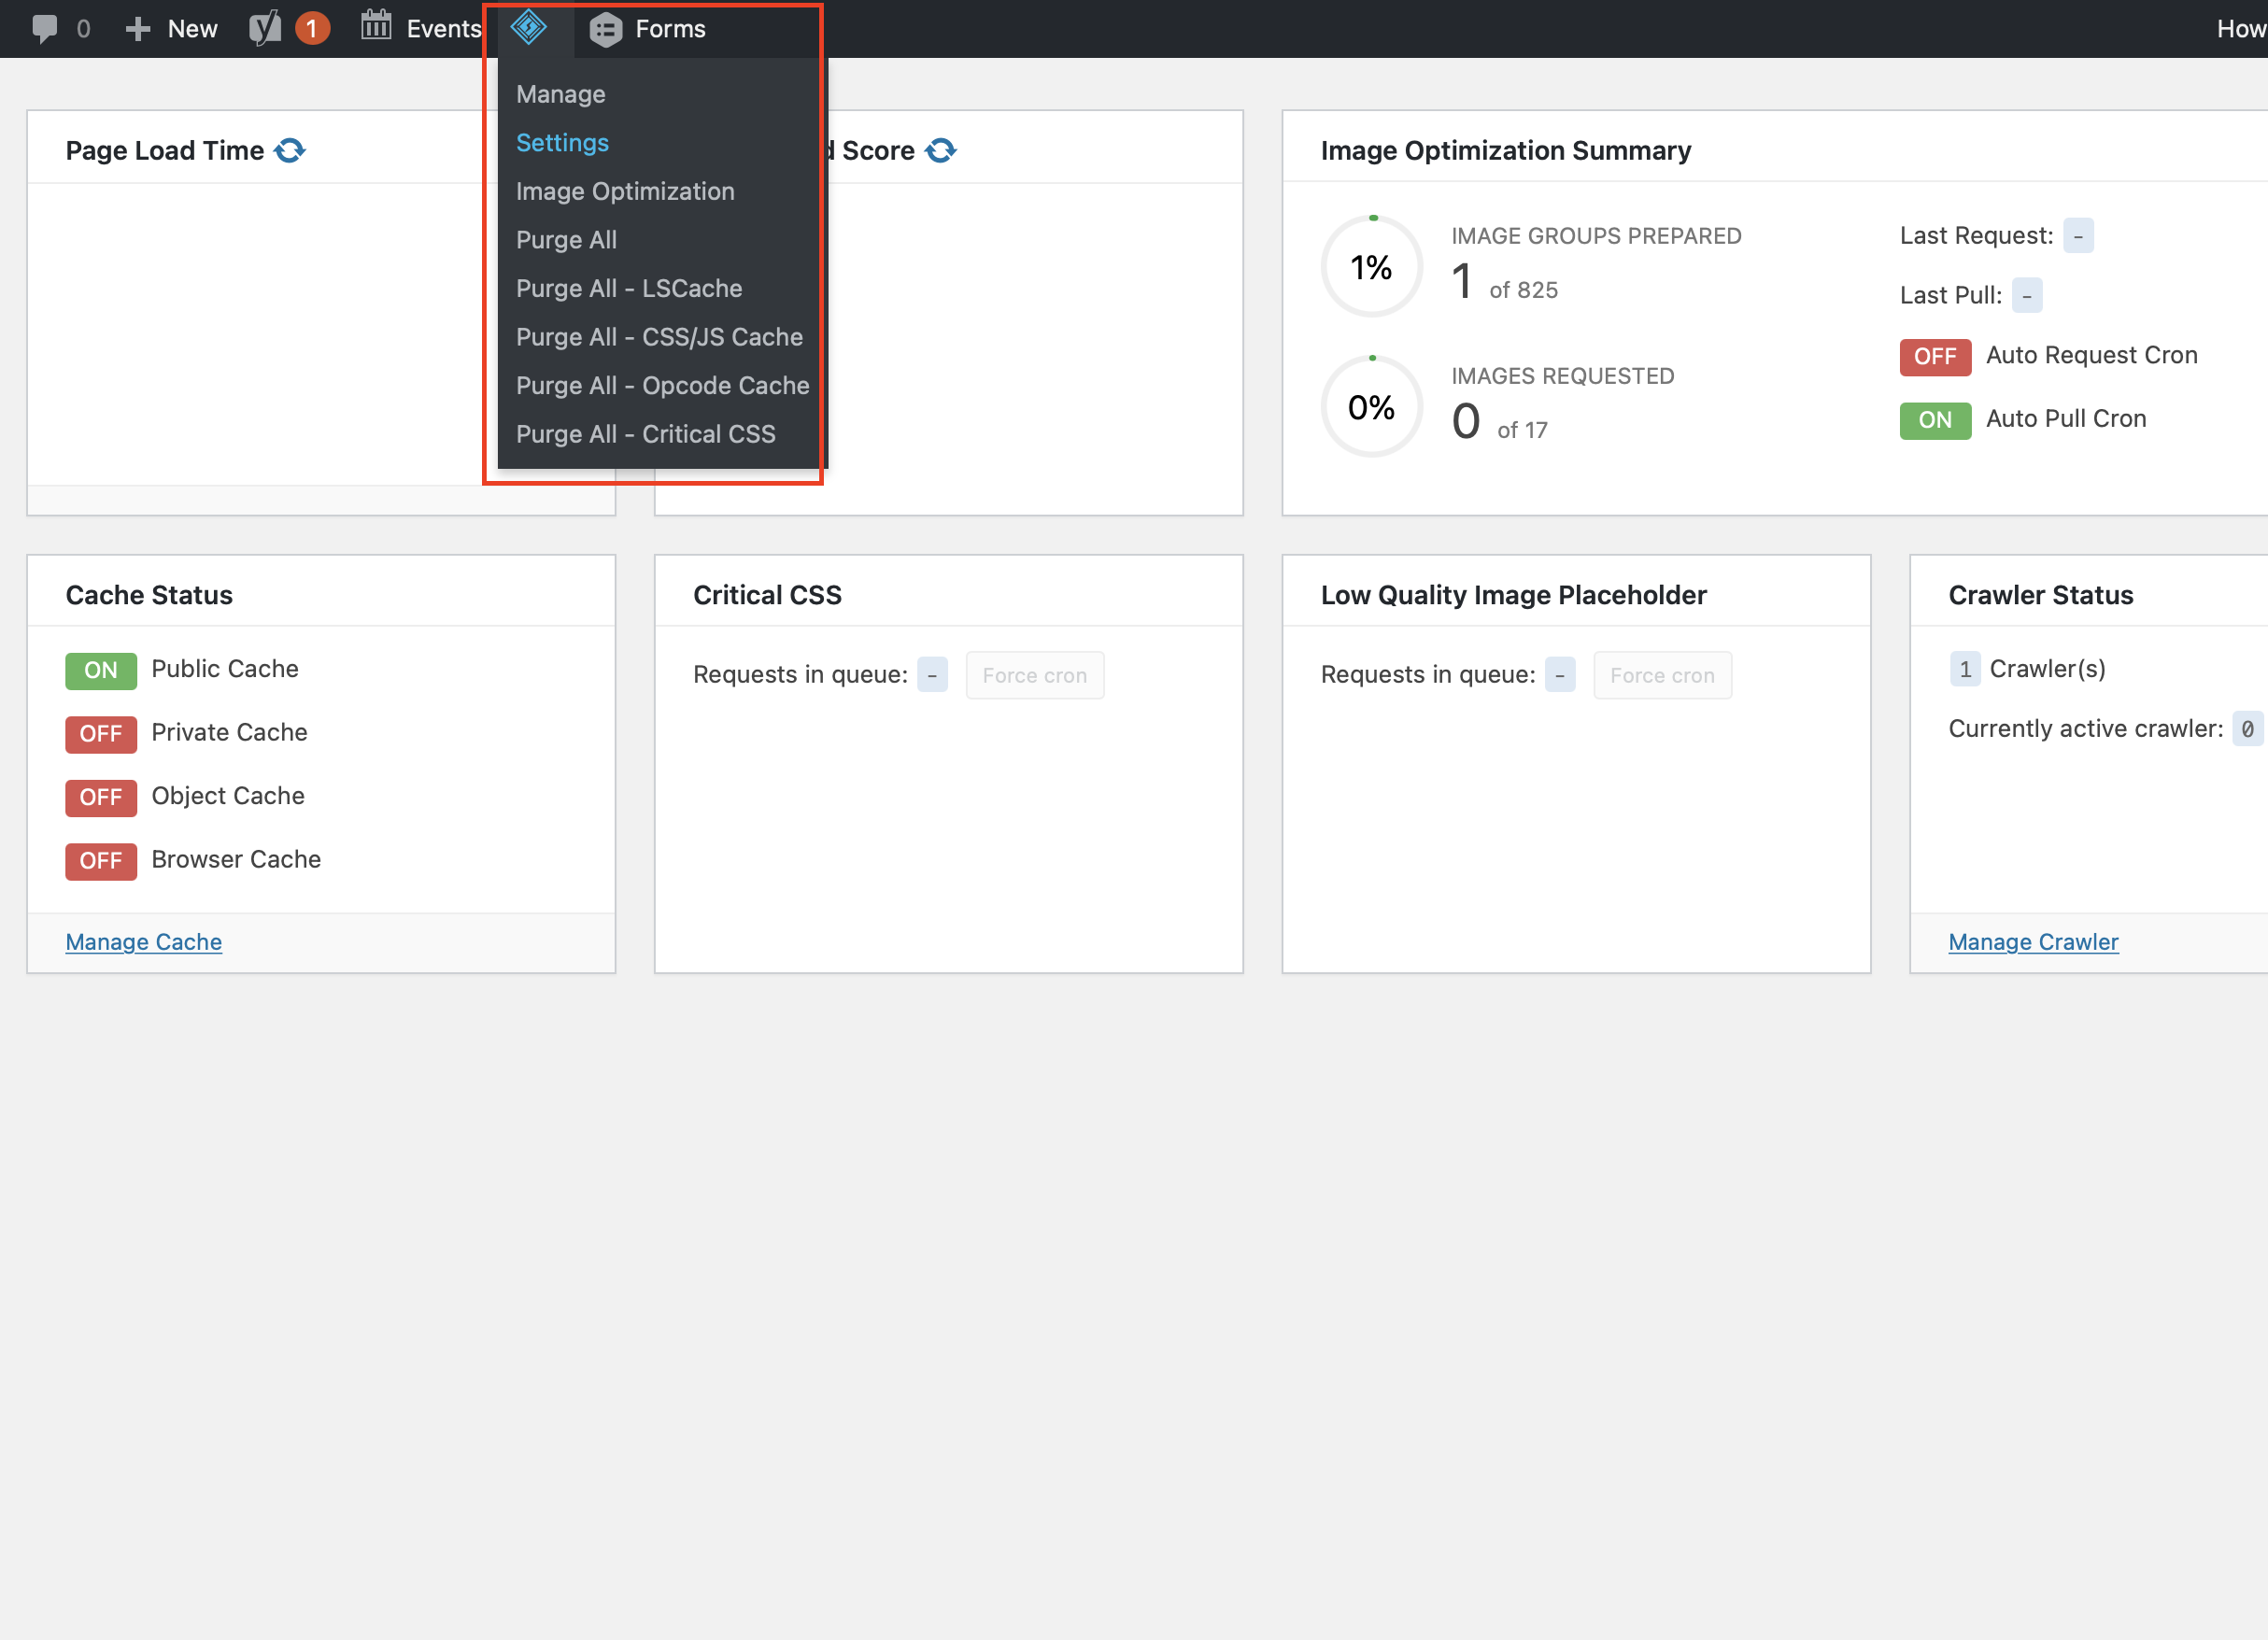
You can manage FixedNet cache by clicking on the Litespeed Cache tab from your Dashboard.
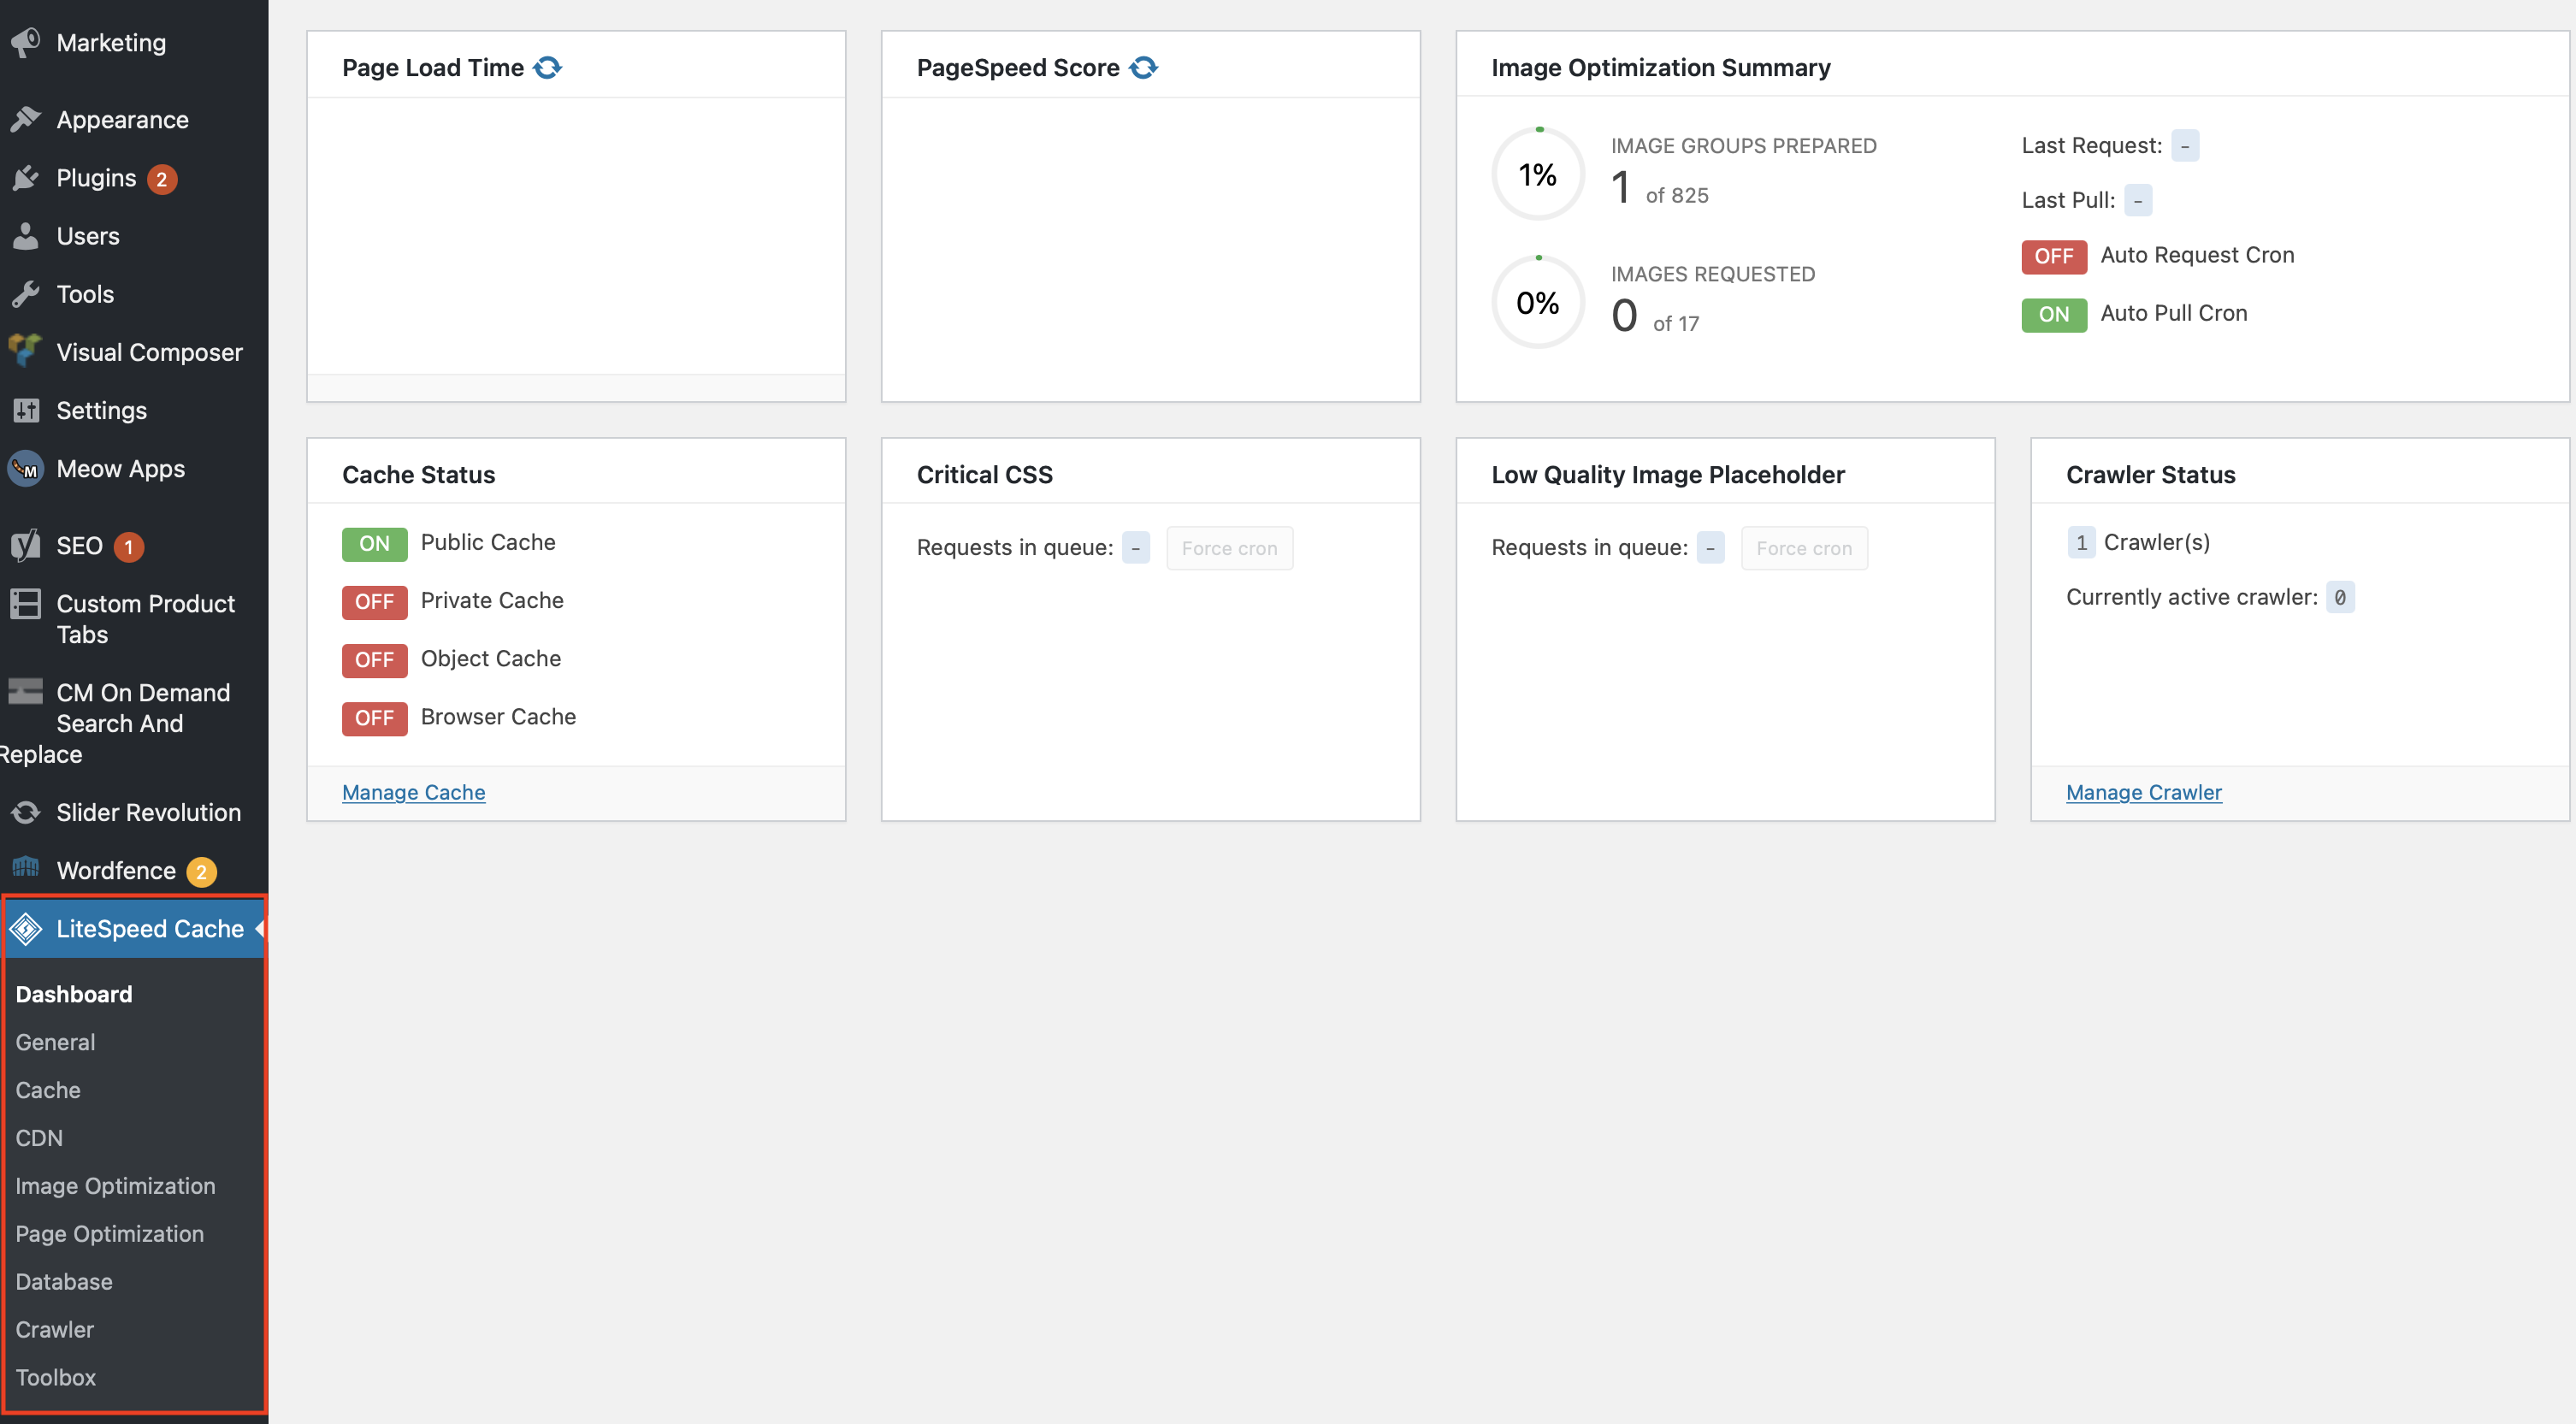
Now head over to the Settings tab and see the available options there.
We hope this article was informative and helpful in fixing this common issue. Share with us what you think, drop a comment bellow!

