By installing WordPress on your computer you have the chance to learn WordPress in details and test any new changes you wish to make. By moving a live WordPress website to your local server, this will enable you to experiment with the same data you use for your live website.
Today we will show you how to easily move your WordPress site to local server without issues.
Why would you need to move your site to local server?
If you have had a WordPress site for quite some time now, you might be willing to try some new plugins and themes. However, if you do this on a live website you might experience some technical issues.
In order to avoid this, a lot of users first create a copy of their website on the local server, so that they can test out new plugins, themes, audio development testing.
This will give you the opportunity to set up your theme along with all of the website content and test out the different features without any worries. A lot of users choose to copy the website to a local server in order to practice their WordPress and coding skills.
Even if you can test with dummy content on WordPress, if you are using real site data you will have a better visual representation of how these changes will appear on your website.
How to prepare?
The first thing you need to do is make sure that your website is backed up. There are a number of great backup plugins which you could use.
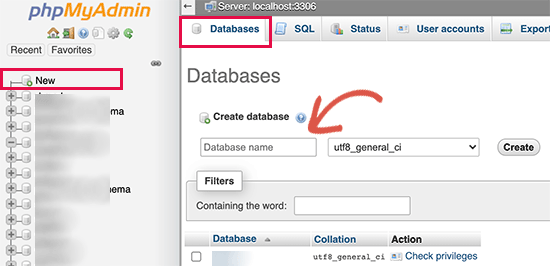
Secondly, make sure to create a local server environment on your computer. For Mac you can use MAMP, and for Windows you can use WAMP. Once the environment is set up, you need to create a new database with the help of phpMyAdmin.
All you need to do is follow these URLs:
http://localhost/phpmyadmin/
http://localhost:8080/phpmyadmin/
From here, go to Databases and create a new database. This will be useful later for your live site data.
You are all set up and can move your live website to your local server.
How to move your WordPress site to a local server by using a plugin?
This is the easiest method we recommend for all users.
You need to install and activate the Duplicator plugin. This tool will allow you to easily create a duplicate package of your whole website. You can use it to move your site to a new location, as well as a backup plugin.
After activating it, the plugin will add a new menu item in your WordPress dashboard. Click on it and you will be taken to the packages screen of the plugin.
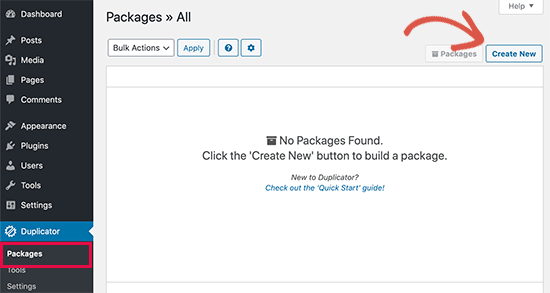
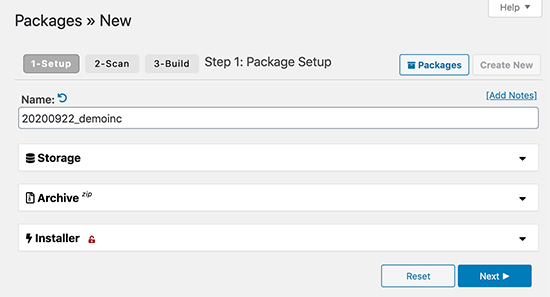
If you wish to create a new package, click on the create new package button. The plugin will start the package wizard, from where you need to click on the Next button.
Duplicator will now scan your website and do some background checks. You will then be shown a summary of those checks. If everything is in order, click on the Build button.
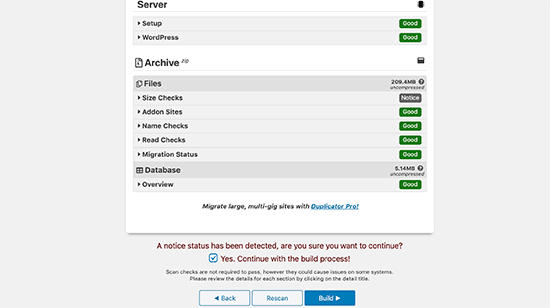
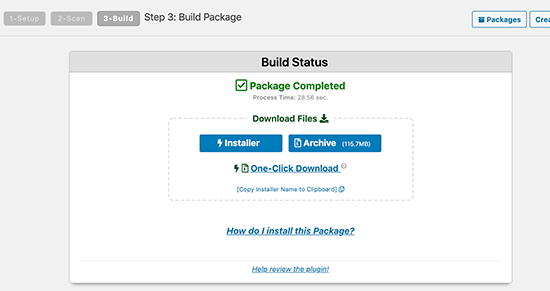
The plugin will now create your website package.
Once this is done, you’ll be able to see an archive zip file which contains all of your sites data and an installer file. Download these files to your computer.
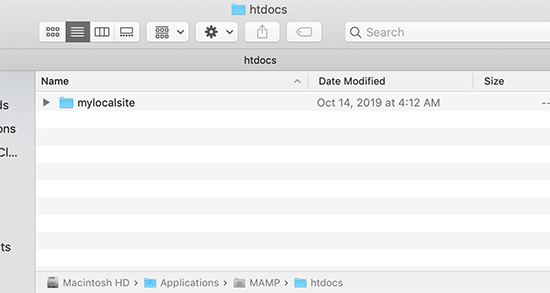
You can now unpack and install these files on your local server. Make sure to create a new folder in your local server’s root folder. This is where your local server stores all websites.
In this folder you can create new folders for each of your website you choose to import or create on your local server.
Once you are finished, open the folder you have just created and copy and paste the installer script and zip file you have downloaded earlier.
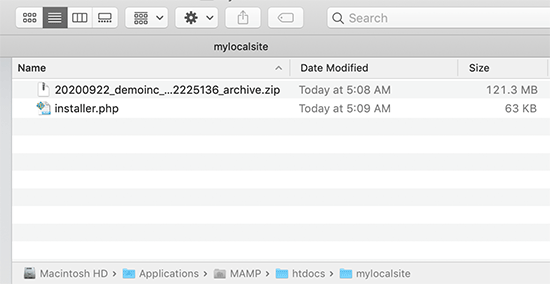
In order to run the installation, open the installer.php script in your browser.
You will now be able to see the Duplicator installation script.
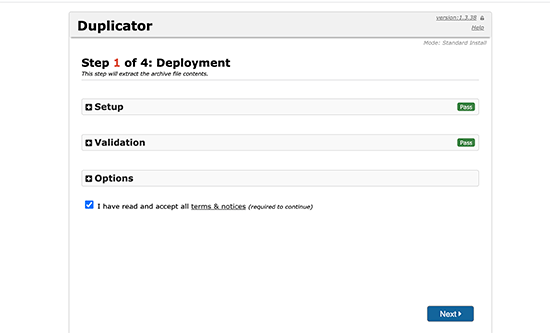
Click on Next.
The plugin will unpack the archive zip file and you will be asked to enter your local sites database information. This is the database which was created earlier.
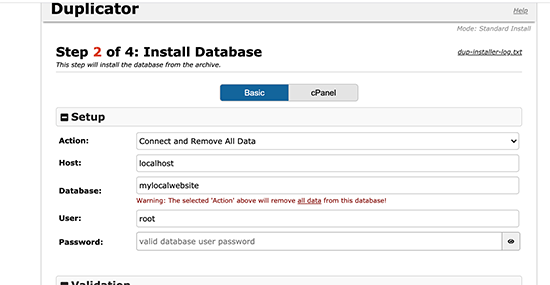
In most cases the server name is localhost, while username is root. Your local server installation will most likely not have a password, so leave that blank for now.
If you scroll down to the bottom of the page, you will see a Test database button which will help you check if all information is correct.
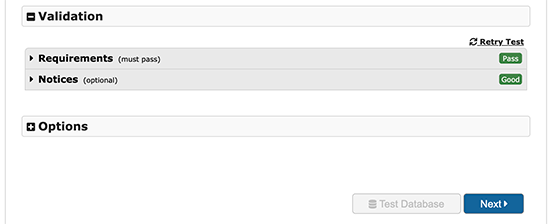
If everything looks good, click on Next.
The plugin will now import your website’s database. It will then ask you to double check the new website information which has been automatically detected.
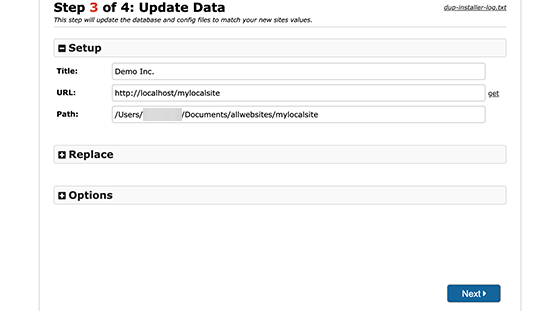
After you click on the Next button, the plugin will complete the set up and you will see a button to log into your local site. Use the same WordPress password and username which you use for your live website.
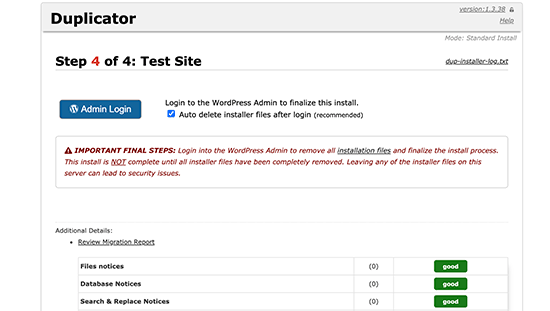
Your website has now been successfully moved to your local server.
How to manually move a WordPress site to local server?
In case you decide not to use a plugin, you can always do the move manually. You will need to first back up your website from your WordPress hosting account.
- Exporting your database
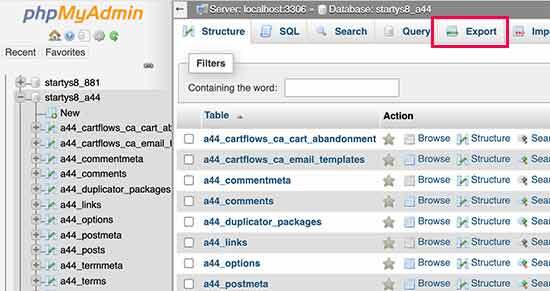
In order to export your website database, log into your cPanel dashboard and go to phpMyAdmin. Once you’re done, select the database you wish to export and click on the export tab located at the top.
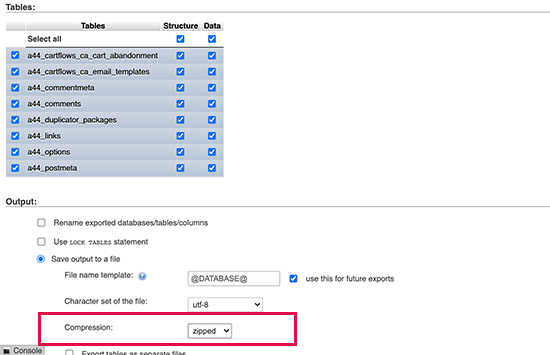
You will now be asked to choose either custom or quick export method. We recommend that you choose the custom method and zip as the compression method.
In some cases plugins can create their own tables inside your database. If you’re not using that plugin, the custom method will allow you to exclude those tables.
Leave the remaining options as they are and click on the Go button so that you can download your database in zip format.
- Downloading all of your WordPress files
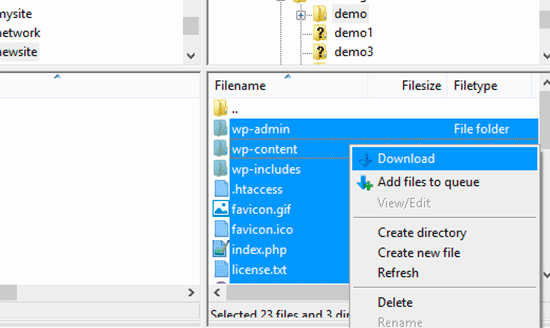
Next step is downloading your files. You need to connect to your website using an FTP client.
Once this is done, select your WordPress files and download them to your computer.
- Importing your WordPress files and database to local server
After you have downloaded your WordPress files, create a folder on your local server where you can import the local site.
If you are using WAMP you need to create a folder inside
C:\wamp\www\ folder
MAMP users would need to create a folder in
/Applications/MAMP/htdocs/ folder.
After this, copy and paste your files in the new folder.
Now you need to import your WordPress database. Open the phpMyAdmin and select the database. Click on import.

Click on Choose file to select and upload the database export file. After this click on the Go button. PhpMyAdmin will now unzip and import your database.
Now that this is done, update the URLs inside your WordPress database by referencing from your live website.
This could be done by running an SQL query in phpMyAdmin. Select your local site database and click on SQL.
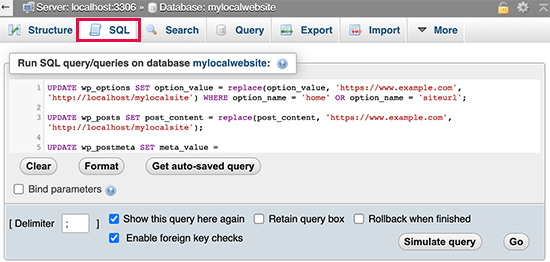
Copy and paste the code on your screen and make sure to replace example.com with your website URL and the http://localhost/mylocalsite with the local server URL of your website.

- Updating wp-config.php file
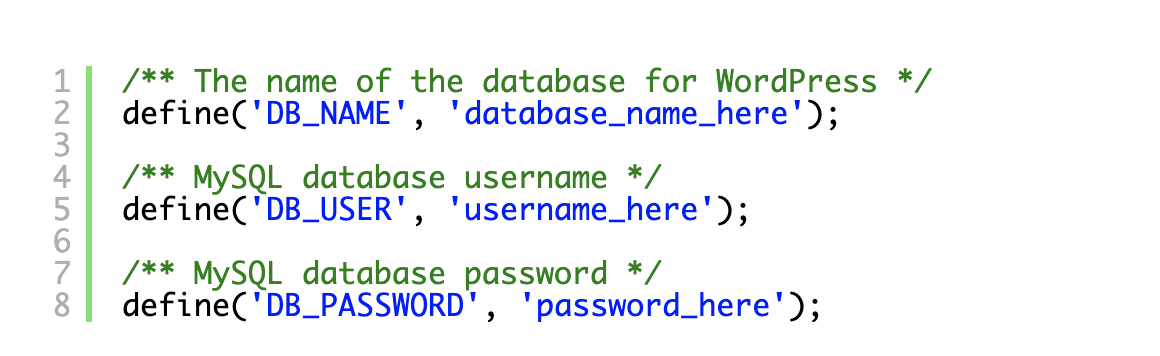
The final step you need to do is update your local sites wp-config.php file. The file contains WordPress settings as well as how to connect your WordPress database.
Go to the folder where you installed WordPress on your local server and open the wp-config.php file in a text editor.
Replace the database name with the name you created in phpMyAdmin.
Now, replace the database username with the local MySQL user root on your localhost, and enter the password.
Now, go to your local site in a browser window by using the following URL:
http://localhost/mylocalsite/
Replace my local site with the name of the folder where your WordPress files were copied.
And that’s it, your live WordPress site is now copied to your local server!