Introduction
Are you searching for ideas to customize your WooCommerce shop page? By looking closely, you’ll note that the default WooCommerce pre-built shop page is limited in customization options. Besides, you have little control over its design; hence, exploiting your store’s full potential can be a nightmare.
Your WooCommerce shop page is the placeholder responsible for displaying your products. Therefore, it means a lot to your business. Lack of a properly designed shop page may end up affecting your conversions.
If you’re looking for a better way to display your products, it’s high time you think of customizing your shop page.
So, are you ready to start learning?
In this post, we’ll take you through the entire process of customizing your WooCommerce shop and why it’s essential to do so.
However, before getting started with our tutorial, let’s explore what the WooCommerce shop page entails.
What is the WooCommerce Shop Page?
The WooCommerce shop page is the most crucial page of your WooCommerce shop since this is where all the products in your online store are displayed.
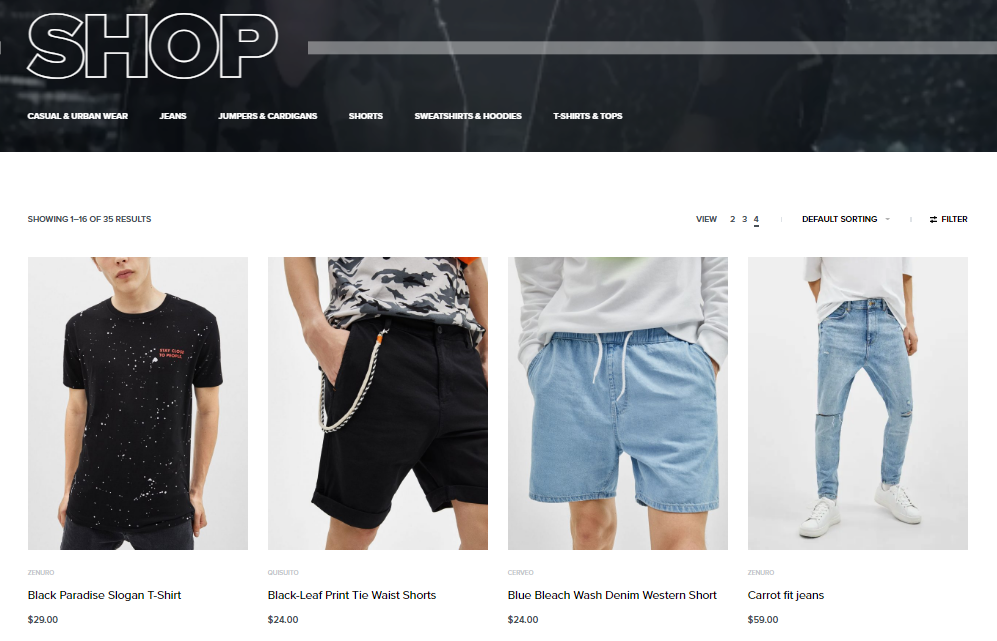
WooCommerce defines a shop page as ‘a placeholder for a post type archive for products’.
In WordPress, the WooCommerce plugin adds four pages to the dashboard, including the Cart page, the Checkout page, My account, and the Shop page. Just as the Blog page is an archive page for posts, the shop page is the archive page for products in WooCommerce.
When customers visit your website, they’ll first land on your shop page. For this reason, it’s essential to fine-tune your page for a better visual appearance.
Benefits of Customizing Your WooCommerce Shop Page
There are numerous advantages to personalizing a WooCommerce shop page. Below are some of them.
1. Improve user experience
Having well-displayed product categories on your shop page eases the process of finding products in your store for customers. Moreover, ensure to show all groupings of your products, including sub-categories. Also, ensure to add high-resolution images together with the relevant information. Customers will find it easier to navigate your store, increasing the user experience.
2. Increase the conversion rate
A nice-looking page with well-arranged products is likely to attract more customers. Besides, it’s possible to convince potential customers to buy from your shop. With a well-customized shop, you’ll easily express your brand better and provide an intuitive platform that will keep customers coming. Your chances of closing an order will increase, meaning more conversions.
3. Improve SEO rankings
Customizing a WooCommerce shop page involves more than just arranging your products and positioning your images. However, it involves overall page optimization. For instance, you can add more keyword-rich content, meta descriptions, and meta titles. This will help improve your websites’ SEO making your page rank on search engines
4. To stand out from your competitors
Having a one-of-a-kind layout for your shop page gives it a professional touch, making it look unique. This puts you at a better advantage over your competitors, who are likely to be confined to the default WooCommerce shop page layout. In addition, it makes it more appealing, and the more attractive your products look, the more customers are attracted to buy from you.
Using a Page Builder to Customize WooCommerce Shop Page
By organizing your products on the shop page, you can simplify the shopping experience for your customers. In this section, we’ll look at how you can apply the Elementor page builder for WooCommerce to customize your shop page.
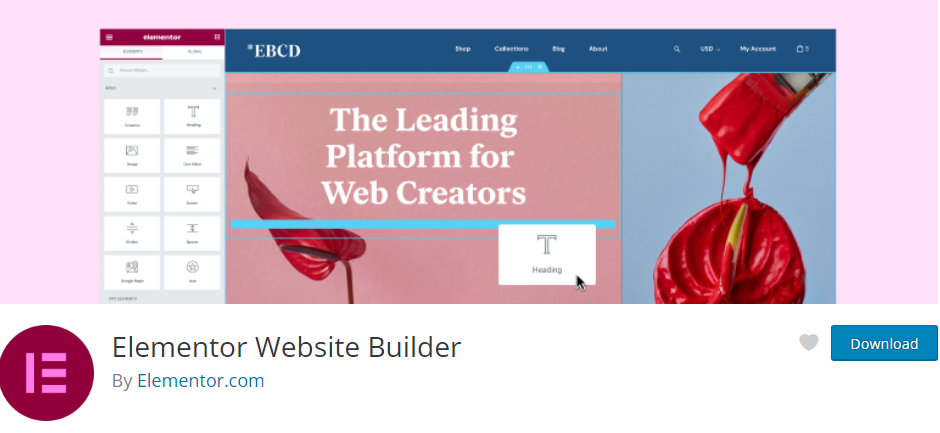
Step 1: Create a listing page with Elementor and fill it with content
Nothing beats Elementor when it comes to WooCommerce page customization. Elementor is a drag & drop WooCommerce page builder for WordPress. It is popular for its easy-to-use and highly customizable features.
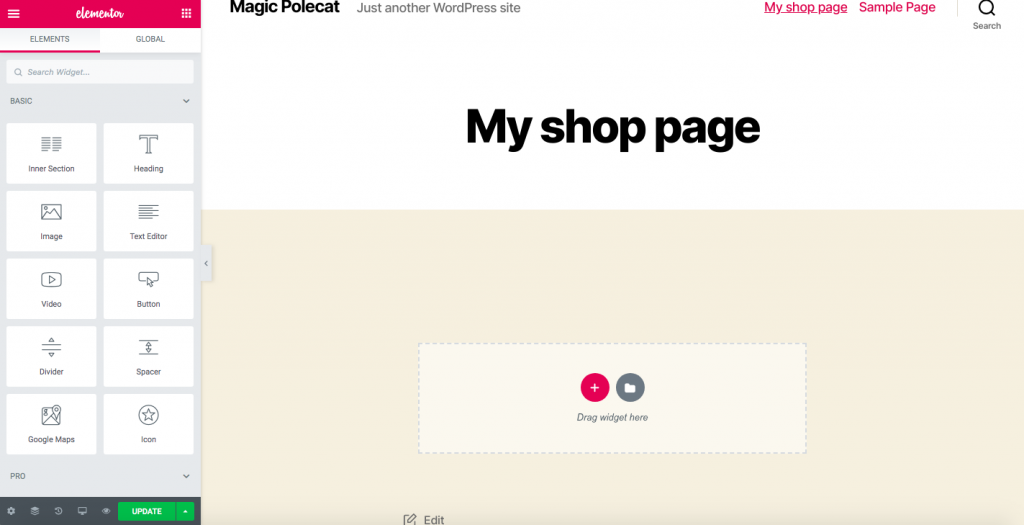
You’ll need to down Elementor, create a new page, and add content to it to get started. However, before creating a new page, ensure you have a visual idea of how you need your page to look like and the products you want to appear first on your shop page. For instance, you should opt for best-selling, latest products and featured products to appear first.
Next, we will use a simple shortcode to add content to your shop page. Below are some essential shortcodes that will be of help to us.
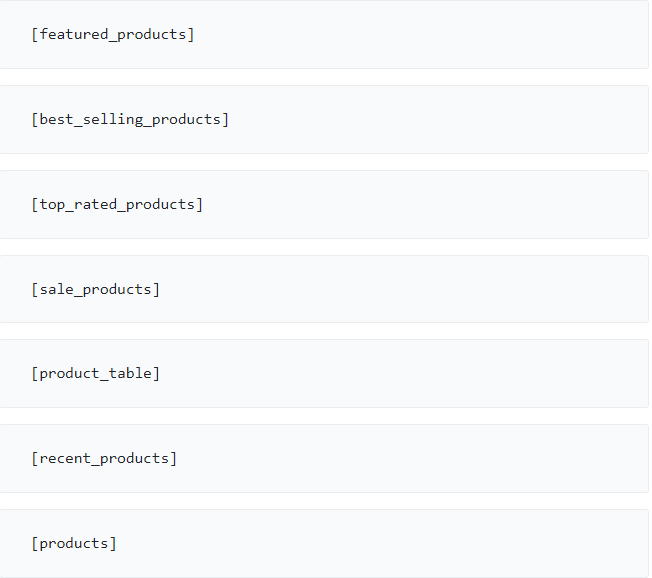
We’ll start by adding featured and best-selling products to our shop page. To add featured products, go to WooCommerce > Products on your WordPress admin dashboard and select the products by clicking the star icon on the right-hand side.
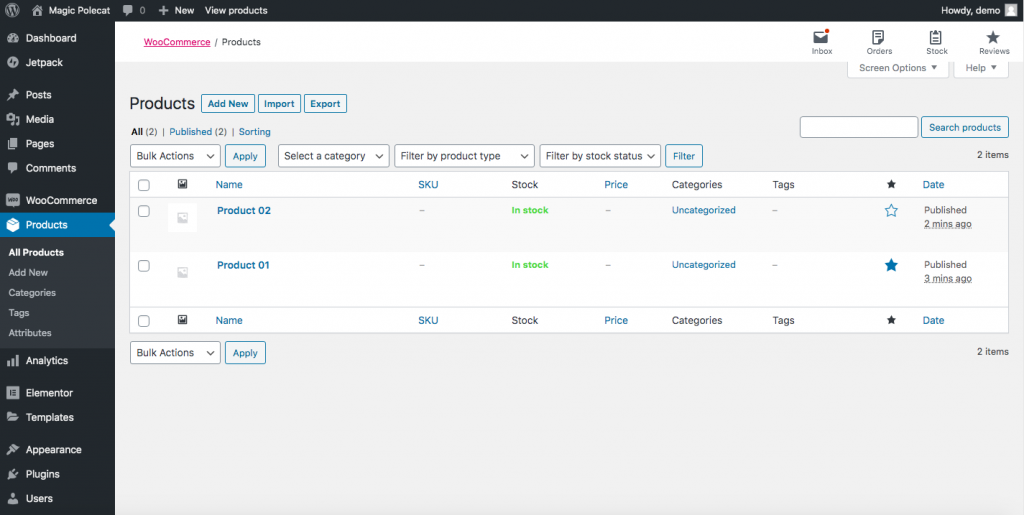
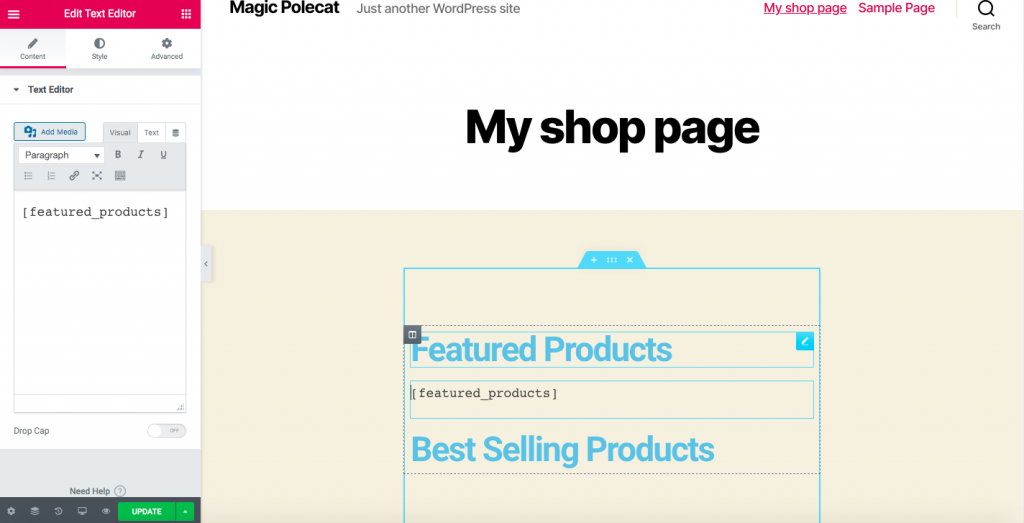
Next, navigate to Elementor, drag the text editor down below the featured products, and insert the shortcode [featured_products].
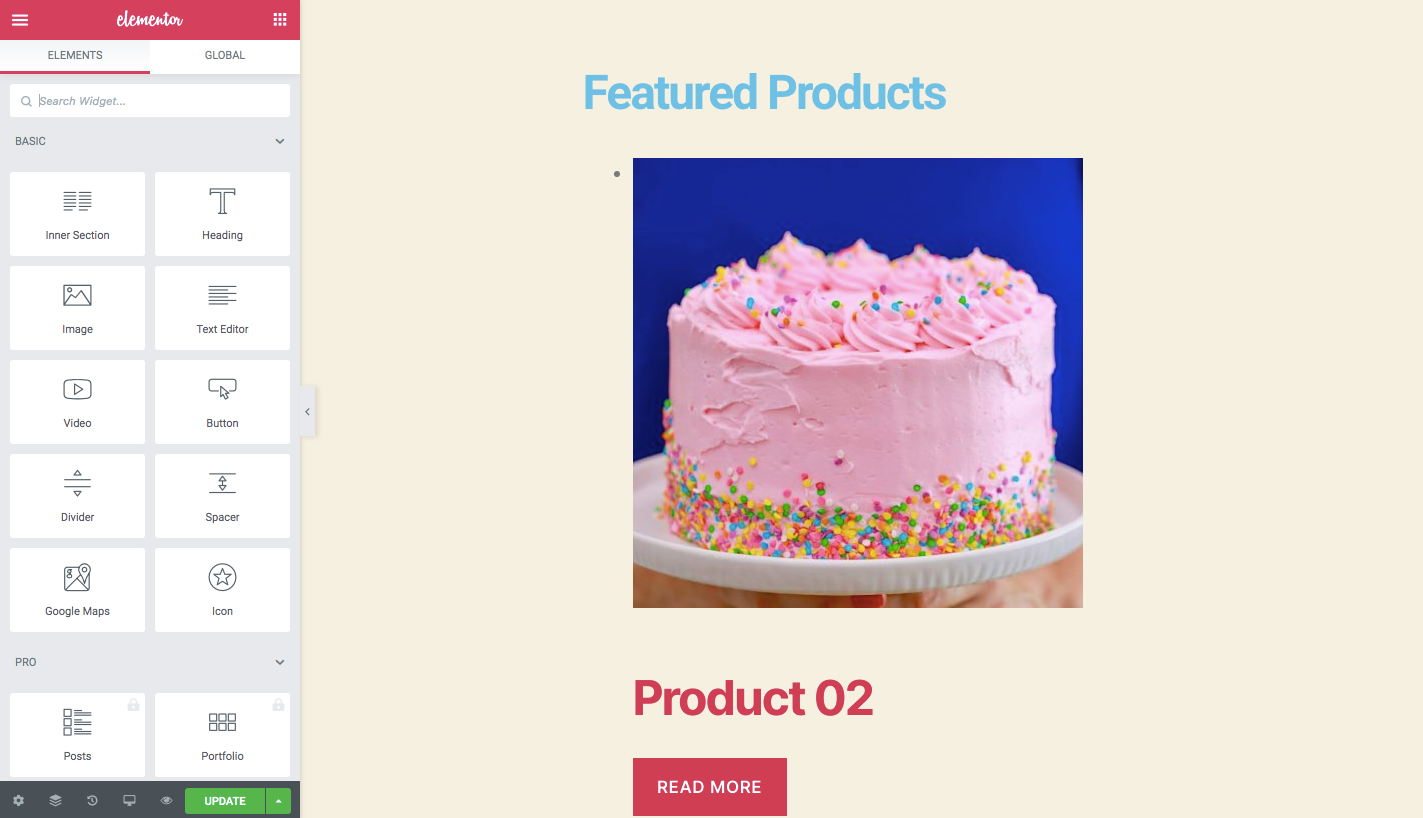
After that, click on ‘Update’, and your product will appear as shown below.
To add your best-selling and recently published products, use the shortcodes below respectively.

Besides, you can also set the number of columns to be displayed on your product page. For example, to display 2 columns of 6 products each, use the below shortcode:

Now, you can repeat this process and add as many product categories as you wish.
Step 2: Upload the page you just created as your WooCommerce shop page
Once you’re done creating the new page, you’ll need to make it your WooCommerce shop page. You must create a child theme of your current theme to do this. You can use plugins such as Generate Child Theme and Childify Me for this purpose.
A child theme overrides and adds elements to a parent theme, helping you generate a separate theme file and retain modifications in your parent’s themes files.
Once you’ve installed the child theme, copy the URL of your shop page, and on your WordPress dashboard, navigate to WooCommerce > Appearance > Theme Editor.
When a pop-up appears, click on the option ‘I Understand’. You’ll be redirected to a page where you can access the Theme Function files.
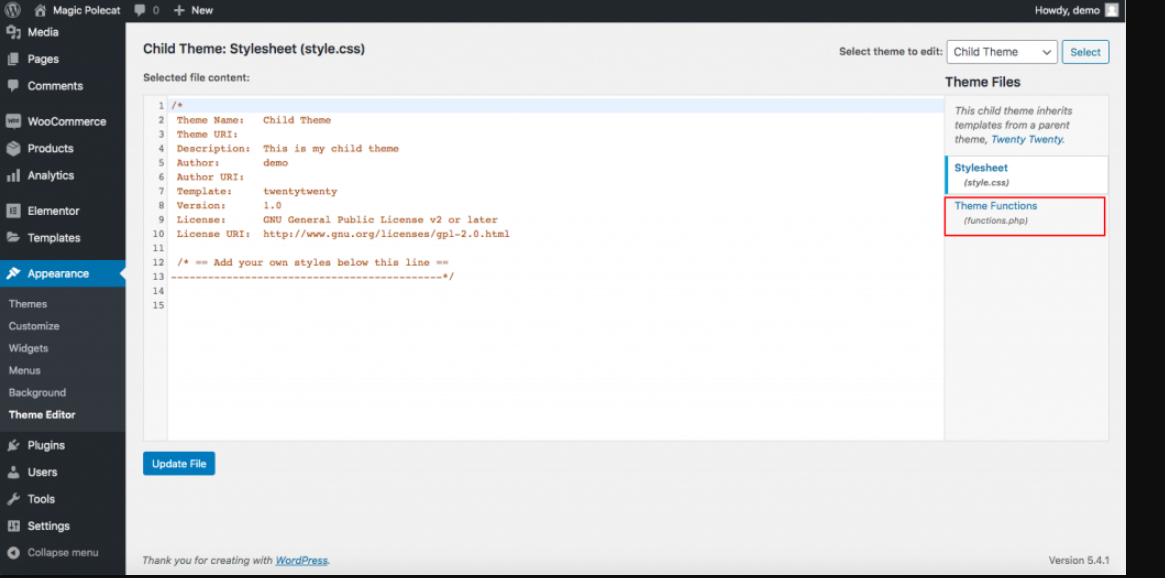
Click on the functions.php file, paste the code on the Stylesheet where the PHP file ends.
Note, you should copy the code as it is. Also, remember to add your URL within the wp_redirect (‘[yourURL]’).

Finally, click on the “Update File” button, and voila! You have just finished customizing your WooCommerce shop page.

Ending Thoughts
The WooCommerce shop page is the most integral part of your store. After all, this is where most of your customers spend their time.
For this reason, it’s essential to re-design your shop page for a more intuitive and user-friendly layout for a better customer experience.
In the past, customizing the WooCommerce shop page involved dozens of lines of code and complex processes.
However, with the Elementor WooCommerce Page Builder, you can have total customization control over the layout of your shop page. It’s as simple as creating a listing page, filling it with content, and setting your customized page as your shop page.
By doing so, you get to stand out amongst your competitors, boost your SEO, and increase your sales.
Sounds great! Right? Customize your shop page today!
Meanwhile, thanks so much for spending time on our post. Don’t forget to share your thoughts in the comments section below. Our team will be glad to hear from you!
Is it necessary to customize my WooCommerce Shop page?
Yes. The default shop page is traditionally pre-designed. Since WooCommerce doesn’t have a built-in resource to tweak the appearance of the shop page, you might end up with a layout that is not attractive in front of your customers. You can consider using page builders or even plugins for your customization.
How do I benefit from customizing my WooCommerce shop page as a shop owner?
Customizing the layout of your default WooCommerce shop page will give you more control over the design of your store. Besides, customizing your page will not only help you represent your brand but also display your products according to your liking.
Why choose Elementor for your WooCommerce store?
Optimize your store with the intuitive drag & drop WooCommerce page builder. No coding is required, and there’s no limit to what you can do when it comes to customizations!
Is Elementor free?
Elementor is more than just a WordPress page builder plugin. Its capabilities extend to a website builder. The plugin is freemium - with a free and premium version. The free version offers limitless design possibilities, while the pro-version has more advanced tools to speed up your workflows.

