In one of our latest posts we explained in detail the GTmetrix scores and how to understand your data better. This tool summarizes your page performance based on certain key indicators of the page’s load speed.
You can analyze your page with Yahoo YSlow and Google PageSpeed, get your Page Load Time, Total Requests and Total Page size as well as track your page’s performance. All of this combined in one very useful tool.
Now we are going to continue our topic and analyze further how to optimize your page speed with the help of GTmetrix.
Enable compression
What exactly is compression? When a visitor goes to your website a call is made to your server so that it can deliver the requested files.
The bigger the files, the longer it takes for them to transfer to your browser and appear on the screen.
Gzip significantly compresses your pages and style sheets before they are sent to your browser which in turn reduces the transfer time as the files are much smaller.
Compression should be a priority for your page speed optimization if it’s not already set up.
How it works?
Gzip is a very simple idea which you can put up to good use. It locates similar strings in a text file and replaces them temporary which makes the file smaller.
The reason it works so well is that HTML and CSS files have plenty of white space and repeated text. With the help of Gzip the size of the pages and style sheets can be reduced by up to 70%!
If you have an Apache server, simply add the following lines to your .htaccess file:
<IfModule mod_deflate.c><p></p># Compress HTML, CSS, JavaScript, Text, XML and fontsAddOutputFilterByType DEFLATE application/javascriptAddOutputFilterByType DEFLATE application/vnd.ms-fontobjectAddOutputFilterByType DEFLATE application/x-fontAddOutputFilterByType DEFLATE application/x-font-opentypeAddOutputFilterByType DEFLATE application/x-font-otfAddOutputFilterByType DEFLATE application/x-font-truetypeAddOutputFilterByType DEFLATE application/x-font-ttfAddOutputFilterByType DEFLATE application/x-javascriptAddOutputFilterByType DEFLATE application/xhtml+xmlAddOutputFilterByType DEFLATE application/xmlAddOutputFilterByType DEFLATE font/opentypeAddOutputFilterByType DEFLATE font/otfAddOutputFilterByType DEFLATE font/ttfAddOutputFilterByType DEFLATE image/svg+xml<AddOutputFilterByType DEFLATE image/x-iconAddOutputFilterByType DEFLATE text/cssAddOutputFilterByType DEFLATE text/htmlAddOutputFilterByType DEFLATE text/javascriptAddOutputFilterByType DEFLATE text/plainAddOutputFilterByType DEFLATE text/xml# Remove browser bugs (only needed for really old browsers)BrowserMatch ^Mozilla/4 gzip-only-text/htmlBrowserMatch ^Mozilla/4\.0[678] no-gzipBrowserMatch \bMSIE !no-gzip !gzip-only-text/htmlHeader append Vary User-Agent</IfModule>
For IIS servers, you are provided with the following compression options:
- Static files
- Dynamic application responses
- Both static files and dynamic application responses
Minify CSS & JS & HTML
Try to minimize unused space in your code as even blank spaces have size in bytes. This can be done through a plugin like WP Super Cache or W3 Total Cache.
WP Super Cache
Always the top choice among best recommended plugins, WP Super Cache is ideal if you are looking for functionality and simplicity. It creates static pages for your website, which can reduce the page serving time and performs a fewer number of PHP calls. If you do not cache your page, load times increases. For the smooth running of your website it’s essential to have a caching mechanism.
The WP Super Cache plugin helps you with optimizing your database by generating static HTML files, used in serving the request. This way instead of processing all PHP scripts, static pages will be served when a page is requested from your site.
If you are on a shared hosting where there are a lot of limitations, the best thing you could do is optimize your WordPress site before page errors start to show up or your server crashes.
Installation
Fortunately, WP Super Cache is a very user friendly and easy to install plugin. First thing you need to do is install it from the WP dashboard, and switch on the cache by going to Settings – WP Super Cache.
For beginners the best features are:
Easy – Cache On – Update Status
Click on Update Options.
If you come up with an error like difference in mod_rewriteor .thaccess rule go to Advanced tab – Mod Rewrites rule and choose Update mod_Rewrite rules.
When the setup is done, time for a test run. Go to Easy – Cache Tester. If everything runs smoothly, you setup is done.
Advanced Options:
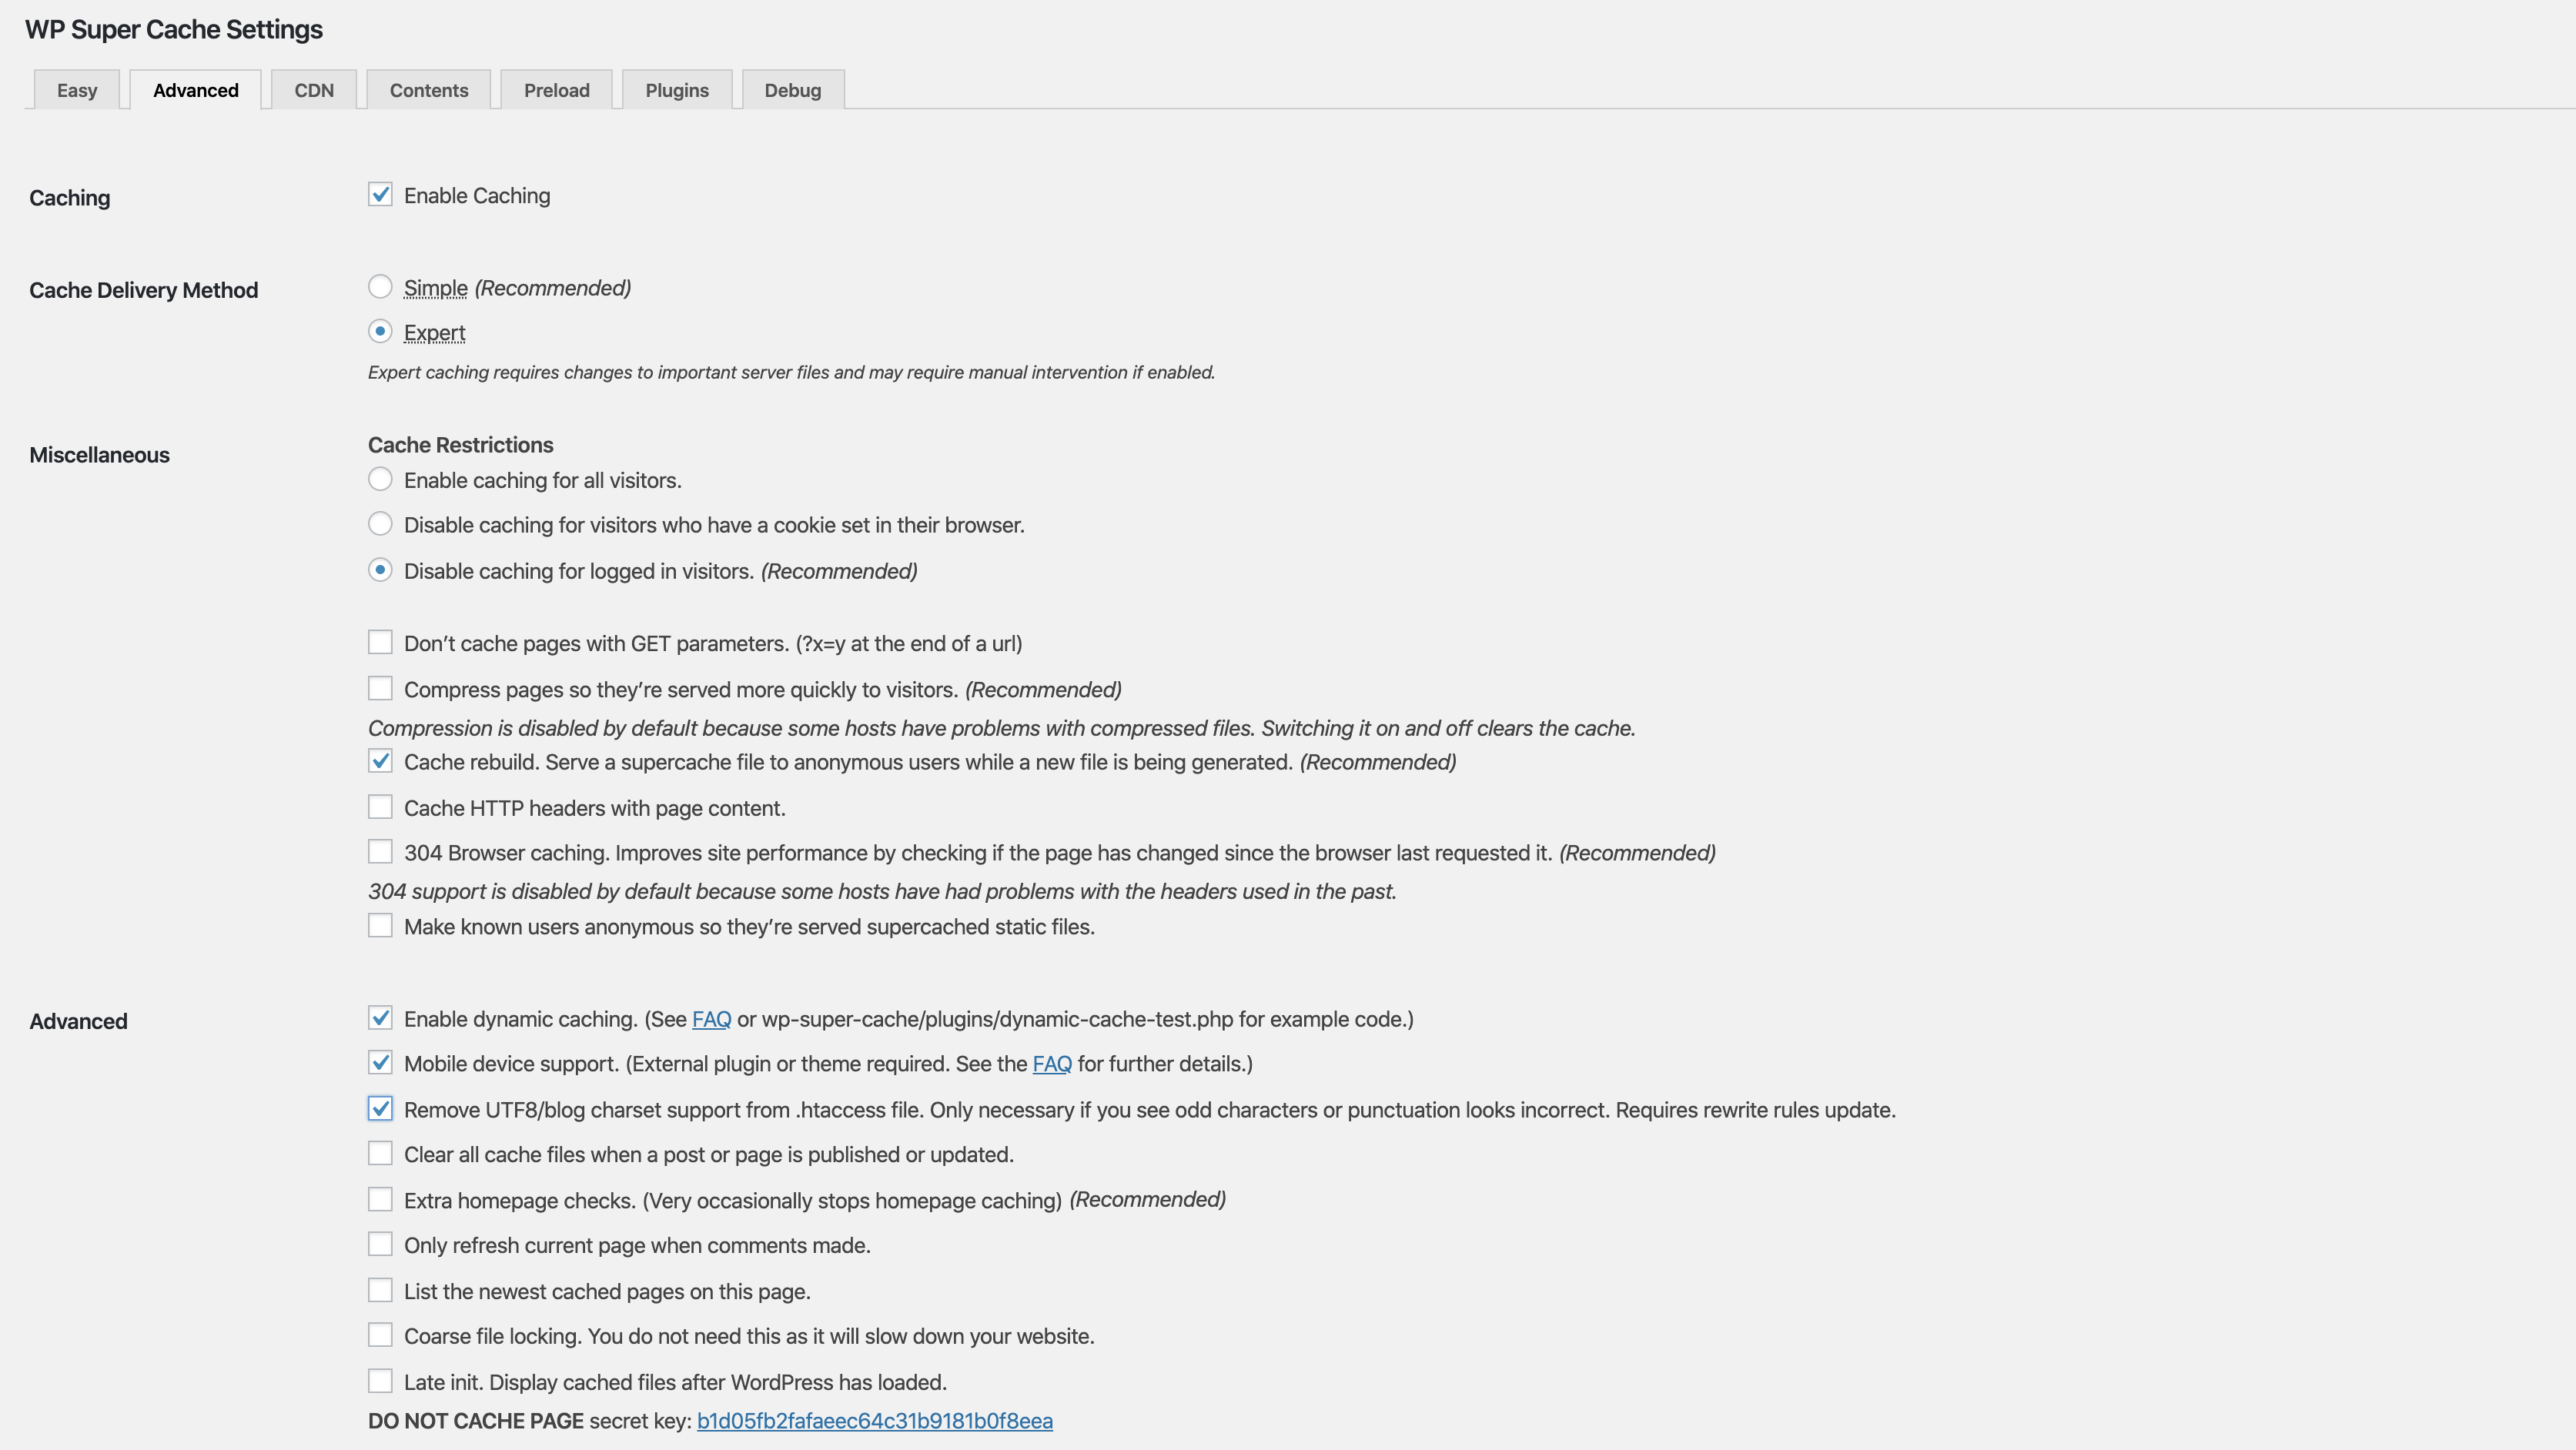
- Disable caching for logged in visitors (Recommended)
- Cache rebuild. Serve a supercache file to anonymous users while a new file is being generated (Recommended)
- Enable dynamic cashing. (Recommended)
- Mobile device support.
- Remove UTF8/blog charset support from .htaccess file. Only necessary if you see odd character or punctuation looks incorrect. Requires rewrite rules update.
Click on Update Options.
If you come up with an error like difference in mod_rewriteor .thaccess rule go to Advanced tab – Mod Rewrites rule and choose Update mod_Rewrite rules.
When the setup is done, time for a test run. Go to Easy – Cache Tester. If everything runs smoothly, you setup is done.
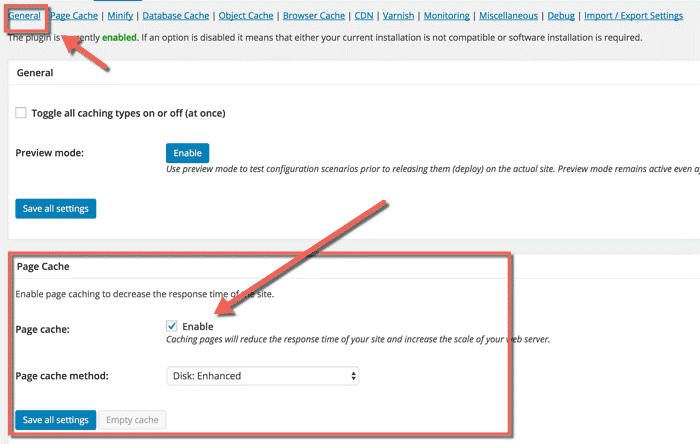
Go to Page Cache

All the essential settings should be checked by default. Review them just in case and move to the next setting.
Minify

All setting in Minify should be done by default.
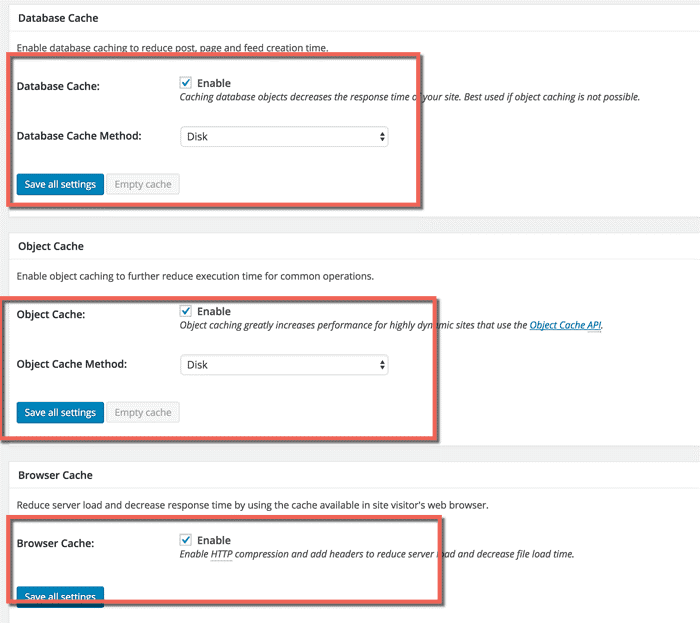
Database Cache

Browser Cache

Extensions

And all done!
Optimizing images
The images you choose can take up as much as 60% of the weight of your page. Therefore, you need to optimize their size and avoid a slow website.
Two great plugins for this are Smush or Robin Optimiser.
WP Smush
A quite popular image compression plugin for WordPress, it compressed images automatically upon upload. You can even compress older image files. Changes can be made when setting up the maximum file resolution, which will make images to more reasonable sizes when compressed.
In the free version it allows you to optimize up to 50 images at a time.

Robin Optimiser
A free plugin, which helps you optimize and compress images up to 80%. This is possible due to the removing EXIF-data and selective decreasing of colors. However, the image quality remains pretty much the same despite the economy in the image size.
Leverage browser caching
Browser caching - every time the browser loads a page it needs to download all the files to properly display the webpage.
Some pages might be consistent only of a few small files. Others however have a lot of files and can be up to several megabytes.
The larger the file, the longer it takes to load and can be especially annoying if your internet is slow.
Each file makes a request to the server and the more requests it gets the more work it needs to do. This in turn only further reduces the speed.
Browser caching can be very helpful by storing some of the files in the user’s browser. The first time they visit your website it may take some time to load, however when they revisit, they will already have of the files stored in their browser. This means the data which needs to be downloaded is less and a lot fewer requests need to be made to the server.
In order to enable browser caching you need to edit the HTTP heathers to set expiry times for certain types of files.
Configuring Apache
Locate the .htaccess file in the root of the domain. It’s hidden but it should show up in the FTP clients such as FilleZilla and CORE. Edit the .htaccess file with any text editor program.
Here we will set caching parameters which tell the browser the types of files to cache.
<IfModule mod_expires.c>ExpiresActive On# ImagesExpiresByType image/jpeg "access plus 1 year"ExpiresByType image/gif "access plus 1 year"ExpiresByType image/png "access plus 1 year"ExpiresByType image/webp "access plus 1 year"ExpiresByType image/svg+xml "access plus 1 year"ExpiresByType image/x-icon "access plus 1 year"# VideoExpiresByType video/mp4 "access plus 1 year"ExpiresByType video/mpeg "access plus 1 year"# CSS, JavaScriptExpiresByType text/css "access plus 1 month"ExpiresByType text/javascript "access plus 1 month"ExpiresByType application/javascript "access plus 1 month"# OthersExpiresByType application/pdf "access plus 1 month"ExpiresByType application/x-shockwave-flash "access plus 1 month"</IfModule>
Depending on the files, different expiry times can be set up. If some files are updated frequently, you can set up an earlier expiry time.
Conclusion
Make sure you are careful when enabling browser caching, as if the setup parameters are too long on certain files, visitors may not receive the most updated version of your website.
We hope this post was useful and we would be glad if you shared with us how the mentioned steps worked out for your website.