Building a WordPress website does not have to be a herculean task. You do not need a separate WordPress website builder plugin and a separate WordPress theme to create a stunning and highly optimized site. All you need is an all-inclusive WordPress tool that comes with the themes and website builder you need to create your website. One of the most popular tools you can consider is Divi. In this post, we will take you through the step-by-step process of building a website with Divi. Let us get right into the details.
What is Divi?
First thing first, let us establish a background for this tool. Divi is one of the most popular website builders in the market. It enables users to simply use a drag & drop mechanism to build a website. It is interesting to note that more than 2.5 million sites have been created using Divi.
It is undoubtedly a very popular theme. The Divi theme builder is all-inclusive and with just a single Divi Theme license, you can create unlimited website designs. Divi comes with over forty modules that you can use to create your website.
It is a premium tool with two different packages – an annual license and a lifetime access license. Both plans allow you to build unlimited websites with only one license.
You can explore the over 157 pre-built templates available in the Divi theme package to create your website. The best part is that the tool is compatible with other theme plugins on WordPress. That means if you want to use the Divi Builder with a third-party plugin, you can.
How to Create a WordPress Website using the Divi Theme
Now that we have a background understanding of what the Divi tool is all about, the next thing is to see how to create a WordPress website using the Divi Theme. You can create a site with the Divi Theme in three steps. These steps are highlighted below:
• Launch your WordPress site.
• Install and set up the Divi Theme on your WordPress site.
• Build your site with the Divi Theme.
We will look at each step in detail in this post. So, get ready to build your website with one of the best tools on the market!
Launch your WordPress site
Before creating a custom WordPress site with the Divi theme, the first thing is to launch the WordPress site. To do this, follow the steps below:
Step 1: Get the hosting for your website. Irrespective of the type of website you want to build, you must first get a domain name and hosting. There are dozens of exceptional hosting companies that you can explore for your hosting. We offer hosting as part of our WordPress maintenance services.
Step 2: Get a domain name for your site. Most hosting companies offer Domain names as a part of the hosting package. If you already purchased a domain name, you can transfer it to the hosting platform that you want to use. Each hosting platform has its setup process but it is often easy and simple to follow.
Follow the prompts on the hosting site to complete your transaction for the purchase of your hosting and domain name. Most hosting platforms have WordPress automatically installed while some others offer a one-click installation for WordPress.
It is pretty easy to complete this process without any glitches. When you are done setting up your domain name and hosting, and installing WordPress, your website goes live and when you check your domain name in the browser, you will have something like this:

Configure the Divi Theme on your WordPress site
Now that your website is live and you have a blank slate to build your custom website, the next step is to download and activate the Divi theme on your new site. To do this, follow the steps below:
Step 1: Purchase the Divi Theme. Purchasing the Divi Theme gives you access to different other products, including Monarch and other popular plugins and themes. To do this, follow the steps below:
• Visit the Elegant Themes website and click on “Pricing”. This will open the two packages of Elegant Themes available. You can select either of the two options based on your requirements and budget. Click on the “Sign up Today” button of your preferred option.

• This will take you to another page where you have to fill up your details and a Username and a password. Next, click on “Complete Registration”.
• You will be redirected to the payment section where you have to enter your card details to complete your transaction. Click the “Pay $89” button to complete your payment. If you choose the other package, the amount will reflect instead of $89.
• After the successful payment, the next step is to download the Divi Theme. Click on “Log in to Download All Our Available Products”.
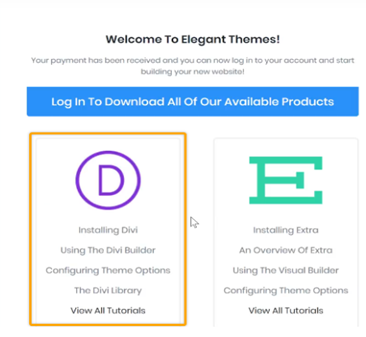
• Provide your login details and click on the “Log in” button.
• Click on the “Download the Divi Theme” button. This will download a zip folder of the Divi theme on your computer system.
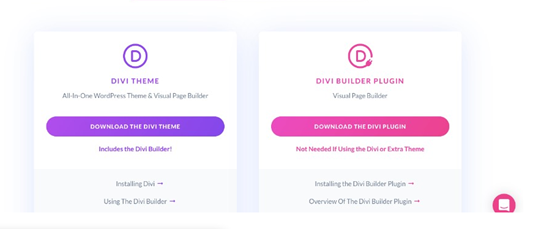
Step 2: Install the Divi Theme on your WordPress site. To do this, navigate to your WordPress dashboard and follow the steps below:
• Click on “Appearance” and then “Themes”
• Click on “Add New” and then “Upload Theme”
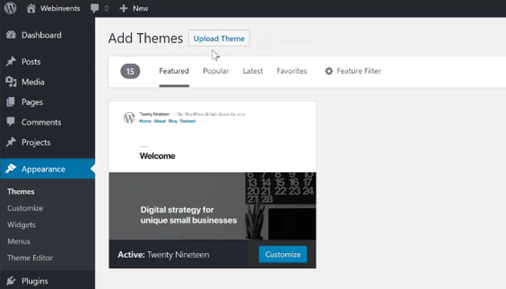
• Click on “Choose File” and select the downloaded zip file from your system. Next, click on “Install Now”.
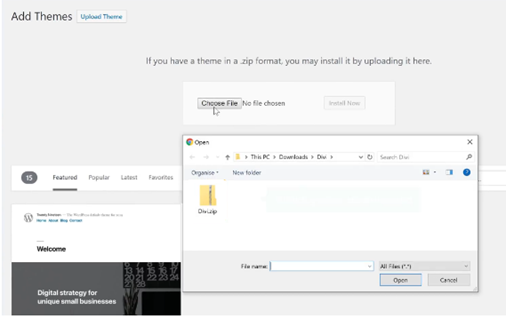
Step 3: Activate the Divi Theme
• Navigate to the left-side menu of your WordPress dashboard and select Divi. Next, select “Updates” in the Divi Theme Options.
• Enter your Username and the API key. To find the API key, go to “My Account” and locate the section labeled “API keys”. Copy the API key and proceed to past it in the API key box and then click on “Save Changes”. This will activate the Divi Theme on your WordPress site.

Build your Site with Divi Theme
With the Divi theme, you can explore different features to create your perfect website. Follow the easy steps below to build your website with Divi Theme:
Step 1: Create the homepage with the existing layouts. Your homepage is the first place your visitors will land when they access your website. Therefore, it has to be as appealing as possible. Follow the steps below to create an attractive homepage:
• Click on the “+New” menu at the top of the site and choose “Page”

• Add the title of the page (Home) and click on “Use Diva Builder”.
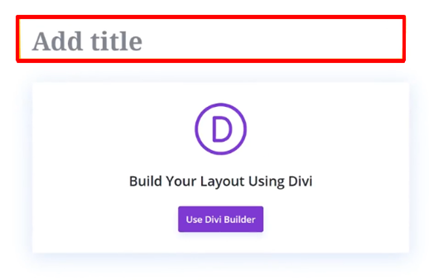
• You have three options to choose from on the next page. They are “Build a Page from Scratch”, “Choose a Premade Layout”, and “Clone another existing page”. In this guide, we will look at how to build a page from scratch and how to use a premade layout.
How to use a Premade Layout to Build a Homepage
• Navigate to the “Choose a Premade Layout” section and click on “Browse Layouts”

• Select your preferred layout and click on “Use this Layout”. You can click on different layouts and preview them to see how they will look on your site.
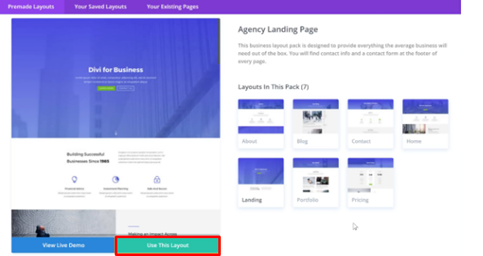
• To change and customize the text in the layout, select the text by double-clicking on it and entering the text you want to use. You can change all texts on the page by selecting and replacing them with your text.
• To change images on the site, double-click on the image that you want to replace and click on the image. Next, drag and drop your preferred image from your system to replace the image.
• When you are done with the changes, click on the “Publish” button and then “Exit Visual Builder” at the upper part of the site.
• You can create other pages on the site following this process
How to Build a Homepage from Scratch
• Click on “+New” and then “Page”.
• Enter the title of the page and click “Use Divi Builder”.
• Select “Build from Scratch” and then “Start Building”.
• To begin, click on the “+” icon at the middle of the page and this will display three options – Specialty, Fullwidth, and Regular.
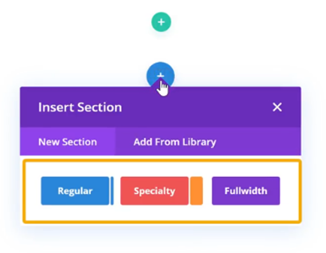
• Your choice will determine the structure of each section you build. For a full-width section, click on “Fullwidth”. This will bring up a list of items you can add to the page from Fullwidth.
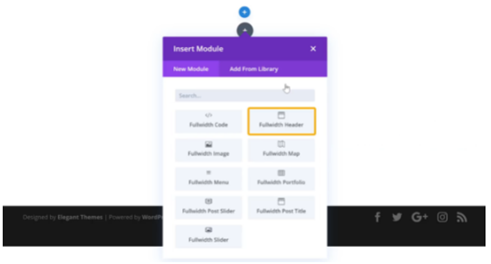
To create the Header, click on “Fullwidth Header”. This will insert the Fullwidth Header into the site. You can customize the text by selecting the text and replacing it with new text. You can do this for each section of the page.
You can also mix “Regular” and Specialty” into the design to create a unique design. When you are satisfied with the result, click the “Publish” button and then “Exit Visual Builder” You can follow these steps to populate and design other pages of your website.
Step 2: Build the main menu
• Click on the site name and then choose “Theme Customizer”

• Click “Menus from the opened area and then click on “Create New Menu”.
• Enter the name for the menu to be created and choose the location where you want the menu to be shown. It can either be the “Primary”, “Secondary”, or “Footer” menu.
• When you have chosen the preferred location, click on “Next”.
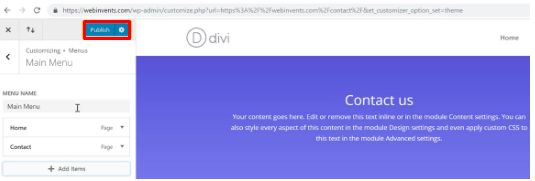
• Click “+Add Items” and a list of pages that you can add to the menu items will be displayed.
• Click the “+” icon to add any page as a menu element. You can add as many items as you want using the same buttons.
• When you are done, click the “Publish” page to save all changes you have made.
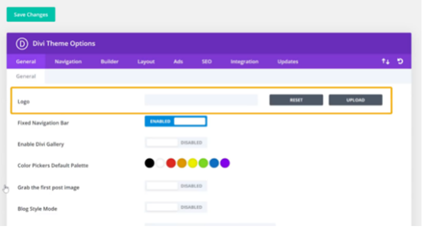
Step 3: Change the logo on the site. To remove the default Divi logo and change it to your business logo, follow the steps below:
• Navigate to the WordPress dashboard and click on “Divi” from the side menu

• Go to the Logo option under the “General” tab in the Divi Theme.
• Click on “Upload” and then drag & drop your business logo to the space where the default logo was.
• Click on “Save Changes” and then refresh your website to see the changes you have made.
Conclusion
That is it! You have successfully built a website using Divi. You do not need any coding or shortcodes to create your website when using Divi. It is a simple drag-and-drop mechanism that makes the process easy and seamless.
What type of Page Builder does Divi use?
Divi uses a drag & drop visual page builder that enables you to create any type of site through the arrangement and combination of content elements. The Divi page builder uses three core building blocks, which are Modules, Rows, and Sections.
Is Divi Page Builder good for SEO?
Yes, Divi Builder is SEO-friendly and can help to improve the aesthetic value and the optimization of your site.
Is Divi a good choice for beginners?
Divi is an excellent choice for beginners in web development and web design because it offers an easy-to-use, drag & drop mechanism for creating WordPress websites.
Is Divi compatible with Yoast?
Yes, the Divi theme is compatible with the Yoast SEO plugin.

