Keep your visitors engaged and up to date by adding your Facebook timeline to your WordPress site.
Read bellow to find out how to easily display your FB posts.
How to display your Facebook Timeline in WordPress?
For this example, we will be using the Smash Balloon’s Custom Facebook Feed Pro in order to add your Facebook posts to your WordPress website.
First things first, visit the Smash Balloon website and download the plugin.
Next step is installing and activating it on your site. You can use the free version of the plugin, which is great for displaying links and text from your timeline. Note, that it will not show photos.
After activating it, click on Facebook Feed – Settings from the WP dashboard. Once there, you would need to connect to your Facebook account.
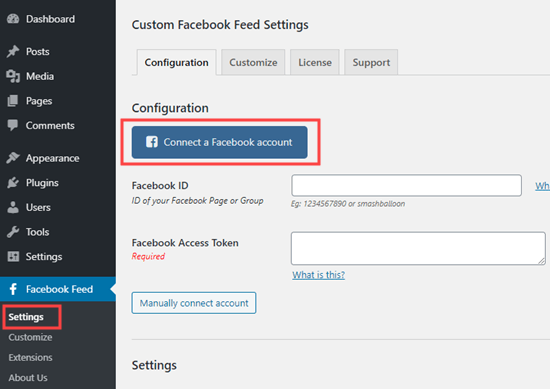
Now it’s time to decide if you wish to display a FB group or page timeline.
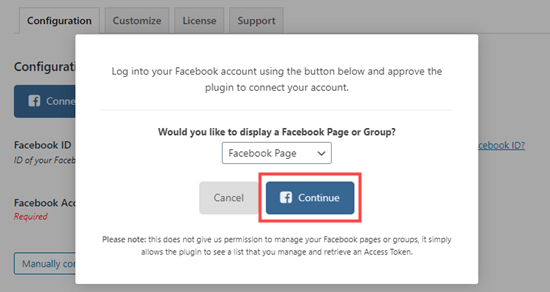
You will now have to agree to give the plugin access to your Facebook account. All you need to do is follow the steps.
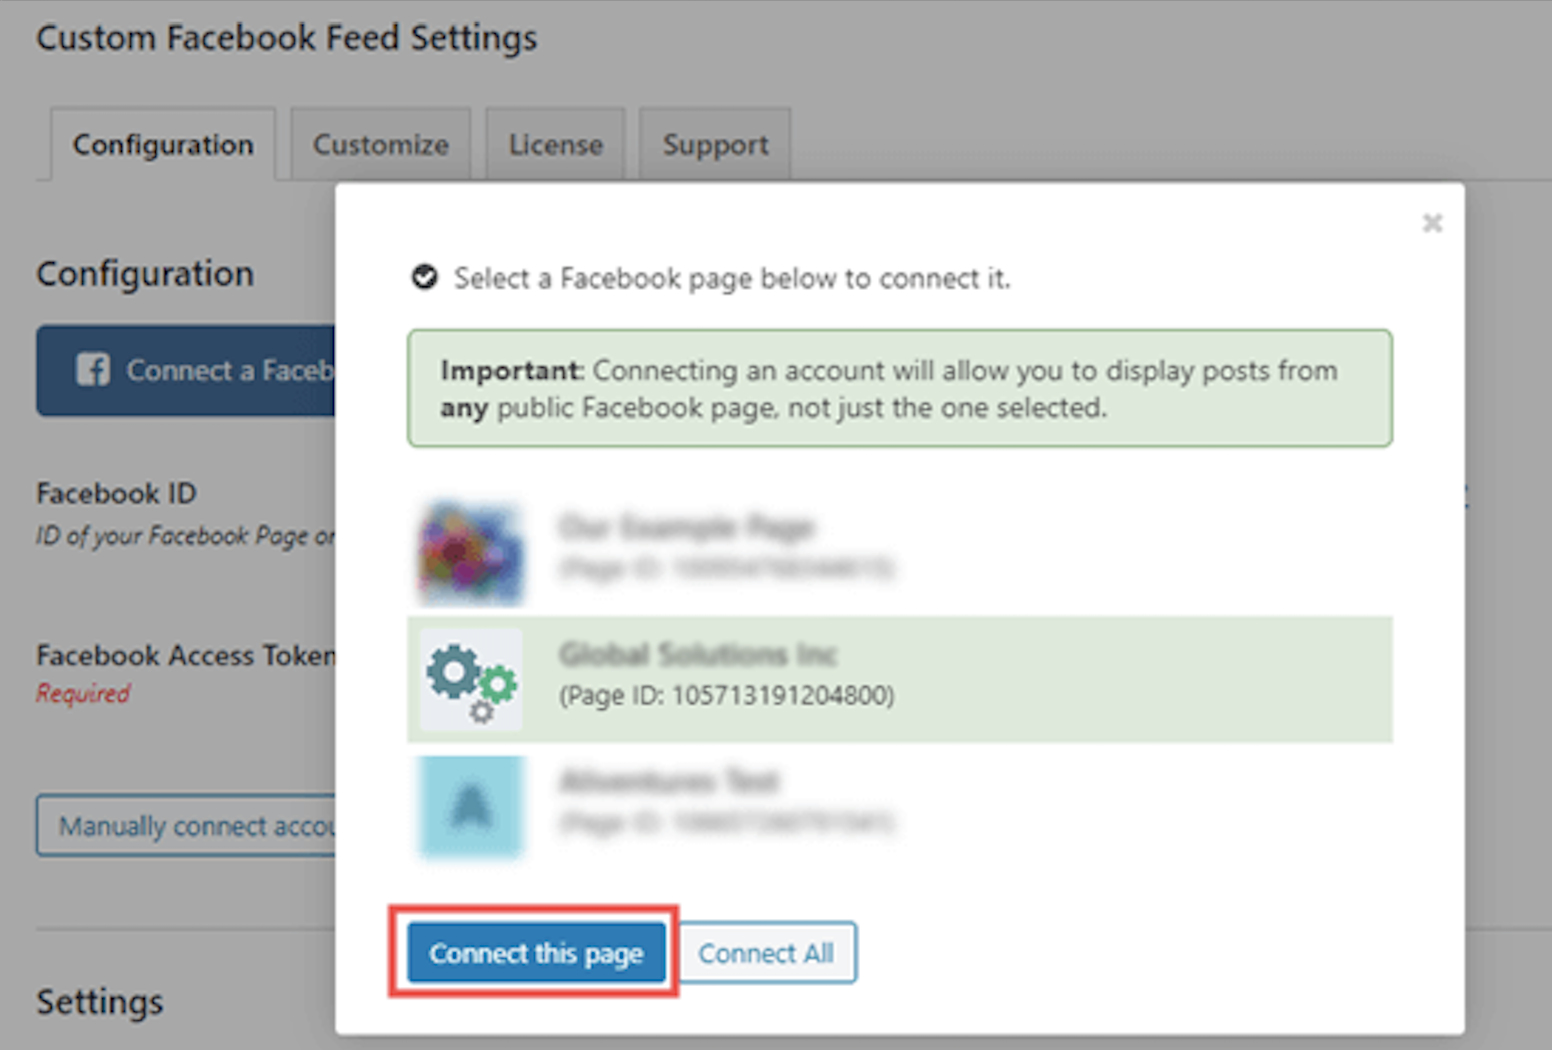
Next you will see the Custom Facebook Feed Settings page admin, showing a pop up where you have the select the page you need to use. Click on the desired page and then on the Connect this page button.
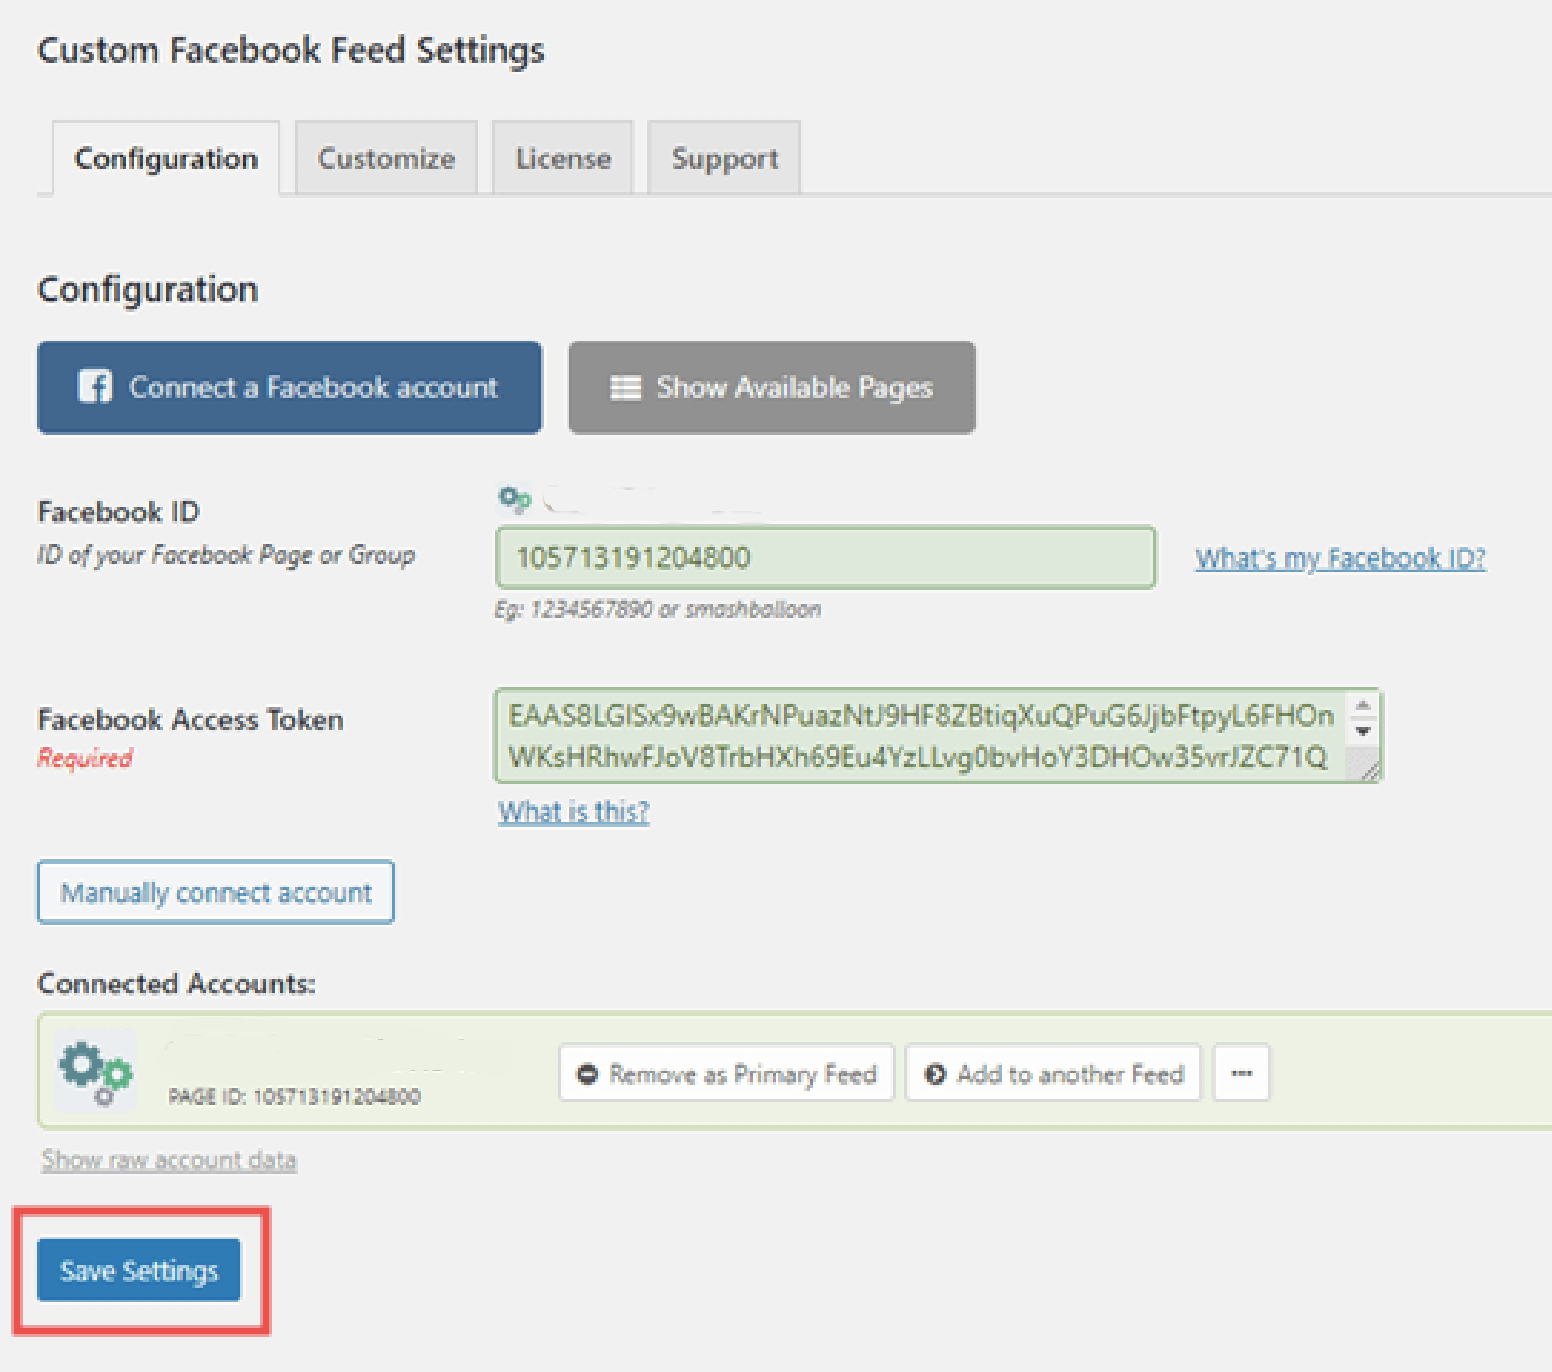
In the Connected Accounts section, you will see your page. Let’s not forget to Save changes.
Now you need to add your FB timeline to your WordPress site. Choose the post or page where you wish to display your timeline, or if you wish create a new post or page.
You can also add the timeline to the sidebar of your website. We will explain further in this article.
In our case, we will now create a new page by clicking on Pages – Add New. Go to the (+) icon in order to add the Custom Facebook Feed block in the block editor.
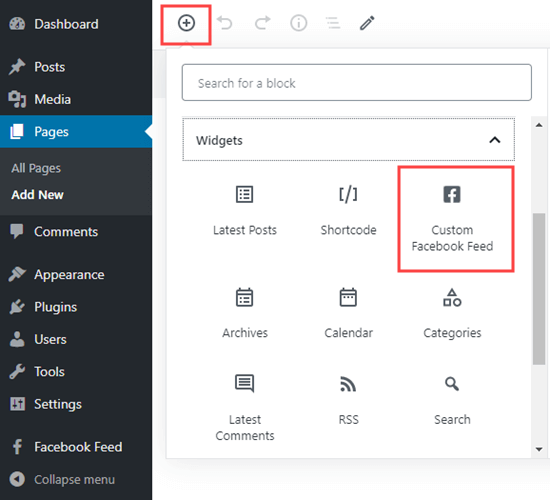
You will be able to see the preview of your FB feed immediately in the content editor. Preview and publish your page so that you can see the changes on your live site.
Let’s now take a closer look at how to customize your own FB timeline by using the Custom Facebook Feed Pro.
Customize your FB feed using Smash balloon Facebook Feed Pro
This plugin will let you change all kinds of options regarding your timeline. We will now take a look at some of the key ones.
Go to Facebook Feed – Settings from your dashboard.
Scroll down so that you can see some key options. You might want to display only 5 posts for example.
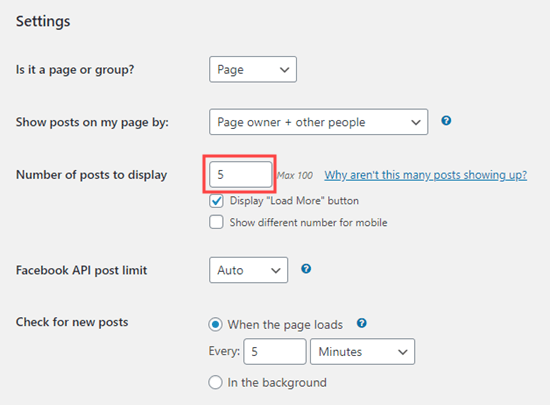
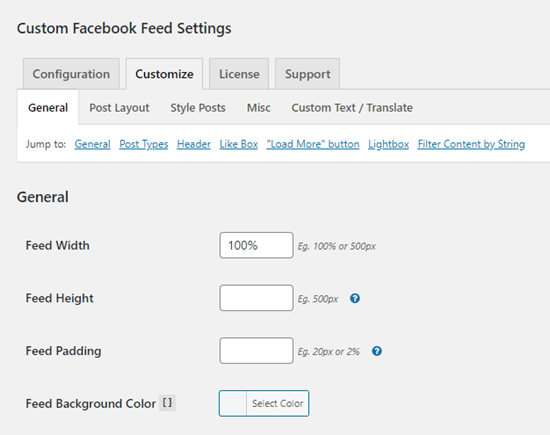
There are a number of settings bellow the Facebook Feed – Customize page you might be interested in trying. It will provide you with a variety of options to choose from in the different tabs.
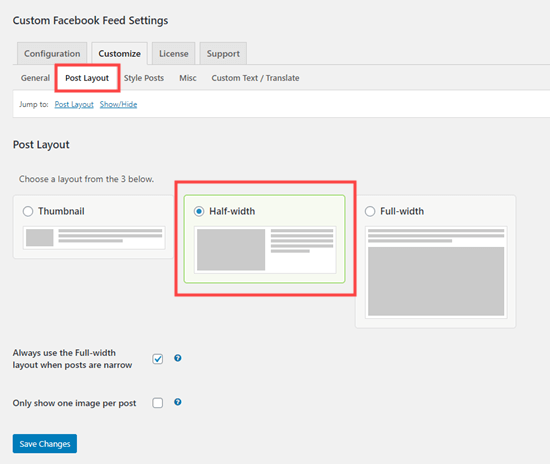
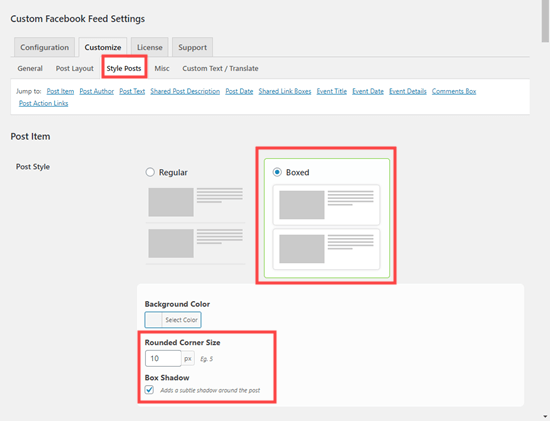
To make changes to how you display your timeline, go to Post Layout and check out the different options. Don’t forget to save your changes.
Now go to Style Posts and change the style of your posts. Here are our choices:
Add your Facebook timeline to your WordPress site sidebar
You might want to display your FB timeline in your sidebar and not inserted in a page or post? This can be easily done with Custom Facebook Feeds.
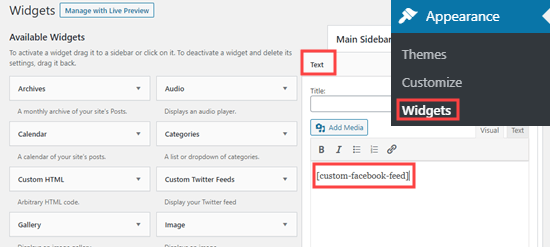
You need to go to Appearance – Widgets page from your dashboard. After that, drag a Text widget to where you wish your timeline to be withing the sidebar. Enter the shortcode [custom-facebook-feed] inside the widget and save the changes.
You will now be able to see your FB timeline in the sidebar on your site.
We hope this guide was helpful in assisting you with how to properly display your FB timeline on your site. Don’t forget to drop a comment bellow and share your thought!


