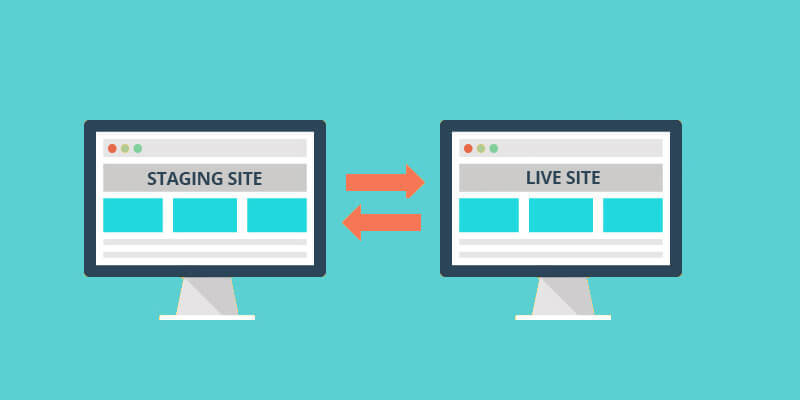
What is a staging website?
A WordPress staging site is actually a test site which can be used to safely make any changes and updates before going to live.
It used to be quite difficult to set up a WordPress staging website but this has changed now and even a non-technical person can do the job.
Today we will show you how to easily create a staging environment for your WordPress site.
The staging website is basically a clone of your real live website which is used for testing all types of changes before making them live. With the help of a staging site, you can catch errors, which in other cases would break your website.
A lot of users install WordPress locally on their Mac, Windows or Linux machines to test the changes. Once the updates are done, they simply upload the changes to their live server.
The issue with this approach is what if what worked on your local host server does not work on your live server? Often live WordPress hosting servers and local hosts are not running same configuration and specification.
As the staging website lives on your web hosting server, you would be able to easily prevent any types of errors as it runs the same server configuration as your live website.
Now let’s take a look at the set up for a staging site for WordPress.
How to create a WordPress staging site?
There is a number of ways when creating a staging site for WordPress. One of the easiest ones is by using your hosting provider’s built in staging site feature.
The best WordPress hosting companies offer 1-Click staging websites. If you are using such a company you would be able to easily create staging site without any troubles.
If that’s not the case, we also have a solution to help you in creating a staging site with the help of a plugin.
Creating a staging site using a plugin
If you do not have a staging site feature provided by your WordPress hosting company, you can create a staging website using a plug-in.
There are a number of disadvantages when using this method.
Note, that by using a plugin, you will have limited control on your hosting server. This is the reason you might not get the best results.
The plugin which we will be using for our example today will store your staging site on their own servers. If you have any concerns regarding your privacy and data protection, this method might not work best for you.
The first step is installing and activating the WP Stagecoach plugin. After activation, a new menu will be added in your admin bar. By clicking on it you will be taken to the plugins setting page.
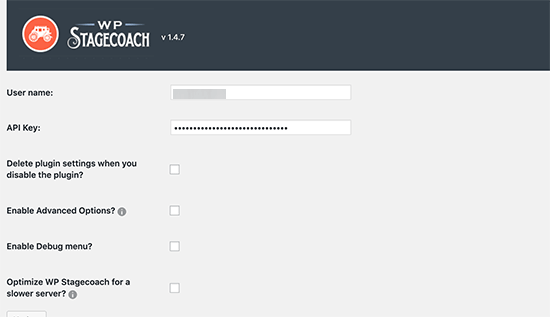
In order to install the plugin, you would need to create an account on the official website. You will then receive a username and API key which need to be entered in order to continue using the plugin.
Once all the info has been filled up, you can proceed to the next step.
A name needs to be provided for your staging website. The same name will be used as the subdomain for your WordPress staging website.
You need to check the box next to the “Password protect the staging site” option. This will protect your staging site from any public views and search engines.
It is very important for search engines to not be able to see the staging site as if they index it, you may get penalized for duplicate content.
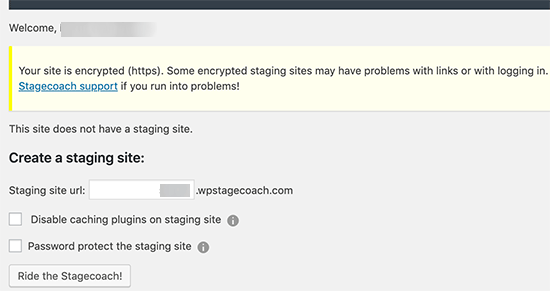
Now, click on the “Ride the Stagecoach” button in order to continue.
The plugin will now create a backup of your files and database so that you can export them to your staging website. Once this is done you will be able to see a link to your staging site as well as it’s admin area.
You can now click the link to your staging site and even start working on it.
Deploying staging site to Live with the help of WP Stagecoach
Once your changes are ready to be imported to your live site, go to WP Stagecoach – Important changes page and click on the “Check for changes” button.
The plugin will now be able to check for any changes on your staging site and show you all the available options to import them
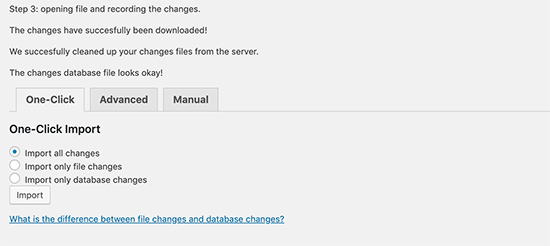
You can only select import file changes, database changes or all changes. Now, click on the Import button in order to continue.
You will be able to see the progress of the import and the plug-in will notify you when it’s done. You can now make tests to your live site and see if all changes were successfully imported.
Creating a staging site for WordPress manually
With this method you will need to manually create a staging site for your WordPress installation. Please note, that this is for advanced users and will require a lot more work than in any of the described methods above.
A disadvantage of this method is that your website will be temporarily unavailable when deploying the changes from the staging to the live server.
Let’s now see how to create a staging environment for your site.
The first thing you need to do is create a subdomain for your staging website. Head over to your hosting account dashboard and go to the subdomains link which is located under the Domain section.
You now need to provide a name for your subdomain and click on the create button.
Your subdomain will now be added by your hosting Control Panel which you can use to import your live WordPress site.
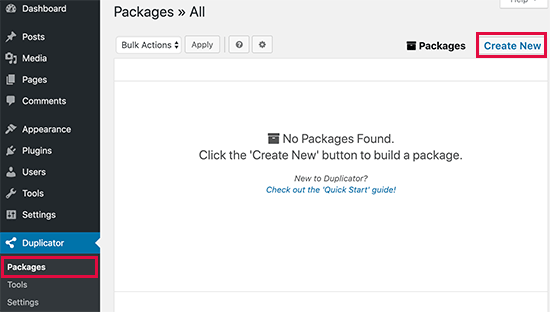
Now you would need to install and activate the Duplicator plugin on your website.
After activation, head over to the Duplicator menu in your admin side board and click on the Create new button.
Next, you need to click on the Next button to continue.
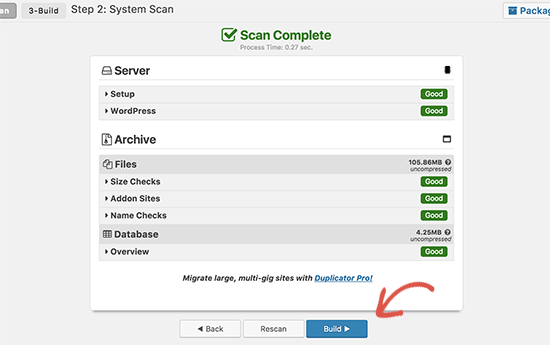
The plugin will now run the website duplicator wizard. It will first run some tests and check if everything is in order. If all items are marked as good, click on the Build button.
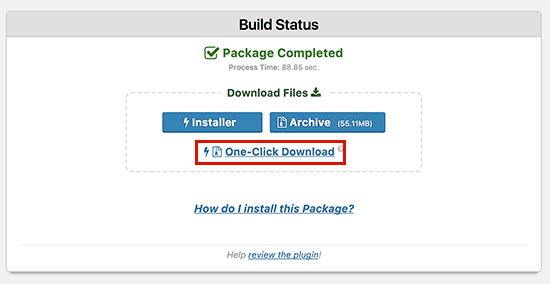
The duplicator plugin will now start creating a duplicate package of your site. This can take a few minutes which depends on the size of your site.
Once this is done, you will be able to see download options for the archive package and installer. Make sure to click on the One-click download link in order to download both files on your computer.
You still need a new database for your new staging website. Let’s now make one. Go to your WordPress hosting account control panel. Click on MySQL databases which should be located under the Databases section.

The next step is providing a name for your database after which you need to click on the Create database button.

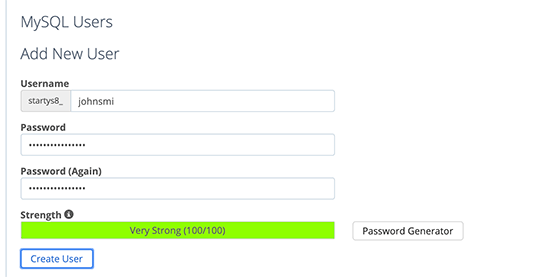
You now need to create a MySQL user for the database. Go to the MySQL users section and give your username and password for your new database user.
You now need to give this user permissions in order to access and make changes to the database you have just created. Go to the Add user to database section and choose your database and the user which you have just created.
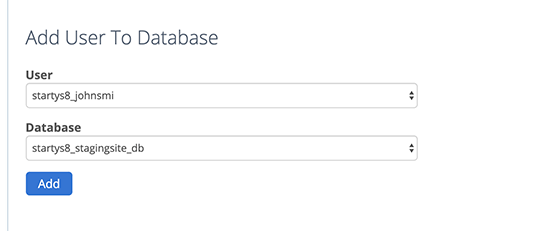
To continue, click on the Add button.
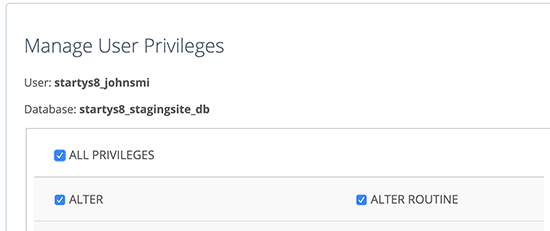
You will now be asked to select privileges for the user. Choose all privileges check box and click on the make changes button.
You can now use your database for your staging website.
You now need to open a new browser tap and go to the subdomain of your staging site which should look like this:
https://yoursubdomain.example.com/installer.php
Make sure to replace your subdomain with the actual subdomain name and example.com with the domain name.
This will now launch the Duplicator installer wizard.
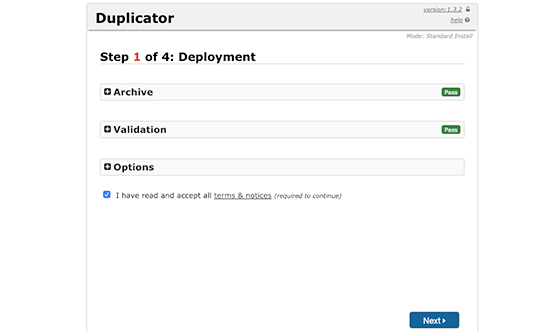
The installer will now look for the archive file. Check the terms and conditions checkbox and click on the next button in order to continue.
The installer will now ask you to add your WordPress database information.
Your host will most likely be localhost. After this you would need to give the credentials to the database you have just created.
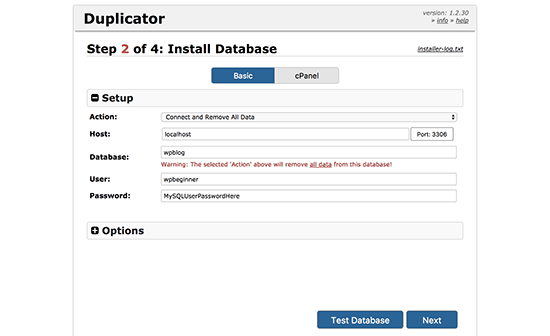
Once you’re done with the step, click on the next button to continue.
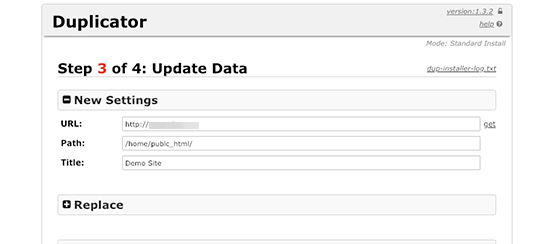
The plugin will now unpack your WordPress database backup from the archive into the new database.
You will now be asked to update the website URL or path. There is no need to make any changes since it will automatically detect the URL of your new subdomain and the path.
If this does not happen, you can change the URL to your new subdomain. After this, click on the next button to continue.
The plugin will finish the migration for you.
Go to the admin login button and enter the WordPress admin area of your site on the new staging site.
Your staging site is now set up. Add a password protection to your subdomain.
Go to your hosting accounts cPanel dashboard click on the Directory privacy account icon.
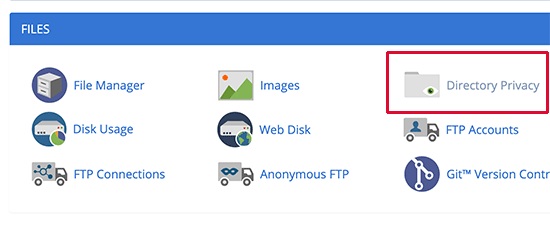
Now choose your subdomain folder and the option to password protect this directory checkbox. You now have to provide a name for this setting, after which you need to enter a password and user name.
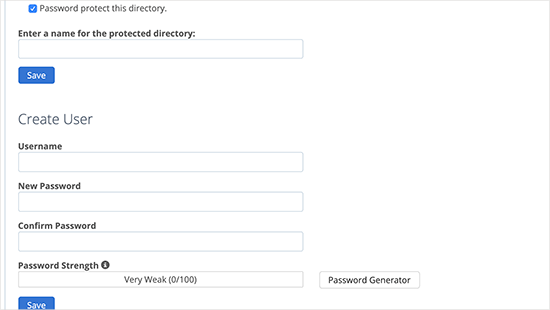
Save your changes. Your staging site is now password protected.
You can do you work on your staging website and make the changes you wish.
Manually deploying staging site to live
You are ready to deploy the changes from your staging site to the life server. You will need to follow the same steps described above.
You would just need to create a new duplicator package on your staging website and download the archive files and Installer onto your computer.
Go to your live site and create a complete WordPress backup. You can use the plugin for this as well.
Once this is done delete all WordPress files and folders from your live website. This means your WordPress site will not be available for a while.
Now, follow the instructions above in order to run the Duplicator installer wizard and import the staging site to the live server.
As you have probably noticed, the last method is definitely not the best method. We recommend using your hosting providers building staging site features.
We hope this article was useful to teach you how to easily create a staging environment for your WordPress site.