How to convert HTML to WordPress?

Nadejda

· 04th March 2021·Wordpress, Website Maintenance

Excerpt

We live in the age where people invented software apps, website templates, and automatic CMS. Thanks to them, designing a website has become not such a daunting task. There are a number of tools you can use when it comes to coding and design.

How to convert HTML to WordPress?

Creating your own website was not always this easy. If you are not experienced in coding then it was almost impossible to launch your own website.

Thankfully, we live in the age where people invented software apps, website templates, and automatic CMS. Thanks to them, designing a website has become not such a daunting task. There are a number of tools you can use when it comes to coding and design.

WordPress

What if your website was created years ago? You would still need to make updates by using HTML coding. This could be extremely expensive and time-consuming. But that doesn’t mean you have to start from the beginning.

You can just convert your old HTML website into a WordPress website.

HTML static websites still exist, but if you are not a coding expert and you wish to have full control over the site, it’s best if you move your HTML website to WordPress.

Why do you need to convert HTML into WordPress?

If your website is a static HTML site, why do you need to convert it?

To answer it simply, it’s far easier to manage. If you’re not a coding expert, you need to hire developers for any minor change you wish to do. Aside from that, you need to closely monitor your SEO and make site updates constantly. This is where WordPress comes in.

These changes are possible with just a few simple clicks.

In order to convert your website into WordPress, this means that you would need to take your already existing data from the static HTML website and transfer it to a WordPress theme.

There are 3 ways you could do that:

Manual conversion

This method is highly complicated, which is why we do not recommend it for everyone.

With manual conversion you use your websites HTML code in order to begin. Is highly recommended that you have some experience in HTML, CSS, and PHP.

Creating a new theme folder

First, you need to create a new theme folder on your desktop. Next, go to the code editor and create the following 5 text files:

Style.css Header.php Footer.php Index.php Sidebar.php

Copying the CSS Code

Next step is copying the CSS code from your website onto a WP style sheet.

The style sheet is the same style.css file you created previously.

Copy and paste the CSS code into the style sheet.

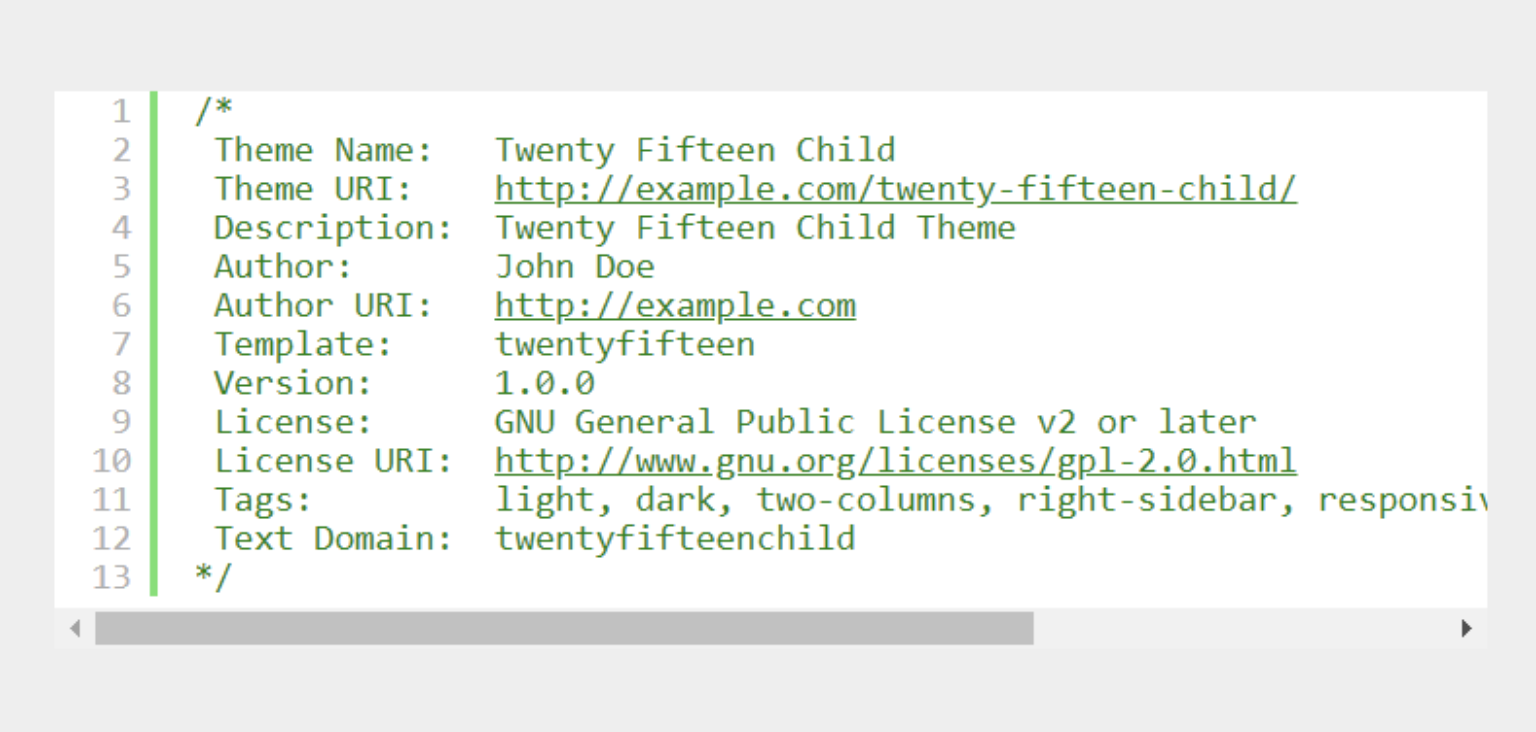
Now, fill in the style sheet header for the new WP theme.

They are:

Theme name Theme URL Author Author URL Description Version License, Tags and License URL.

CSS code into the style sheet

Paste the CSS code from the static HTML website to the file. Save the changes.

Separating existing HTML

WP can access database information by using PHP. The result is that your HTML code needs to be chopped into pieces which will be strung together by WordPress.

To achieve this, copy some of the original HTML document into different PHP files.

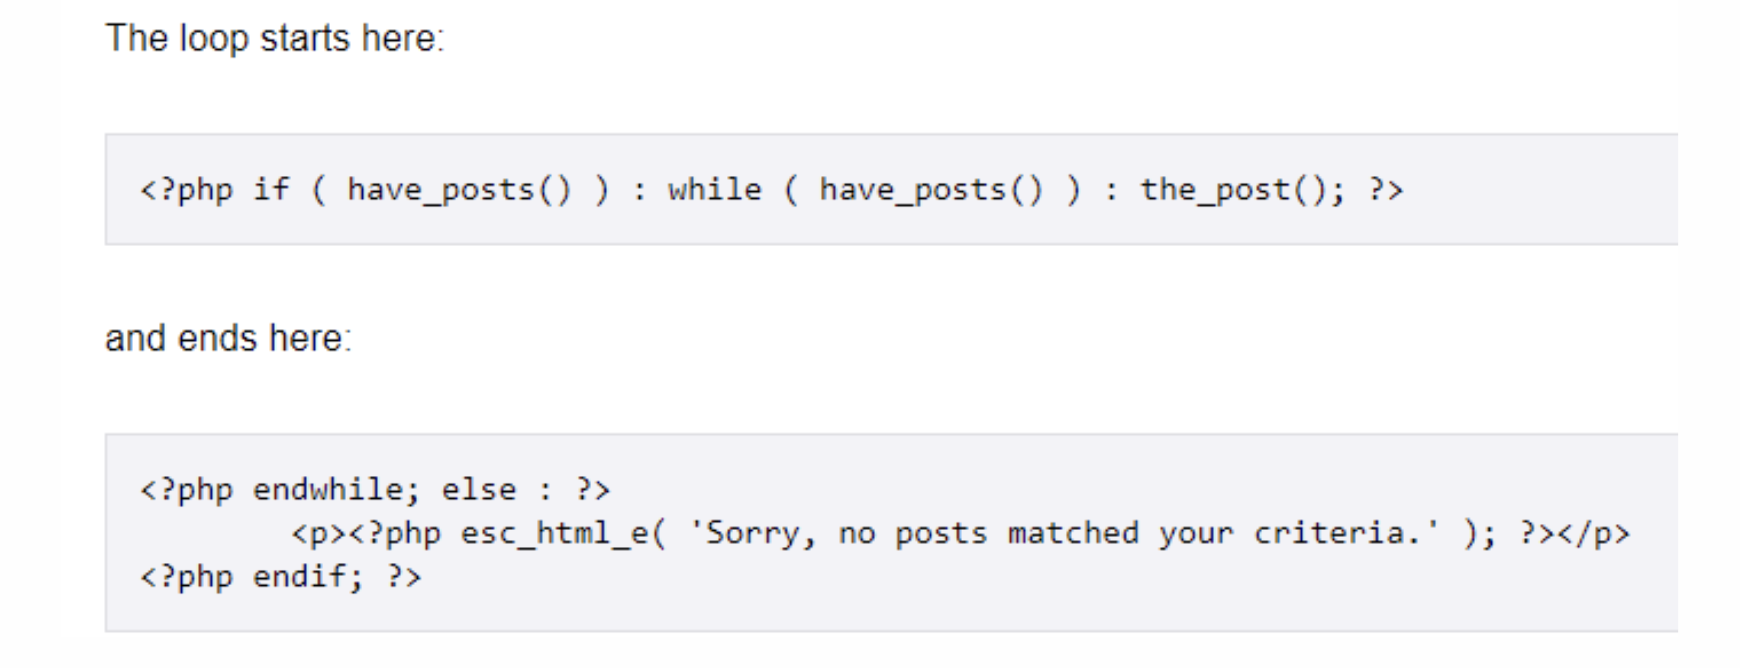
Open the index.html file. Copy the code in the following places:

Heather.php – It includes the beginning of the HTML code up to the area with the main content. Prior to the section , copy and paste <?php wp_head();?>

Sidebar.php – Here you need to paste the code from the section with

Loop code

Save all changes.

Screenshot and Upload

The final step is creating a screenshot of the theme and uploading it. It will show a preview of your website and WP backend. Make the screenshot and adjust it to 880 x 660 px. Save the file as screenshot.png. Add it to the theme folder.

Next, you need to upload and activate the theme to WP.

Converting HTML to WordPress using a Child theme

When using a WordPress child theme to convert your HTML website into a CMS one, you will receive a lot more freedom and not need so much technical knowledge. It can also be a lot cheaper and easier.

You can also make adjustments to the design of your current theme so that it looks you’re your old website as close as possible. Meaning, that while using WordPress you can still retain the original site’s feel. As you will be creating a new website on an already existing theme, there is no need to add additional WP features.

Child themes are created on top of another theme, modifying it in a way suitable for the specific website.

1. Choosing a Theme

The first step, is naturally, choosing a theme. Find one, which is similar to your current design.

Install the theme but don’t activate it just yet.

2. Add a new Theme Folder

Very much like in the previous steps, create a new folder on your desktop. As a name of the folder use the parent theme and “- child” next to it. There should not be any spaces in the name.

3. Create a style sheet

As we did in the previous method, this step is identical. Only this time, add a tag to it, titled template. The name of the parent theme should be included as well.

4. Create e Functions.php file

Create a functions.php while inheriting the parent styles for the child theme. To achieve this, add a file named functions.php. It needs to start off with <?php.

Add the following code:

Functions.php file

5. It’s time to activate the child theme

Next step, activate the child theme. Make sure that you make a screenshot for the WP backend. Create the zip file which includes everything and add it to WP. You can now make changes to the design so that it matches the original HTML.

Importing content from HTML into WP with the help of a plugin

We recommend using this only if you would like to make changes to the design of the website. If you’re looking for a more different look, plugins can be a very useful tool. This can be done in the following way:

1. Setting up a new website

Set up a new website and install the WP theme you have chosen. It needs to be a template which you like and can be easily edited.

2. Installing the plugin

You now need to install the plugin. For our example we will be using the HTML import 2 plugin.

HTML import 2

Install and activate it.

3. Uploading pages

Now that your plugin has been activated, upload the pages to the same server as the WP installation.

Enter the following information in the files tab:

Directory to import

Old site URL

Default file

File extensions to include

Directories to exclude

Preserve file names

Once you are done, go to the Content tab in order to configure the HTML tag holding your website’s content.

Conclusion

If you are still using a static HTML website, it’s probably a good idea to change this and move to a more effective CMS, such as WordPress. Although, it does require some efforts, it’s all worth it. Uploading HTML to WP can be helpful when you decide to implement a HTML module or verify ownership of your website.

Thanks to the easy-to-use dashboard, converting your HTML website to WordPress will make managing your website a lot easier and cheaper.

Nadejda
Nadejda Milanova

Get 10% off your order

UYD-772-MK5

Enter UYD-772-MK5 at the checkout to get 10% off one-time tasks or any maintenance plan.

Get started