Do you want to create the option for your visitors to be able to upload files from your contact form?
Maybe you have some job openings and wish to collect CVs, or you are running a photography contest and the applicants have to attach certain files.
Today we will show you how to create the option for file upload in WordPress.
Do you need a file upload form in your website?
If you need to collect some type of files from your visitors, then a file upload option would be great for you.
Instead of emailing constantly, you can simply create a form including all of the details you need and collect the information.
The form would also automatically save the data from the form into your WP database. This way it would be easier for you to locate submissions, even of the email was deleted.
Creating a file upload form
For this example, we will use the WPForms plugins, one of the best available contact form plugins.
If you are currently on a tight budget and would like to save on the excess features, you can use the basic plan of WPForms. Please note, that the Pro version will give you access to survey reports, bonus form templates and tons of other useful features.
After installing and activating the plugin, you can see the WPForms tab in the dashboard.
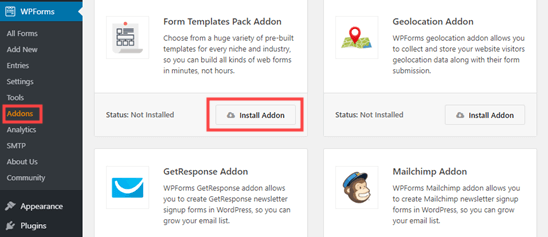
Click on WPForms – Addons and go to Form Templates Pack Addon. Click on Install Addon to activate it.
You can now create your first file upload form.
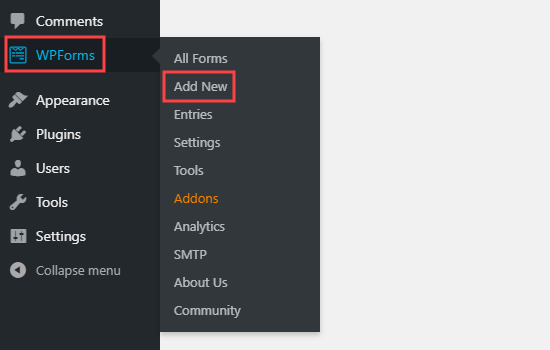
Go to WPForms – Add New page.
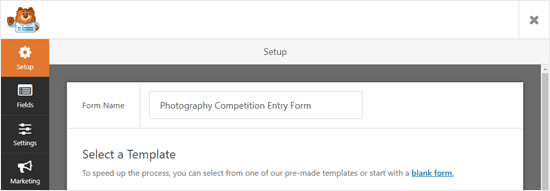
It will take you to the WPForms builder, where you can name your form at the top of the screen.
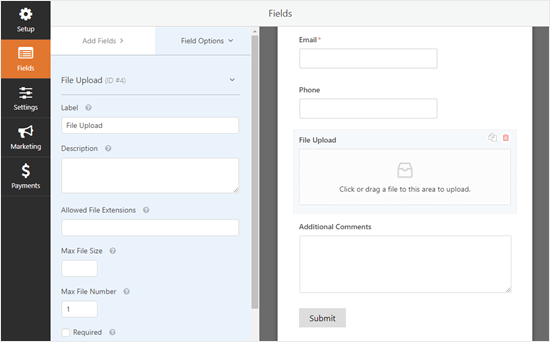
You will need a template. You can use the File Upload Template, which is located in the Additional Template section. Click on it in order to start using it.
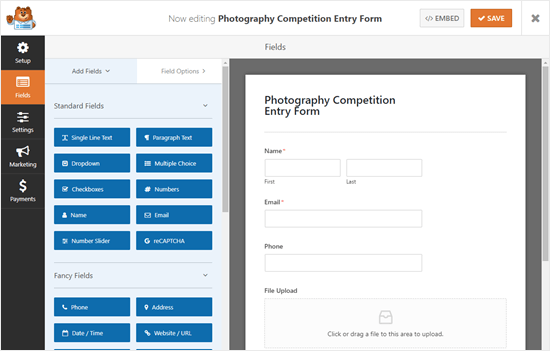
The file upload form can be used without the need to make any changes.
By default, users can upload:
- Images: jpg, png, gif
- Documents: pdf, doc, ppt, xls
- Audio: mp4, mp3, wav
- Video: wmv, mov, mpg
You can also restrict certain file types. Simply go to File Upload and start editing. You can see the Filed Options located on the left side:
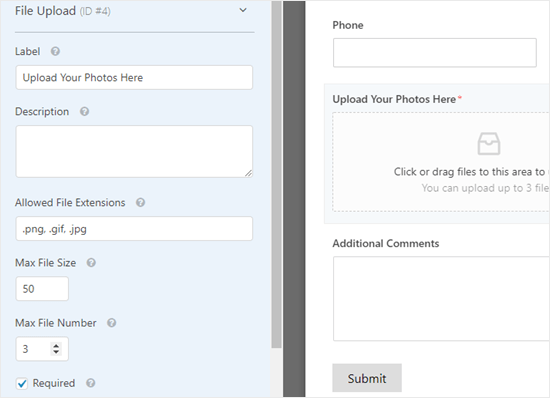
You should see the Allowed File Extensions tab, type in any file type you wish to include. Make sure the allowed formats are separated with comas.
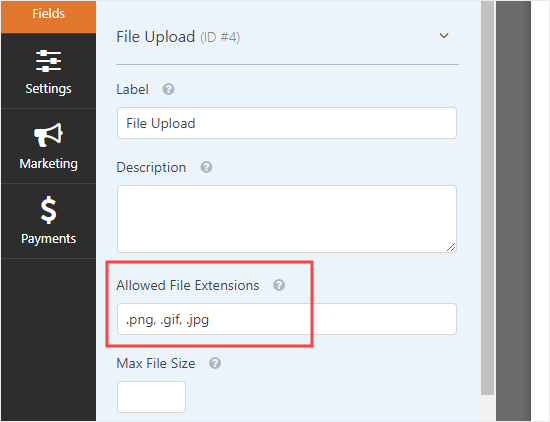
For WordPress security reasons, some file types are limited. Additional file types can be added if you wish users to be able to upload files which are usually excluded.
You can even set the maximum number of files and file size.
If you wish to prevent users from submitting their form without any files attached, simply check the Required box. This means that at least one file needs to be uploaded in order to submit the form.
By default, users can upload their files using a drag-and-drop format. If your space is limited, however, you can edit this.
Go to Advanced Options and switch the style from Modern to Classic with the help of the dropdown.

Note: If you are using the classic upload field, you need to know that only one file can be uploaded. For users to be able to submit more files, you need to add more File Upload Fields.
The submitted files can be stored in the WP Media Library if you wish. You can add them later to a page or post.
Note: Even if the box is not checked, the uploaded files will still be saved in your WP database. They will be located in a separate folder in your WP hosting account.
If you want to make changed to other fields in the form, all edits can be done from the left hand side.
You can also make edits from the Add Fields tab. Just grad and drop any desired field.
For our example, we have added a URL link field, so that users can provide a link to their website.
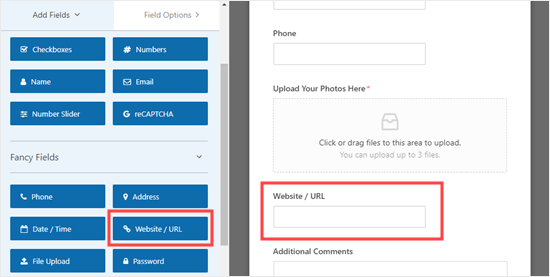
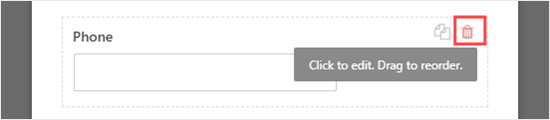
For removing a field, hover with the mouse over it and click on the trash icon. Here we will remove the tel. number option.
Once the form is ready, click on the Save button.
Adding the form to your website
Once the form is ready, you have to add it to your site. This can be done on an existing page, or you can simply create a new one.
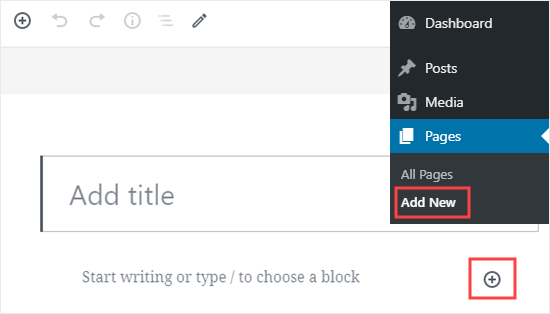
In our case we will create a new page. Go to Pages – Add New and add a new block using the + icon.
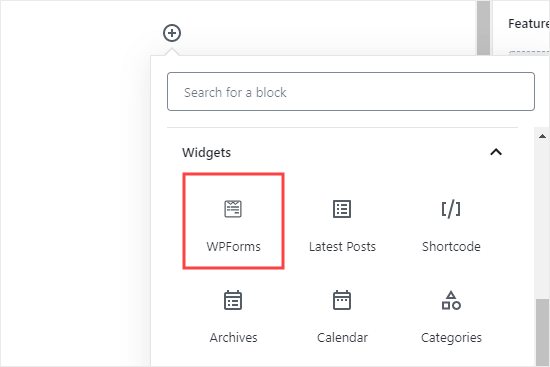
Next, select the WPForms block, located in the Widget section. You can also use the search bar if needed.
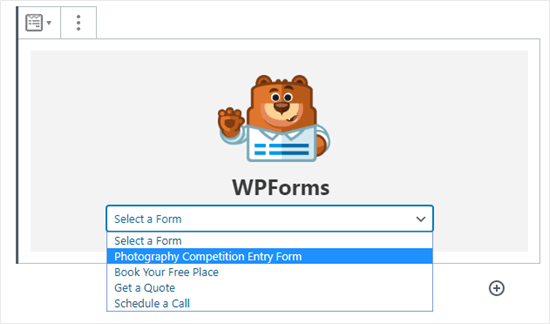
After adding the block to the page, choose your new form from the dropdown menu.
Next, publish your changes and see the form live on your website. This is how our example form looks:

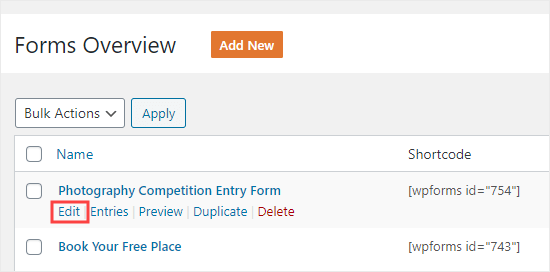
Changes to the form can be done from WPForms – All Forms. Choose the name form or run the mouse courser over it and click on Edit.
When you make changes to your forms, it’s automatically updated on your site. No need to add it again to the page.
View and Download the uploaded files
When a user sends you a file, you can see it form the WP dashboard or your email.
With each entry in the form, the email will look like this:
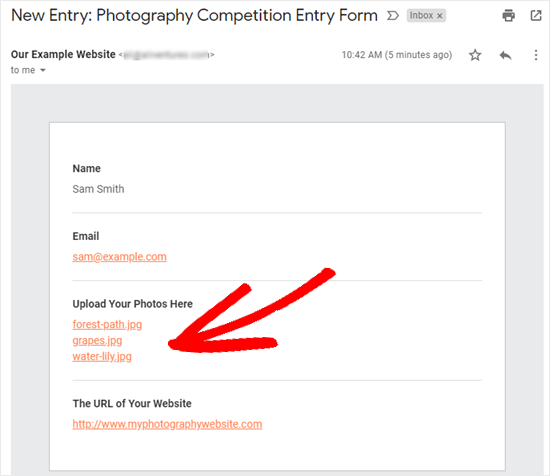
You can simply click on the links or download the selected files.
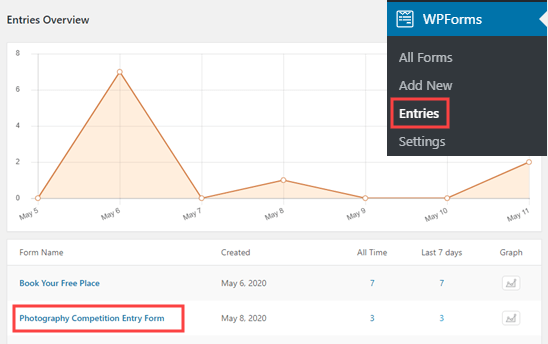
The files are very easy to find using your WP dashboard. Click on WPforms – Entries and choose a name from the form.
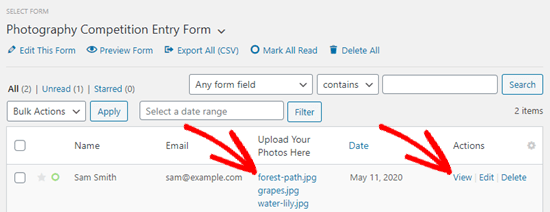
The uploaded files can be viewed from the table of forms entries or you can go to View Link and all details will be visible.
We hope this guide was helpful in creating a useful file upload form on your website. Drop a comment bellow and tell us how you have used such a form for your website.