By using WordPress, you can easily organize your content into a variety of categories and tags. You can even go as far as creating subcategories for organizing further.
It’s crucial to use them properly, as this will help users to shift trough the content, they have interest in. This will improve your SEO ranking as well.
Today we will talk about how to use categories and subcategories in WP.
Understanding different categories in WordPress
Categories can be a very useful tool when used properly. They are helpful not only in organizing your content, but can also assist in developing a proper website structure. This is a great opportunity for your SEO.
You might be curious as to why someone might want to use subcategories on their website? Let’s say, for example, that you have a travel blog with a number of destinations across the world. You would want readers to be able to locate the article for a specific country and city.
This is where a subcategory will come in handy. You can choose a country for a parent category, while the cities can be subcategories (or known also as subcategories).
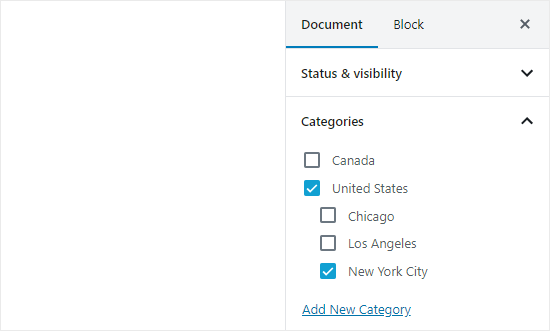
If a post is filed under a subcategory this does not mean that it needs to be under the main category as well. If your post is filed under the subcategory and not the main category, then it will appear only on the archives of the subcategory. This can be quite handy if you wish to avoid duplicate content.
How to add a category in WordPress?
This can be easily done when writing a post. From the Document panel located on the right-hand side click on the Categories tab.
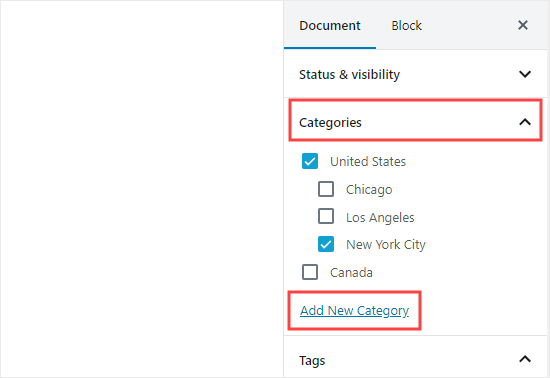
When you click on the link, you will see two boxes where you can add the category. For a normal category, there is no need to choose anything from the parent category drop down menu.
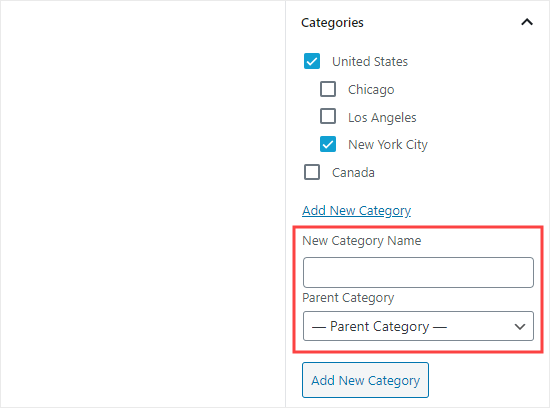
Type in the name of the category and click on Add new category.
After this the box for this category will be automatically checked and you can uncheck it if you want.

A new category can be added without the need of editing a post.
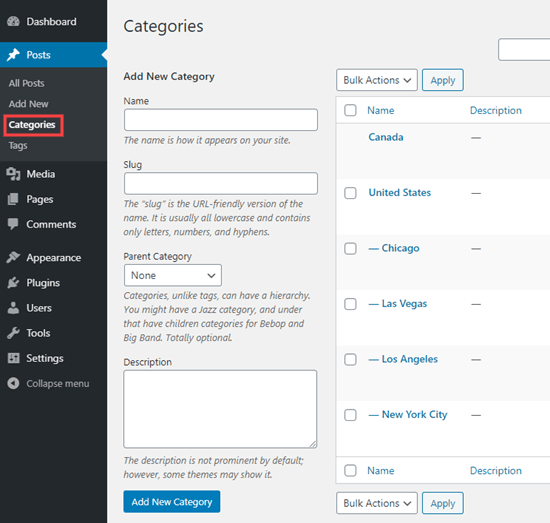
Click on Post – Categories and add the new category. This is very useful if you wish to create categories before adding your content.
With this method you can also edit the URL (slug) for the categories. You can also rename or delete categories as well, or add a description.
How to add a subcategory in WordPress?
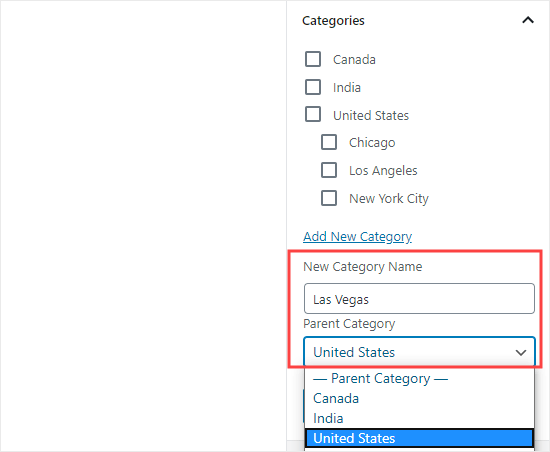
The subcategories are added the same way as the main categories. While you edit a post, open the Categories tab and add the name for your subcategory. After this, choose the category which you wish to use as the main one from the drop-down list.
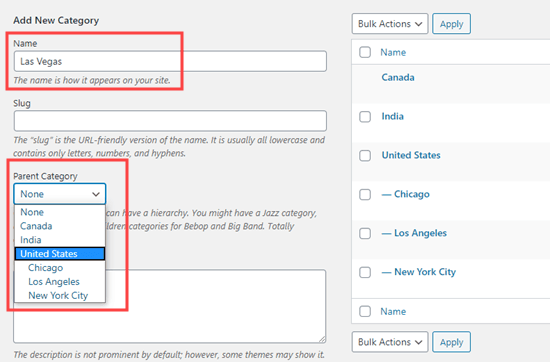
Quite similar, you can go to Posts – Categories to add subcategories. Type in the name and select the main category.
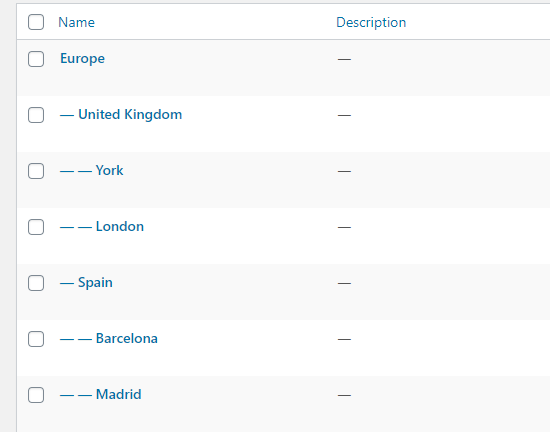
The subcategory can have its own subcategory if you wish. For example, you might like to use a category structure which includes continents, countries, cities.
Categories can only one main category. You cannot add one subcategory under two different main categories.
SEO benefits
The category URL can look like this:
www.example.com/category/united-states/new-york-city/
This is very useful for search engines and users in order to understand what the page is about. You can also add keywords into the URL. Readers can find the content they’re looking for by using these keywords.
With WordPress you can easily manage the /category/prefix your category URLs. You can delete it entirely if you wish.
Click on Settings – Permalinks and scroll to Category base.
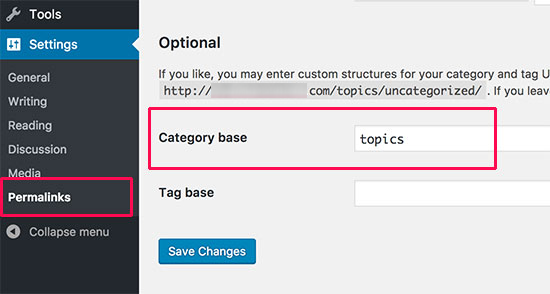
From here you can add the prefix you want to use and save the changes.
A category prefix in your category URLs will not add any benefits in terms of SEO. You can remove it with the help of the FV Top Level Categories plugin. After installing it, it will remove the word “category” from the category archive pages’ URLs. They will now look like this:
www.example.com/united-states/new-york-city/
Displaying categories and subcategories in WP sidebar
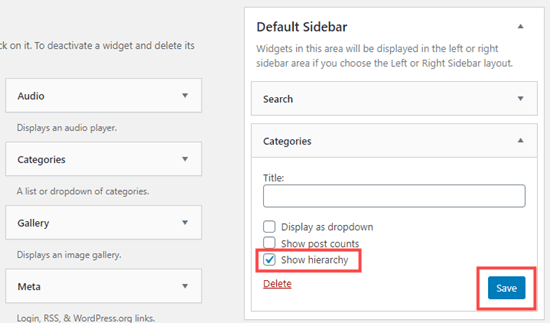
You can use the widget to the WP sidebar of footer in order to show the categories. From WP dashboard, go to Appearances – Widgets.
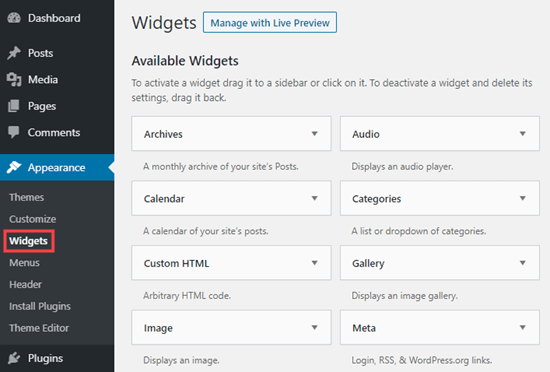
If you haven’t changed your default widgets, you will be able to see the category which it already in place. If that’s not the case, simply drag and drop it from the list of Available widgets which is located on the left hand side.
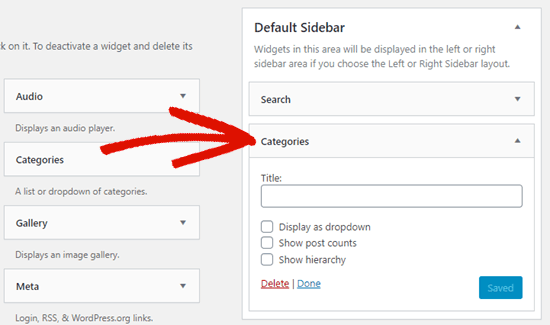
By default, you will see all the categories in the list, in alphabetical order.
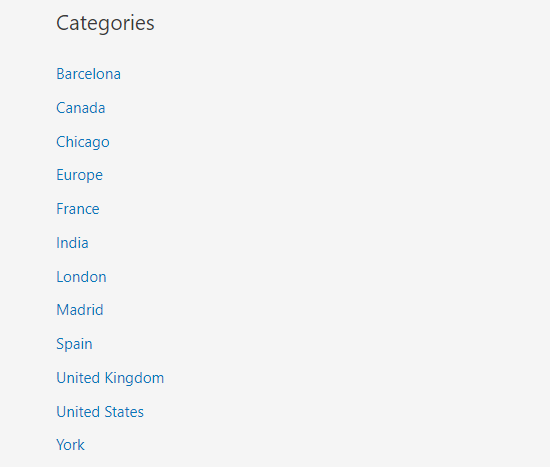
The categories will be visible on the list only if you have assigned at least one already published post to them.
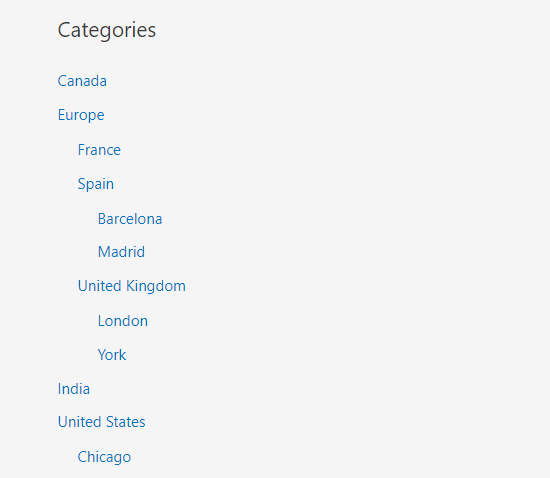
You can change it in order for it to show the subcategories below the main category if you wish. Check the Show hierarchy box in the widget and save the changes afterwards.
Go to your site and you will now be able to see the main categories along with the subcategories beneath them.
Along with the default category widget, you can create custom category menu links with the help of the WordPress navigation menu. After that, the menu can be added in the header menu, footer, sidebar, or any other menus.
We hope today’s article was useful and learning how to add categories and subcategories to your WordPress website!


