Introduction
The WooCommerce email system is a powerful and flexible way to update your customers on the status of their orders. However, there are times when you want to customize it with more information or add in different features that aren't available by default. Besides, you might also want to think about what you want to include in the email and how best to customize it. In this article, we'll show you how to do just that!
The Standard WooCommerce Email Templates
WooCommerce offers a range of email templates for letting your customers know about various things, such as order confirmations and password resets. In case you want to update your email settings, login to your store dashboard and click on the WooCommerce > Settings page. Here, you will find the following default customer emails. Click on ‘Emails’ to view the default WooCommerce email templates. WooCommerce is equipped with 11 built-in email templates usually sent to customers.
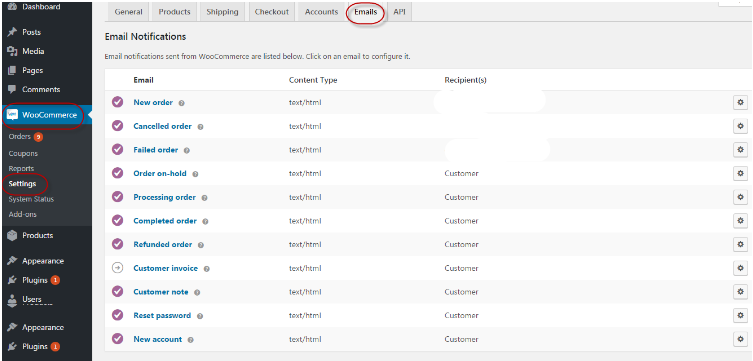
Below is a list of all the email templates.
• New Order - It is sent when a customer purchases an order from the store.
• Customer Invoice - Sent to customers after an order has been completed, and payment has been processed.
• Order Completed - When an order is marked as complete, this email will be sent to the customer.
• Processing Order - This is an automatic email sent to customers when their orders have been submitted.
• Order on Hold - This is another automated email, but it only occurs if you choose this option in your settings section under “order notification”.
• Customer Note - This is an automated email sent when you add a note to an order from your admin panel.
• Reset Password - This email will is sent to the customer if they forget their password. It will include a link that they can use to reset it.
• Failed Order - This is an automated email that gets sent to the customer if their order fails. It will include a link that they can use to retry or start over.
• Refunded Order - This is an automated email that gets sent to the customer if their order fails. It will include a link that they can use to retry or start over.
• New Account - This email is sent to customers when they create a new account. It includes their login information and a link to the store's terms and conditions.
• Cancelled Order - This email is sent to customers when their order is cancelled. It includes a link to the store's terms and conditions.
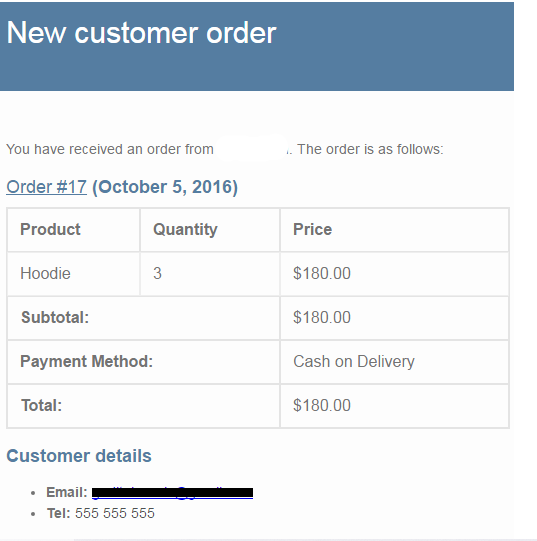
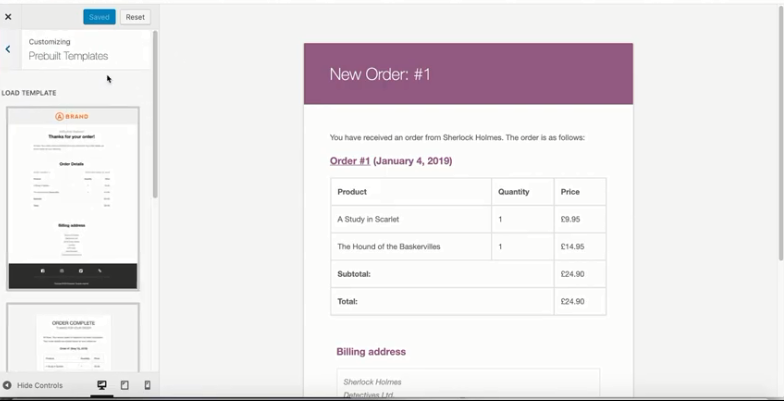
Each template contains replaceable tokens, which you can easily change to suit the purposes of your store and business. Below is a sample of a WooCommerce email for an order.
Why Should You Customize WooCommerce Emails?
1. Increased Engagement
When you send a customer an email about an abandoned cart, they will be more likely to look at your email if it has more relevant content.
2. Boost Sales
Customizing WooCommerce email can help increase sales by providing customers with more relevant content.
3. Better Customer Experience
A better customer experience is a huge plus for your business. Properly communicating with customers will let them know that you care about their business and feel confident in your products and services.
4. Increased ROI
WooCommerce emails are not only great to boost sales, but they also help increase your return on investment (ROI) by reducing fraud and abuse. When you identify fraud and abuse quickly, it reduces your processing fees and fraud losses.
5. Improved Website Security
Website security is a top priority for online businesses. Customizing WooCommerce emails can help improve website security by providing customers with more relevant content and helping to identify potential threats quickly.
Customizing WooCommerce Emails
Customize Email Using the Default WooCommerce Settings.
You can use the default WooCommerce settings to customize your WooCommerce emails.
To do this, go to WooCommerce > Settings > Emails.
In this section, you will find all types of WooCommerce emails. Click on the ‘Manage’ button to select the type of email you want to customize.

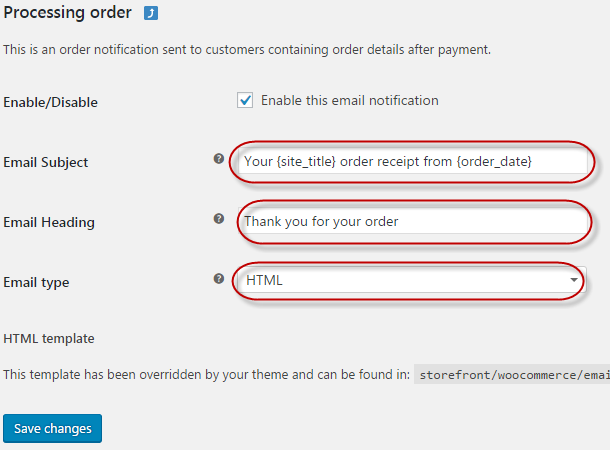
Here you can set the header image and footer text for your WooCommerce emails.
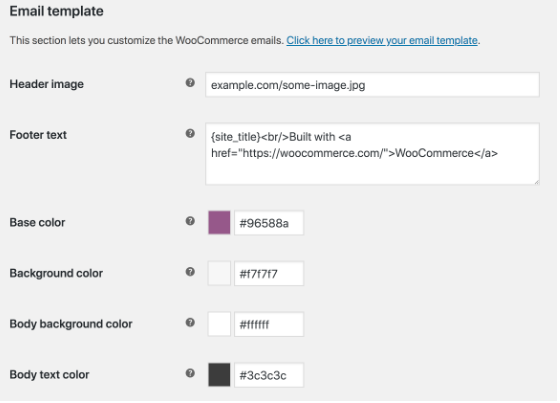
The first section, Email Subject, contains a default email subject for WooCommerce emails. The next section, Email Header, allows you to customize the email header of your WooCommerce emails.
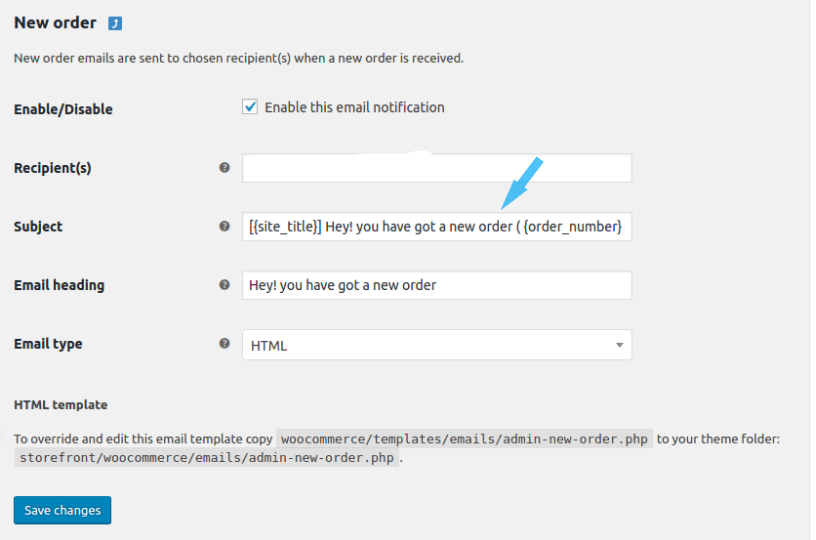
To do this, simply replace the default code with your code using HTML or PHP variables. Click on the ‘Save Changes’ button once you are done.
Customize WooCommerce Email Using the WooCommerce Email Customizer
Now that you have installed and activated the WooCommerce Email Customizer, let's look at how you can customize your WooCommerce emails.
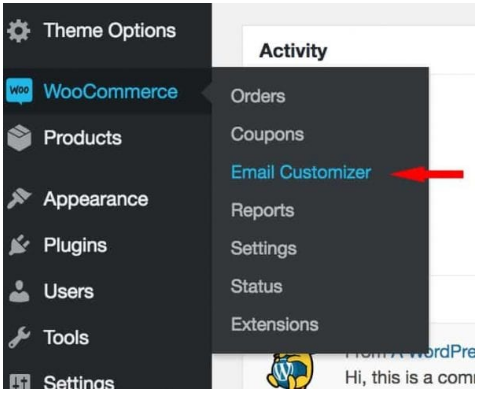
The first step is to open the plugin settings page. To do this, go to the WordPress admin area and click on the 'WooCommerce' menu item in the menu on the left.
In this admin area, click on 'Email Customizer', which is under the 'Settings' menu item in the sub-menu that appears when you hover your mouse over it:
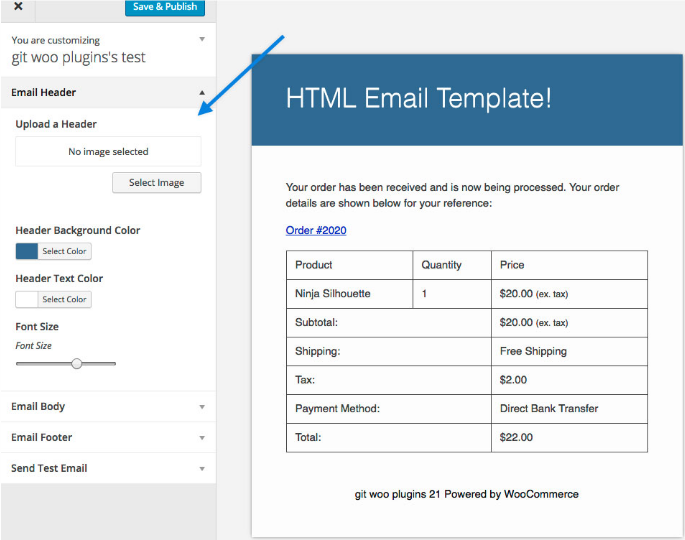
This will open a page where you can configure a few basic options about how this plugin should handle emails.
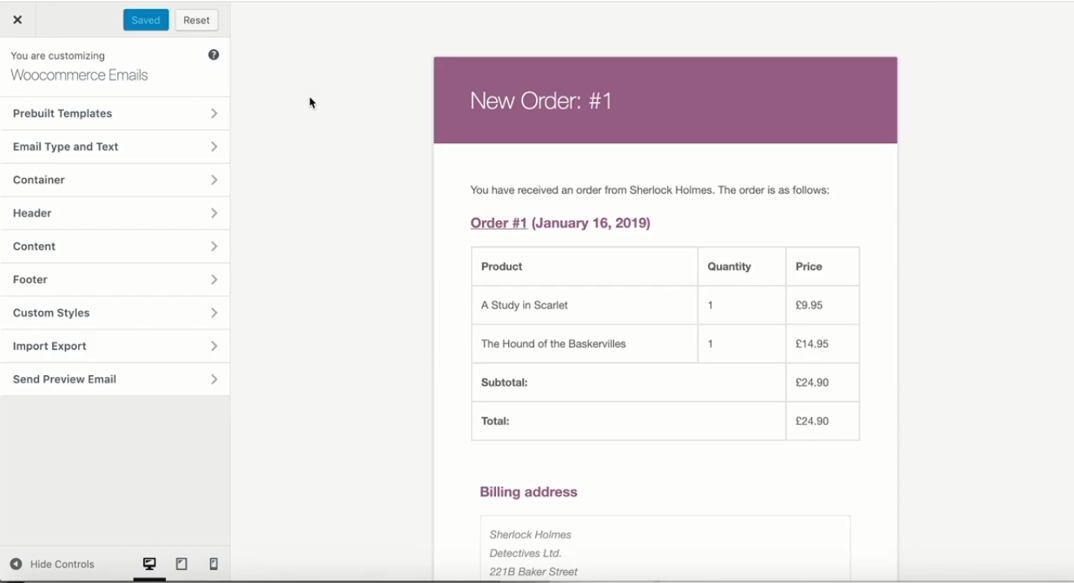
The customizer has a wide range of settings that enables you to customize different sections of your store, such as the header, footer, and body.
Customize WooCommerce Emails Using a Plugin
Here, we look at how you can customize your WooCommerce email templates using a WordPress plugin. In this case, we will use the Kadence plugin. Once you have downloaded the Kadence plugin, navigate to your WordPress Dashboard, go to Plugins > Add New and upload the Kadence-woocommerce-emails-customizer.zip file.
Once installed, click on Settings > Kadence WooCommerce Emails Customizer to get started.
You will need to decide which email template you want to use for a particular email. Once selected, click on the Save Template button, and your new template will be saved in the Customizer's Email Templates area while retaining all data from the previous one. Then add, remove, or edit any of the template's fields as needed.
When finished making your changes, be sure to click on the Save & Close button at the bottom of the screen to save your work.
To edit existing WooCommerce emails, click on the "Design" button in the Emails tab of your WooCommerce store's Settings screen. You will see a preview of your email with placeholder content.
You can replace this content with your custom text and images.
Customizing Emails With Mailchimp
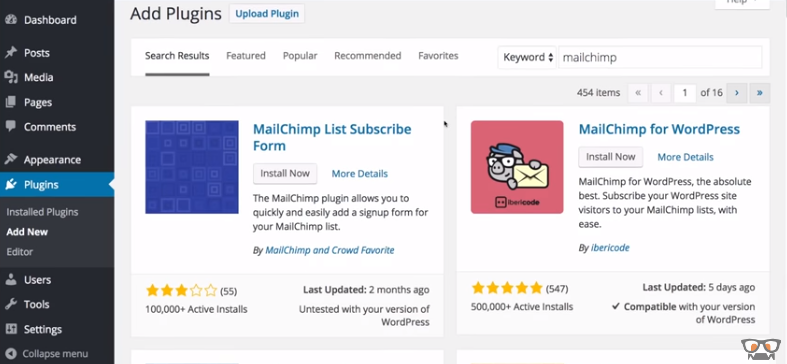
The Mailchimp extension for WooCommerce enables you to customize your emails without coding. It has a simple interface to add custom fields from your WooCommerce product data. You can also use this plugin for abandoned cart emails and order confirmation emails. The Mailchimp plugin is available as a free and premium version.
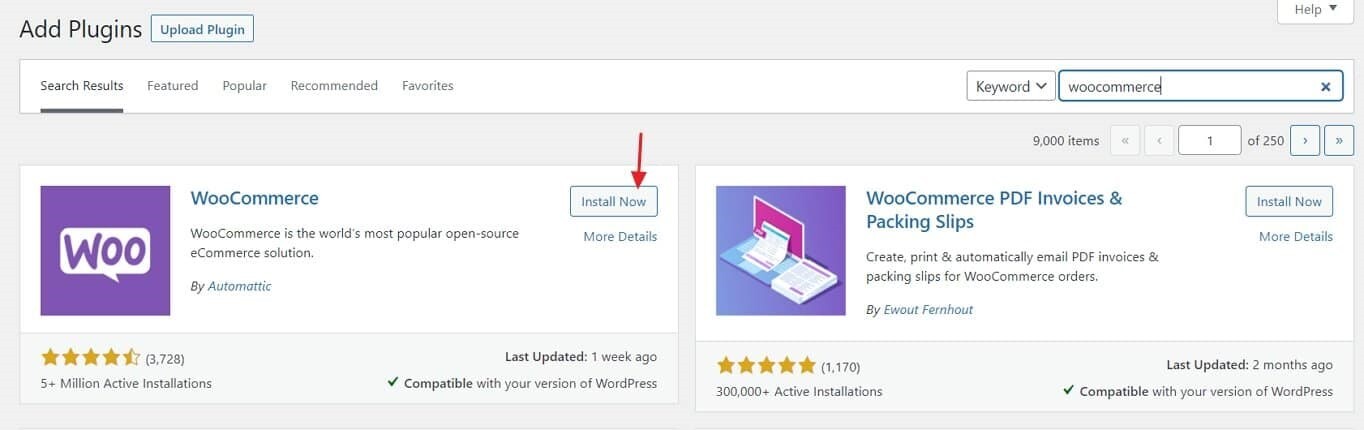
To activate the plugin, on the left side of your WordPress dashboard, click Plugins –> Add New, Select Upload Plugin → Choose File, and add the ZIP file that you downloaded. Finally, click on ‘Activate Plugin’
Next, you will be redirected to the settings page where you can synchronize your WooCommerce store with Mailchimp.
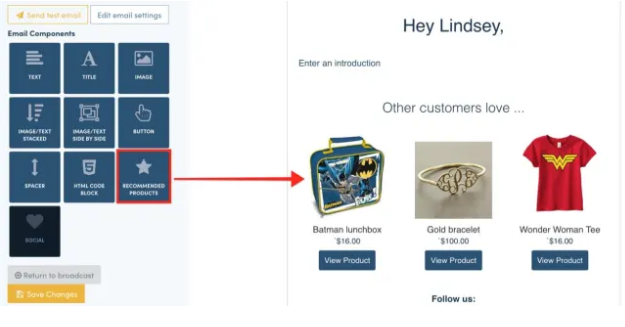
There are plenty of ways you can use Mailchimp to customize your WooCommerce emails. You can add different header and footer designs, use custom fonts, and even add images to your email templates.
You can also use Mailchimp's powerful merge tags to personalize your emails. For example, you could include the customer's name in the subject line or body of the email. This helps to increase the likelihood of people opening your emails.
Customizing Using Action Hooks and Filters
WooCommerce hooks are an excellent way to add additional content to your emails. However, hooks will not help you modify the text. You can only modify the existing test by overriding the templates.
There are various hooks defined by WooCommerce. For instance, the ‘wc_email_header’ hook allows you to add content before the email header, while the ‘wc_email_footer’ hook lets you add content after the email footer.
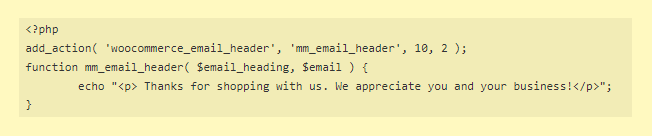
Whenever you want to add some content just below the header, use the woocommerce_email_header( $email_heading, $email ) hook.
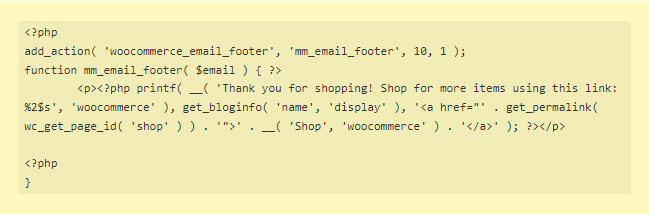
To place the content just above the footer, use the woocommerce_email_footer($email) hook.
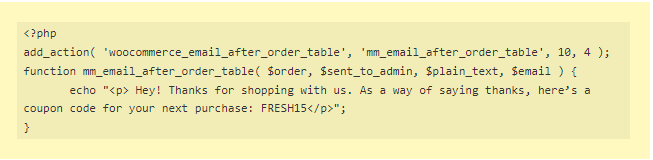
To add content just below the order table, use the woocommerce_email_after_order_table ($order, $sent_to_admin, $plain_text, $email) hook as shown below.
Other important hooks include:
• woocommerce_email_after( $subject, $message, $headers, $attachments ) - This hook allows you to add content after the email subject, before the email body, and after the email body.
• woocommerce_email_before - This hook allows you to add content before the email body.
• woocommerce_email_after - This hook allows you to add content after the email body.
In addition, there are also a few filters that can be used to modify the email content, such as:
• woocommerce_email_subject( $subject ) - This filter allows you to change the email subject.
• woocommerce_email_header( $message, $headers, $attachments ) - This filter allows you to modify the email header.
• woocommerce_email_footer( $message ) - This filter allows you to modify the email footer.
• woocommerce_email_body( $message, $headers, $attachments ) - This filter allows you to modify the email body.
By using these hooks and filters, you can add additional content to your WooCommerce emails. This can be used to add dynamic content, such as order totals or customer information, or to include additional images or attachments. You can also use these hooks and filters to customize the email formatting and layout.
Conclusion
Have you already customized your WooCommerce emails? Customizing your emails is a great way to add some personalization and increase the open rate for your emails.
Using the default WooCommerce settings is an excellent place to start for beginners. If you want a little more control, the WooCommerce Email Customizer will serve you right. Besides, if you're looking for a more advanced solution, the MailChimp plugin is an excellent choice.
One of our favorite plugins, the Kadence plugin, also offers much flexibility in customizing your WooCommerce emails. Finally, hooks and filters are a good choice too.
By using our tips, you can make sure your WooCommerce emails look great and get the attention they deserve.
Do you feel that we missed anything? We would love to hear your thoughts and ideas! Let us know what you think by leaving a comment below.
How can I change the email template?
You can change the WooCommerce email template by adding a filter to your theme's functions.php file. The filter is called 'woocommerce_email_template'.
How can I change the email sender name?
You can change the WooCommerce email sender name by adding a filter to your theme's functions.php file. The filter is called 'woocommerce_email_sender'.
How can I add a custom header or footer to WooCommerce emails?
You can add a custom header or footer to WooCommerce emails by adding a filter to your theme's functions.php file. The filters are called 'woocommerce_email_header' and 'woocommerce_email_footer'.
How can I change the email content?
You can change the WooCommerce email content by adding a filter to your theme's functions.php file. The filter is called 'woocommerce_email_content'.