Using a CSV importer to upload data to a website saves you time. Instead of retying data from a text file or spreadsheet to your site, the CSV importer feature enables users to import data from a file directly to the web.
Beyond word content, you can also add products to your site using the CSV Importer feature. Thankfully, the CSV importer comes as a plugin for WordPress. With it, you can import content from CSV files to your site. This can prove very useful, especially when you have a bunch of content to upload from an Excel document or other documents. All you have to do is export your document to a CSV file and leave the rest to the plugin.
It should be noted that there are many third-party CSV Importer plugins that you can use. Each of them has specific guides on how to upload to a website. For instance, you can find more details on how to use WordPress CSV Importer and WooCommerce CSV Importer Plugins in their plugin directories.
Here are some of the common options of CSV Importer that you can explore: - WP Ultimate CSV Importer - WooCommerce CSV Importer Plugin - Asana CSV Importer - Flowfinity CSV Importer - Download Monitor CSV Importer
This post looks at the step-by-step process to follow when uploading to a website using a CSV Importer. Before going into the details, it is crucial to mention that WordPress allows users to add third-party plugins to their site. However, they do not necessarily offer support for such plugins. Therefore, if any plugin is affecting the optimal functionality of your WordPress page, you may have to uninstall such a plugin to restore normal functionality.
Steps to Upload Data to a Website using a CSV Importer
The first thing is to ensure that you include the entire links and attributes that you want to import into the CSV file. Additionally, you should be assigned a specific role in the project area that you want to import data and you must have permission to create new objects.
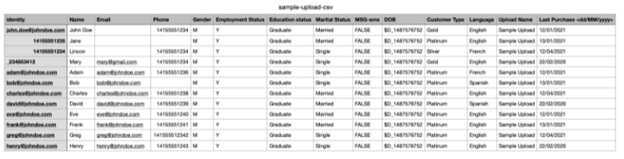
You must do it correctly because if you do it right, you will be able to upload files and also create new fields, taxonomies, and categories. Preparing the file starts with creating a spreadsheet and then saving it as a CSV file to import. You can use Open Office Calc or Microsoft Excel for this task.
Now that you have set the permission, the next step is to upload your data from a CSV Importer to the website. So, how do you do this? The following are the basic steps to upload data to a site with the use of a CSV importer:
Step 1: Download the plugin from WordPress and log in to the WordPress administrator Area
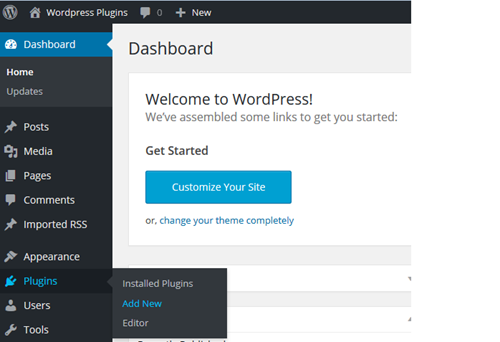
Step 2: From your administration dashboard, navigate to “Plugins” and then “Add New” and next, “Search Plugins.” Browse through the list to locate the CSV Importer. Click the “Install Now” button and wait for it to install. Next, click the “Activate Plugin” button.
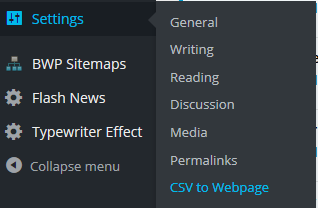
Step 3: After you have successfully installed the plugin, it is time for the interesting part – upload to your website using the CSV Importer. Navigate to “Setting” and click “CSV to Webpage.”
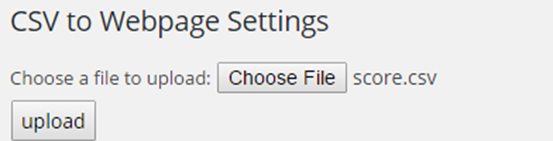
Step 4: Click on the “Choose File” button and select the .csv file you want to upload from your system. Next, click the “Upload” button to upload the file to the server.
Step 5: Map and customize the CSV fields with relevant fields Step 6: If you want to upload any external images, you should enable the media handling option to make this possible. Step 7: After the file has been uploaded, select the file and preview the project. If you want to change the information you have uploaded from the CSV file, select the “Make changes.” If you are okay with the project, click the “Go to project” to complete the upload to your website.
Conclusion
These are the basic steps to import to a website using a CSV Importer. You should note that when you upload to a website using a CSV Importer, the file is sent to a folder on the website. If you have the wrong path to the folder, you will receive error messages and you will get stuck until you can get the right path. If you have any issue uploading to a website using a CSV Importer, you should contact Fixed support.
How does a CSV Importer work?
The CSV Importer is a plugin that enables users to import different items from a CSV file to a website. Users can map the CSV column data for multiple tags, files, and elements with each row in the file representing meta-data for one item.
How can I upload a CSV file to my website?
The first step is to create the CSF file. It should include all work items that you want to import to your website. Open your project page and click on “Create” and then “Import from CSV File.” From the CSV file page in the data tab from the Import work Items, click the “Browse” option to upload the file. Wait for the upload to complete and review it.
Why am I having trouble uploading a CSV file to my website
One of the most common reasons you may have trouble uploading a CSF to your website is that the file size is too large. If you have too many records or fields in the file or too many rows and columns, you may receive an error code while uploading a CSV file.
Another reason why your CSV file may not upload to your website is if the volume of available memory on your system is low. If the program using the file also has restrictions in place, you may be unable to upload a CSV file to your website.