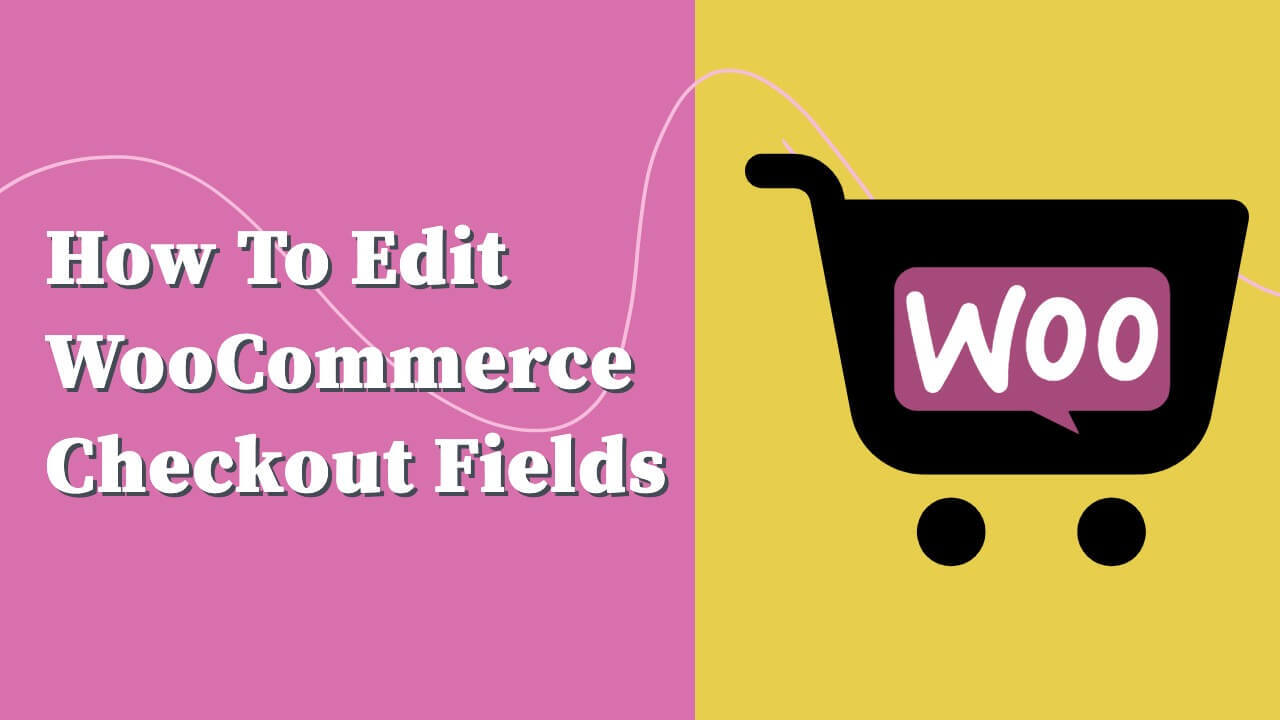
Introduction
Are you running a WooCommerce store and yet to customize your checkout? You could probably be losing out on sales due to cart abandonment. It has been estimated that one out of every five shoppers abandon their cart due to a complex checkout process.
For this reason, customizing your checkout page is crucial to attaining a streamlined order processing experience.
By default, the WooCommerce checkout page has some limitations that may deter you from providing the perfect shopping experience to your customers.
A complex and lengthy checkout process can be frustrating to your customers. In other cases, the checkout page might request too much information making customers reluctant to share their deets.
It only gets worse when you discover how much revenue you’ve been losing.
This post will shed some light on how you can improve your store’s checkout flow by customizing the checkout page.
Let’s jump straight into this guide.
Reasons Why You Might Want to Customize Your WooCommerce Checkout Page
The WooCommerce checkout page is the last step customers pass through before purchasing their order. This section, however, can make a significant difference in the order purchase process.
Here are a few reasons why you might consider customizing WooCommerce checkout.
1. Improve user experience
The default WooCommerce checkout comprises lengthy procedures that can be distracting to shoppers. To shorten this process, you might consider customizing your checkout. Auto-filling details such as phone number, address, and card details can help reduce the time a customer takes filling these details. Providing such a feature will shorten the checkout process, leading to a better shopping experience for your customers.
2. Increase the conversion rate
Speeding up the checkout process helps customers make faster decisions. Shoppers get distracted or bored when filling multiple pages before placing their orders. In turn, this prompts them to abandon their carts. However, when the order process is short, customers will quickly place their orders and make payments, increasing your sales.
3. Provide a secure checkout experience
A secure checkout process provides a great shopping experience to customers. To gain the trust of your customers, you should offer a secure payment gateway at checkout. This assures customers that their personal details and billing information is safe. Consequently, this will facilitate better relationships and engagement.
Customizing the WooCommerce Checkout Page
1. Using a Plugin to Change the WooCommerce Checkout Fields
Plugins provide a quick and simple way to customize your checkout field according to your liking. One such plugin is the Checkout Field Editor WooCommerce plugin that enables you to easily add, edit and remove fields in a codeless process. Let’s quickly explore how to use this plugin in just a few simple steps.
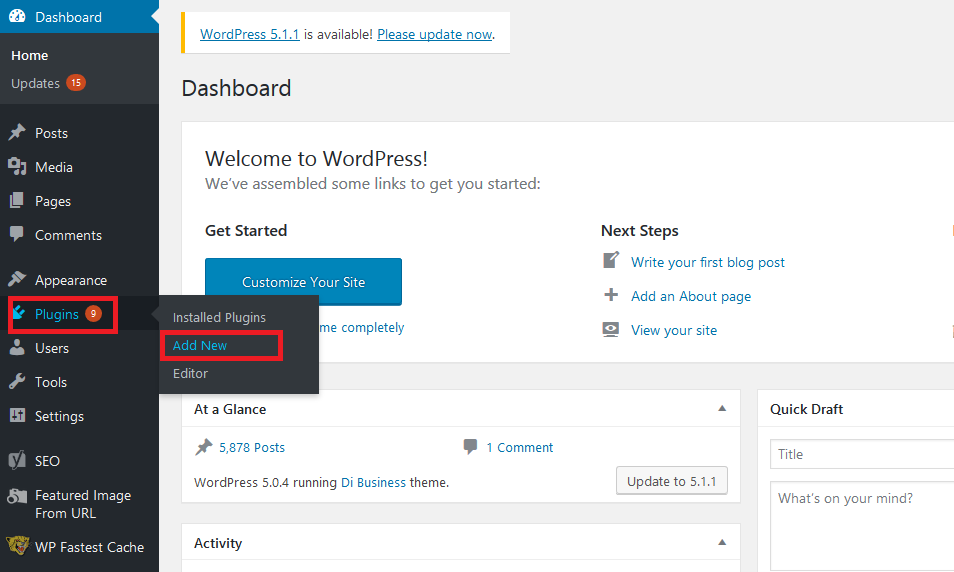
Step 1: Installation
To start with, you’ll need to download the extension’s .zip file from your WooCommerce account. On your WordPress admin dashboard, go to WooCommerce > Plugins > Add new. Click on ‘Upload Plugin’ and upload the file you just downloaded. Once your file is uploaded, click the ‘Install Now’ button and activate the extension.
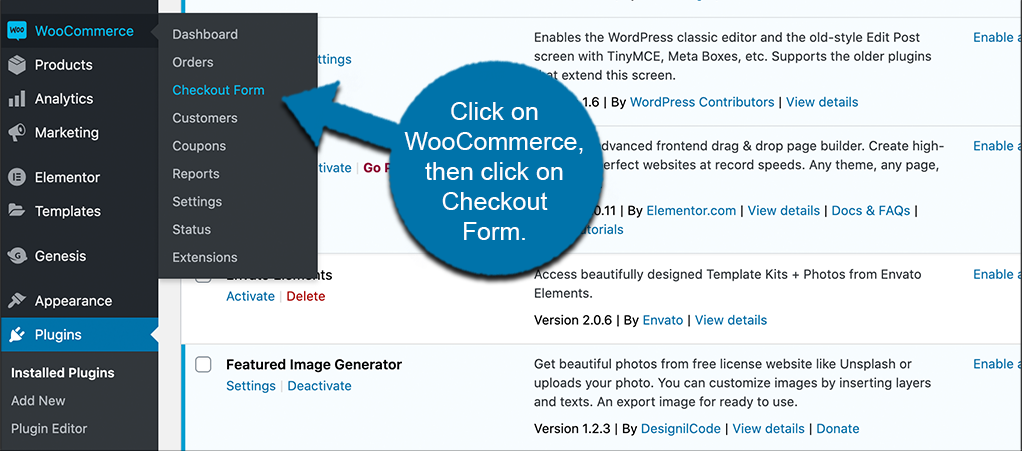
Step 2: Setup and configuration
At this point, you need to configure the plugin’s settings. Go to WooCommerce > Checkout Form.
Step 3: Customizing the checkout fields
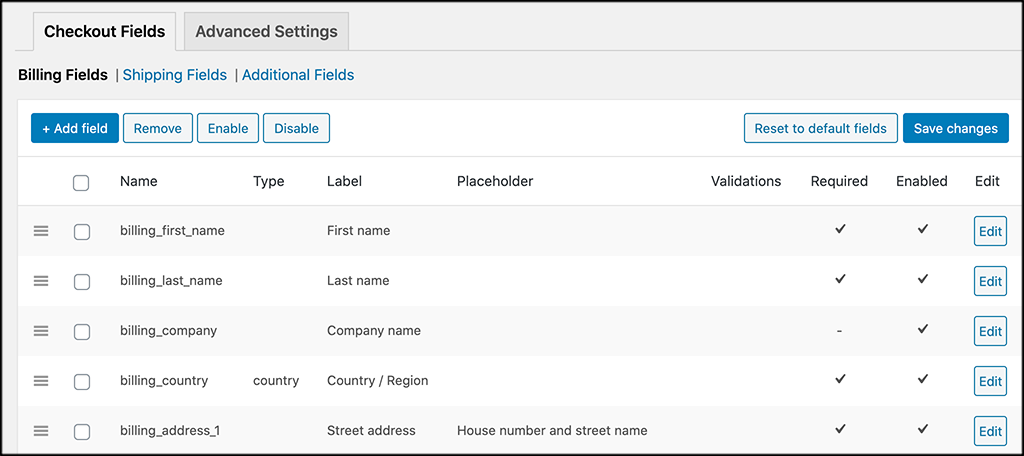
You will find two tabs in the main settings, ‘Checkout Fields’ and ’Advanced Settings’. Under that are three fields available for editing:
Billing: Comprise the payment and billing address field at checkout
Shipping: Comprise the shipping field at checkout
Additional: This is the section next to billing and shipping sections at checkout
Select the field you want to make changes to customize this section and click on the ‘Remove’, ‘Enable’, or ’Disable’ button.
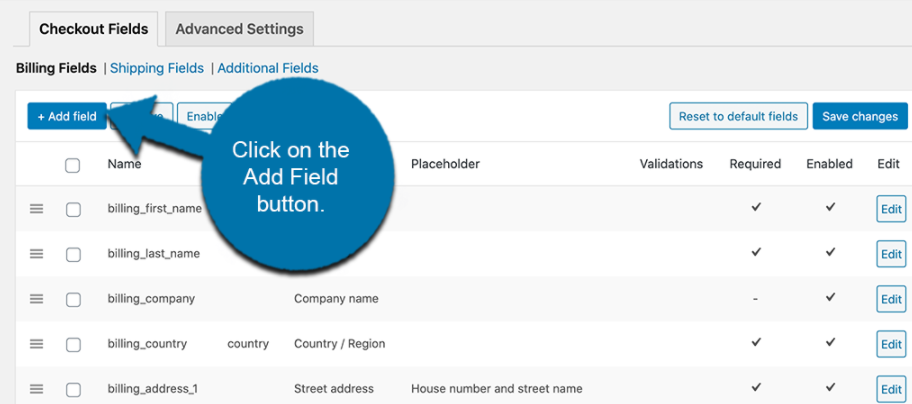
Step 4: Adding/editing custom fields
At the top left corner of the settings page, click on ‘+Add field’ to add a new field. A pop-up screen will appear with some blank fields. Add all details you find relevant to the custom field. After making your changes, remember to save your work by clicking the ‘Save’ button.
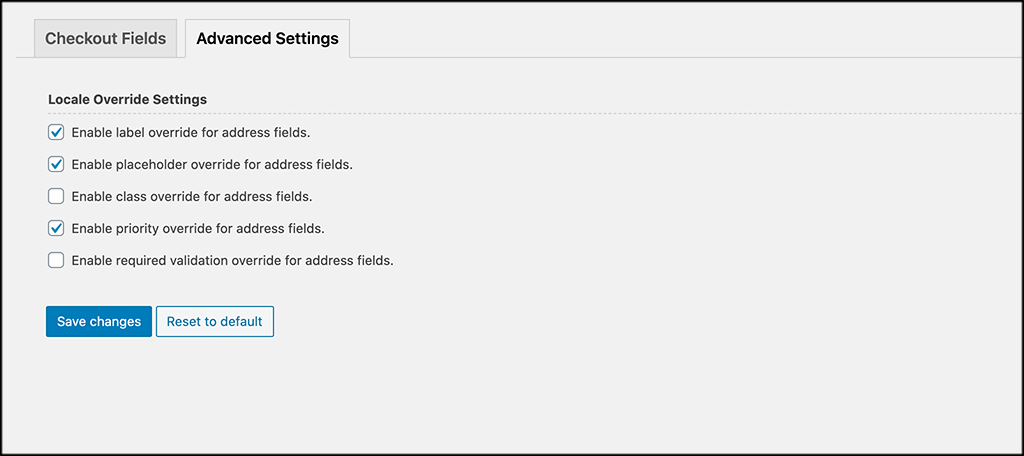
Step 5: Configuring advanced settings
Beside ‘Checkout Fields’, you will find the ‘Advanced Settings’ tab. You can customize the locale override settings by enabling/disabling the checkboxes. Click ‘Save Changes’ once you’re done.
Step 6: Resetting checkout fields
To apply original settings to your fields, go to WooCommerce > Status > Tools. Navigate to ‘Checkout Fields’ and select the ‘Reset Checkout Fields’ button. All your fields will revert to their original settings.
Before proceeding, here’s a different method of setting up a WooCommerce checkout page with Divi.
2. Using Code to Customize WooCommerce Checkout Fields
Custom coding is a different method that enables you to customize your WooCommerce checkout. This method is better than using a third-party plugin, as you have more control over customization.
You can also use your site’s functions.php file and filters to edit your checkout page. Some of the filters include:
woocommerce_checkout_fields
woocommerce_billing_fields
Woocommerce_shipping_fields
With WooCommerce actions and filters, you can manipulate the checkout fields in any manner you wish. You can add, edit, remove or even change the displayed text on your checkout page.
Linking Products Directly to the WooCommerce Checkout Page
We will use the manual method to link our products to WooCommerce checkout directly. Follow the below steps:
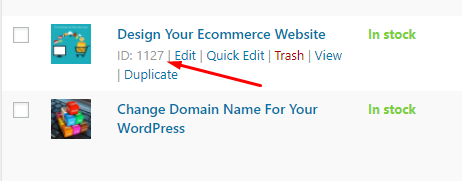
Step 1: Find the product ID
To find your product ID on your WP admin dashboard, go to Products > All Products. Here, you’ll find various products with their product ID numbers just below them.
Step 2: Create a link
Let’s begin with a brief illustration. Take a case whereby you have this URL: www. yourdomain.com//checkout/?add-to-cart=ID
You’ll need to replace ‘yourdomain’ and ‘ID’ with your domain name and specific product ID of the product you want to link, respectively.
Step 3: Copy and paste
Since we’ve already found our product ID, we’ll add our product URL like this www. yourdomain.com//checkout/?add-to-cart=1127
Once you’re done, you can place this link anywhere on your WooCommerce site.
Applying Free Shipping Per Product in WooCommerce
Offering free shipping is a perfect way to entice customers to purchase from your store. Furthermore, you can customize the shipping settings to apply only to specific orders where shoppers reach your pre-defined target amount.
For example, here are the steps you should follow to trigger free shipping for orders above $100.
Navigate to WooCommerce > Settings > Shipping. Next, go to the shipping zone you intend to apply changes and click on the ‘Edit’ link.
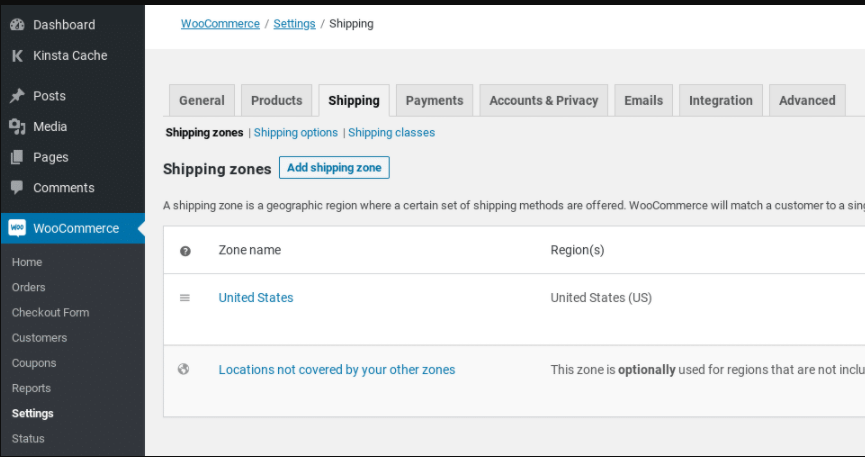
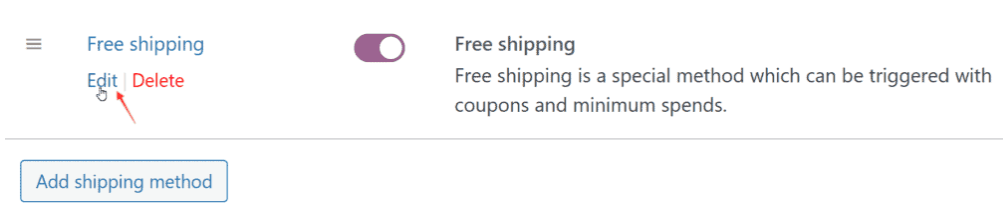
Click on the ‘Add shipping zone’ button if you are yet to add any zones. Otherwise, click on the ‘Add shipping method’ button. You will find a list of shipping methods in this section.
Click the ‘Edit’ button under Free shipping.
A ‘Free shipping Settings’ panel will open where you will select ‘A minimum order amount’ as your preferred option. Finally, click on ‘Save changes’ to apply your settings.
Conclusion
Do you wish to take your WooCommerce business to the next level? Adding changes to your checkout page can significantly impact your site. From increasing your conversion rates to offering your customers the best possible shopping experience.
In this article, we covered how you can customize your checkout page using the Checkout Field Editor plugin and by coding. When setting up your checkout page, complex checkout procedures, distractions, and unnecessary fields are just a few things to watch out for.
Moreover, it would be best if you considered linking your products directly to checkout, adding custom fields, and triggering free shipping to reduce cart abandonment. Do you feel satisfied with your current checkout page?
There’s still a lot left to explore in this field. However, I hope you have seen how easy it is to modify various checkout components. Was this post helpful? Why not share it with your network?
How do I customize the appearance of my checkout page for a better look?
Follow these tips for a better checkout page
Choose an attractive checkout page custom template
Use fewer form fields on the checkout page
Add trust symbols
Use testimonials for social validation
Create a one-page checkout
How do I change the address format in WooCommerce checkout fields?
WooCommerce Checkout field Editor allows you to change the address format displayed in the ‘Addresses’ section of ‘My Account page’, ‘Thank You page’, and transactional emails. Use the override feature to include custom features created using the plugin.
How to create a billing code in WooCommerce?
Go to WooCommerce > Checkout > Billing and click on the ‘Add New Field’ button. Enter the type of field you want to create and fill in the ‘Label’, ‘’Placeholder/Type’ and ‘Description’ sections.
How do I add mandatory fields to a checkout field?
To set the mandatory fields on your checkout page, add the name ‘TRUE’ in front of the required field. Similarly, add ‘FALSE’ for optional fields. An asterisk (*) will show customers areas where it’s compulsory to add their details.