MailChimp is a popular email marketing service that can be integrated into your WordPress site. It helps you to build a strong subscriber list and create campaigns easily, among others.
Since it can be used with your WordPress site, you can easily streamline your email marketing campaigns without issue. In this post, we will look at a step-by-step guide on how to connect MailChimp to WordPress
Why should you build a Subscriber List?
There are numerous reasons you should build an emailing list. If you want to have direct communication with your clients and prospects, an email list is a must-have. Secondly, unlike social media accounts, emails let you have direct communication with each client and prospect.
You can tailor your communication to each client or prospect with the right message per time. Without an email list, it becomes difficult to achieve this.
Also, if you have many customers that do not use social media, such as Instagram, Facebook, and Twitter, communicating with them through newsletters is the next best effective way to reach out to them. An email list is needed to make this possible.
Why should you use MailChimp for your WordPress Website?
Without a doubt, there are different marketing services that you can explore, including GetResponse, Constant Contact, and AWeber. However, MailChimp is highly recommended because of its numerous features. MailChimp offers features, such as Advanced Analytics, A/B testing, Segmentation, and Automation.
All these make it possible to build and manage efficient email campaigns. Additionally, MailChimp has a user-friendly interface, which allows you to build effective emails and newsletters to send to your subscribers. It also offers excellent customer support that is available 24/7.
Step-by-Step Guide to Connect MailChimp to your WordPress Site
Now that you have a clear understanding as to why you need MailChimp to build a fantastic email list, let us look at how to connect it with your WordPress website. You first have to set up everything before you connect both systems. In this guide, we will provide detailed steps on how to go about it. Let us get right into it already!
Step One: Create a MailChimp Account
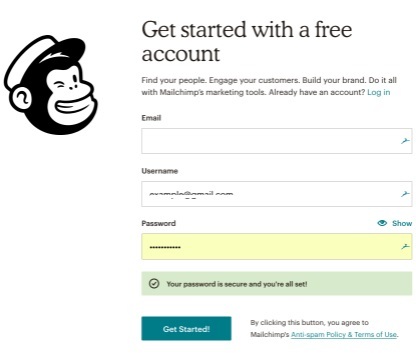
• Visit the official MailChimp website and create an account. It is easy to create an account on the platform.
• Fill out your information and provide a valid email address. You need this email ID to confirm and activate your account.
• When you have activated your account, you have to fill out a few short forms to enable MailChimp to build an account for you. There is an optional section where you provide details about your business.
• After completing the forms, choose a MailChimp package from the several options available. You can also opt for the free option.
• When you are done selecting your preferred plan, click the “Complete” button. Next, you will be prompted to connect your social media handles to your MailChimp account. This will make it possible to share your marketing campaigns directly on these social media platforms.
• You can complete the rest of the step or simply skip it. Next, click on the “Continue” button to complete the setup process for your account.
Step Two: Build an Email List
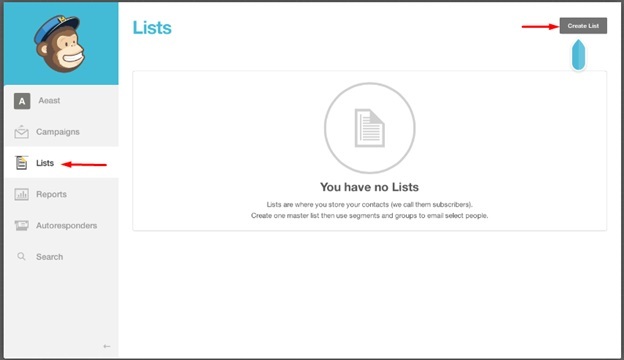
The next step after the account creation is to configure your email list. Click on the “List” menu and then on “Create List” to create a master list where you can upload the contacts of your subscribers. You can also select the “Add a Contact” option to build the list manually. The manual option requires that you add each contact individually.
Step Three: Install MailChimp Plugin in your WordPress site
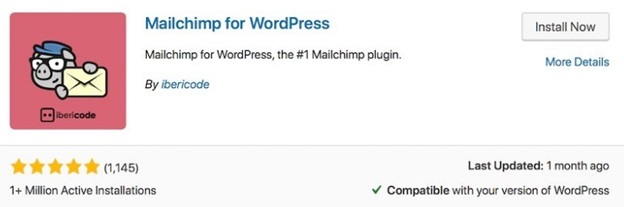
MailChimp plugin makes it easy to connect and integrate MailChimp to your WordPress website. So, search for the plugin and install and activate it on your site. Next, navigate to the MailChimp Settings menu on your WordPress dashboard.
From here, you can use an API key to connect your MailChimp account to your site. With this, you will be able to access your email lists and forms from the site.
Step Four: Generate an API Key
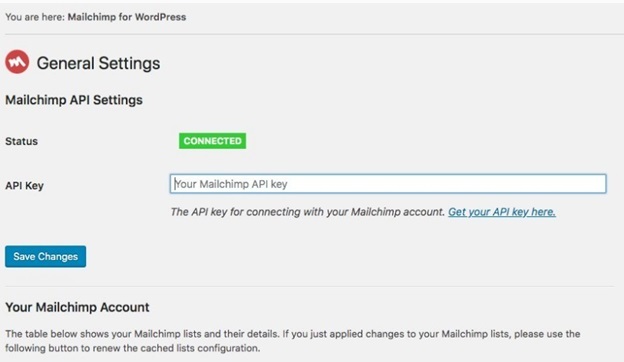
So, how do you find an API key to use to connect your MailChimp account to your WordPress site? First, an API key connects your website to another service, such as MailChimp. To locate the API key, navigate to “MailChimp for WP” and then click on “MailChimp” in WordPress.
Locate the API Key field and click on the “Get your API Key here” button. You will be redirected to the MailChimp site. From there, select “Create a Key” to get a code. Copy the code out and navigate back to your WordPress site. Paste the code in the API Key field and click on the “Save Changes” button.
With this, you will have access to your email lists and other forms you have previously created as well as other integrations on your dashboard. You can also create new forms simply by navigating to “MailChimp for WP” and then “Form. When you are done creating the form, you can add the form to your posts, pages, or widgets with the shortcode provided.
How to Add MailChimp Email Signup Forms to WordPress Site
So, it is time to get started with your form creation and start building your email list through subscribers on your site. MailChimp has built-in subscription forms, which you can directly embed in your WordPress site seamlessly. To do this, follow the steps below:
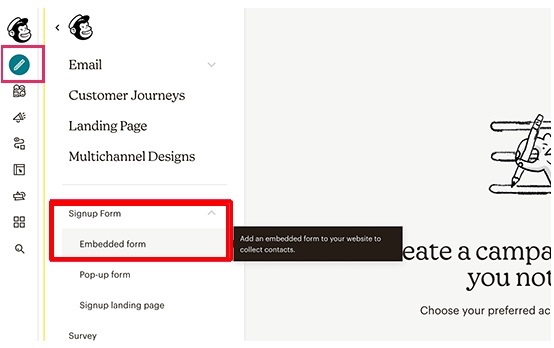
• Navigate to the toolbar at the left side of your screen and click on the “Create” button.
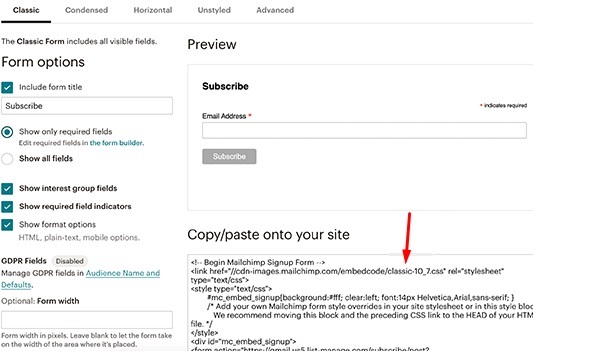
• Select the “Signup Form” button and then the “Embedded Form” option. This opens the form configuration page.
• Select the form fields you want to display from the page and choose other options you want in your signup form. • When you are satisfied with the form you have created, copy the embed code on the screen.
• Switch to the administrator area of your WordPress site and navigate to the “Appearance” menu and then “Widgets”.
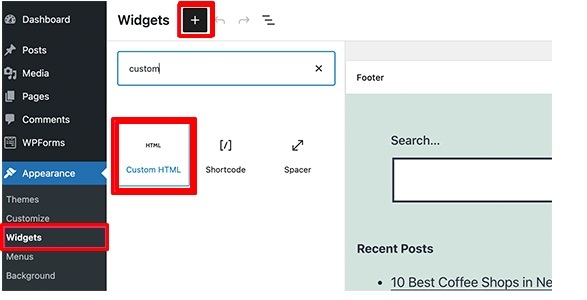
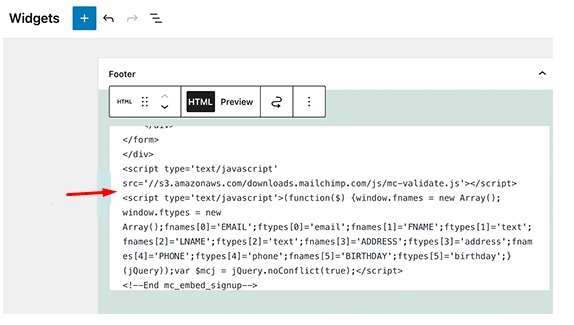
• Paste the code that you copied from the MailChimp website in the widget settings and click on the “Update” button to save the changes you made to the widget settings.
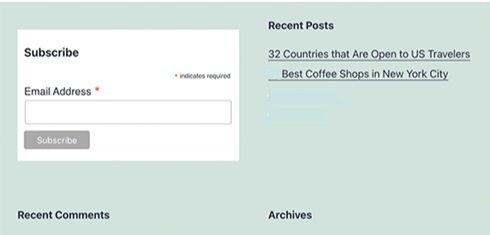
• Navigate to your WordPress site to view your MailChimp signup form all set up and ready to start collecting subscriptions.
Conclusion
There you have it! With these steps, you can connect MailChimp to your WordPress site without any stress. This post has also provided a guide on how to add a MailChimp email signup form to your site seamlessly. It is easy and simple to complete.
How do I connect MailChimp to my WordPress site with a plugin?
Sign up for a new MailChimp account and create your email list by importing contacts from your device. Next, install the MailChimp WordPress plugin on your WordPress site. Generate an API Key from the MailChimp site and copy and paste it into your WordPress site.
How does MailChimp work with WordPress?
MailChimp is designed with in-built subscription forms that you can easily embed in your WordPress site. Click on the create button on the toolbar from the left-hand side of your page and click on the “Signup Form” and then the “Embedded Form” option. Select the fields you want to display and when you are satisfied with the final form, copy the embedded code on the screen and past it in the widget settings.
How do I add a newsletter to my WordPress site?
Log in to your WordPress site and navigate to the admin panel. Place your mouse over the “Plugins” link in the left column and click on the “Add New” link. Enter “Newsletter” in the Search Plugins box. When you have found the Newsletter plugin, click on it and then click on the “Install Now” button to install and activate it on your WordPress site.